Identify - Attribute query
Introduction
The SAML 2.0 attribute query feature extends the capability of the SAML 2.0 protocol. The traditional SAML 2.0 function requires that the identity provider sends the federation partner all required user attributes. The attributes are included as part of the assertion generated during the single sign-on flow.
Support for attribute query provides a set of core attributes when the initial authentication context is established. You can query user information as needed during the application runtime operation.
Attribute Services Administration
You can find Attribute Services feature at:

Attribute Service connection has the basic settings like:
| Property name | Description |
|---|---|
| Name | A name that identifies the Attribute Service Connection. |
| Description | A description of the attribute service connection for administrative purposes. |
| Enabled | The state of attribute service connection. |
| Owner Organization | This attribute service connection is owned by the following organization. |
| Attribute service context | The context of Attribute Service Connection. |
To see the additional settings you will first have to save a connection with the basic settings then open the connection for editing again. The configuration settings offered by Attribute Services are:
| Property name | Description |
|---|---|
| Entity ID | The entityID attribute is the unique identifier of the identity provider. |
| Signing certificates | This signing certificate element specifies the signing certificate used by the Protocol Connection. The potential values are:
|
| Signing certificate revocation check | Revocation methods to determine the status of in use signing certificate. The values that can be set for this setting are:
|
| Encryption certificates | This encryption certificate element specifies the encryption certificate used by the Authentication Connection. The potential values are:
|
| Encryption certificate revocation check | Revocation methods to determine the status of in use encryption certificate. The values that can be set for this setting are the same for Signing certificate revocation check setting |
| Attribute service - Location | The endpoint to which Safewhere Identify should send requests to |
| Attribute service - Binding | The binding that Safewhere Identify should use to send requests to the involved Identity Provider |
| Cached Metadata URl | The URI of metadata that it's used to upload metadata |
| SOAP binding binding customization | SOAP binding binding customization |
| SOAP binding binding name | SOAP binding binding name |
| SOAP binding behavior customization | SOAP binding behavior customization |
| SOAP binding behavior name | SOAP binding behavior name |
| Secure hash algorithm | Support for both SHA1 and SHA256 algorithm |
Support API for AttributeServices connection
Safewhere Identify supports APIs for AttributeServices. With REST API, we can post, put, get, patch, delete an AttributeServices connection as same as other existing connections.
For more details, you can open /admin/swagger/ui/index#/AttributeServices to view description and try them:

Setup Attribute Services flow
The following steps describe the process for querying Attribute Services from Safewhere Identify. It is recommended that you read the following document before starting:
- Saml2Wif installation guideline: Please take special notice on all the PowerShell information in this document.
- How to connect Safewhere Identify to AD FS
The login flow that we make in this guideline is:
- The main flow: Saml2Wif => Safewhere Identify => ADFS (Upstream IdP)
- The second flow: Safewhere Identify => Another Identify(AttributeService IdP) to query more attributes
1. Create Attribute Service connection at Identify
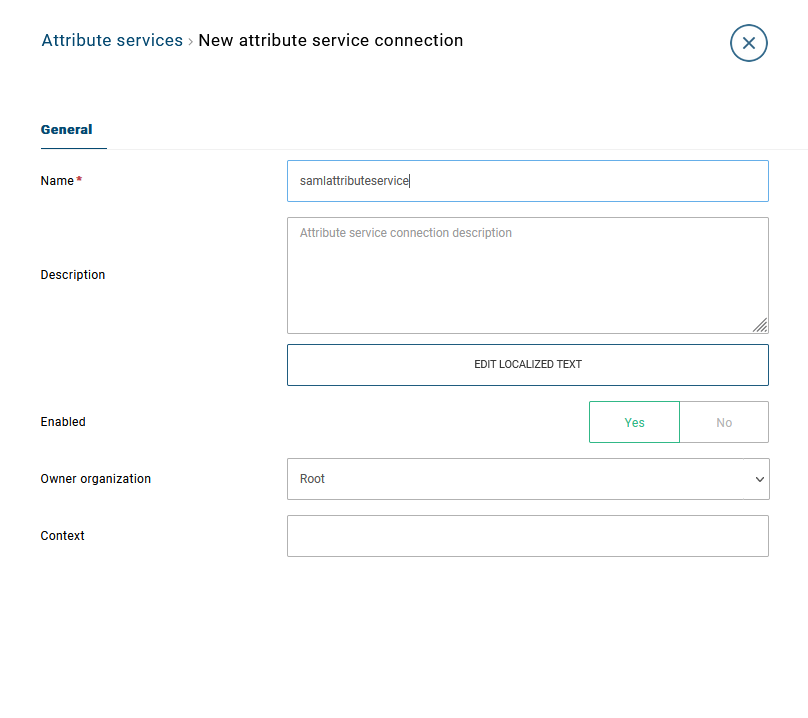
- Create new attribute service connection, enter the name for it (in this example, I use "AttrSrv" for the name), check enable and save it.
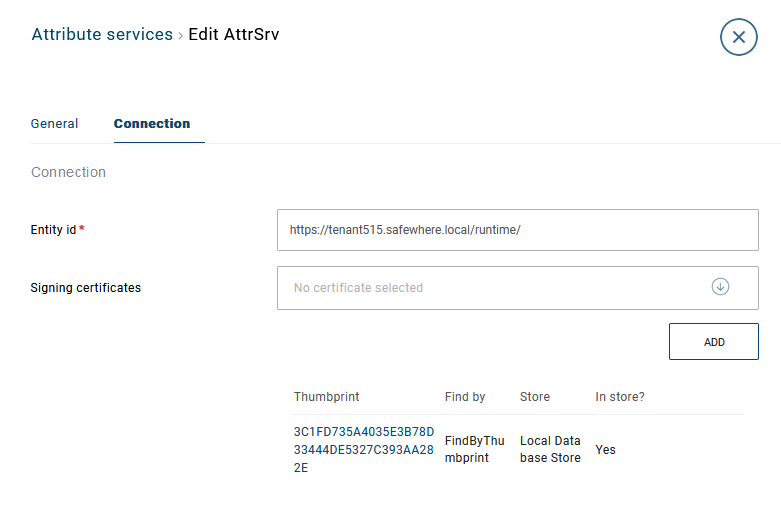
- Given that your attribute service IdP name is identifydev56. After saving attribute service, you need to update the value for the configuration fields:
- Entity ID: replace it with the value of the attribute service IdP entity ID
- Signing certificates: add the thumbprint of signing certificate using for the attribute service IdP
- Encryption certificates: add the thumbprint of encryption certificate using for the attribute service IdP.
- Attribute service setting:
- Location: set the URL value: https://your_attr_serv_tenant/runtime/services/attributeservice/saml2/soap
- Binding: set the binding value: urn:oasis:names:tc:SAML:2.0:bindings:HTTP-POST
2. Create External Claims transformation at Identify
Open Transformation list and create a new external claim transformation with the settings:
- Name: give the name you like
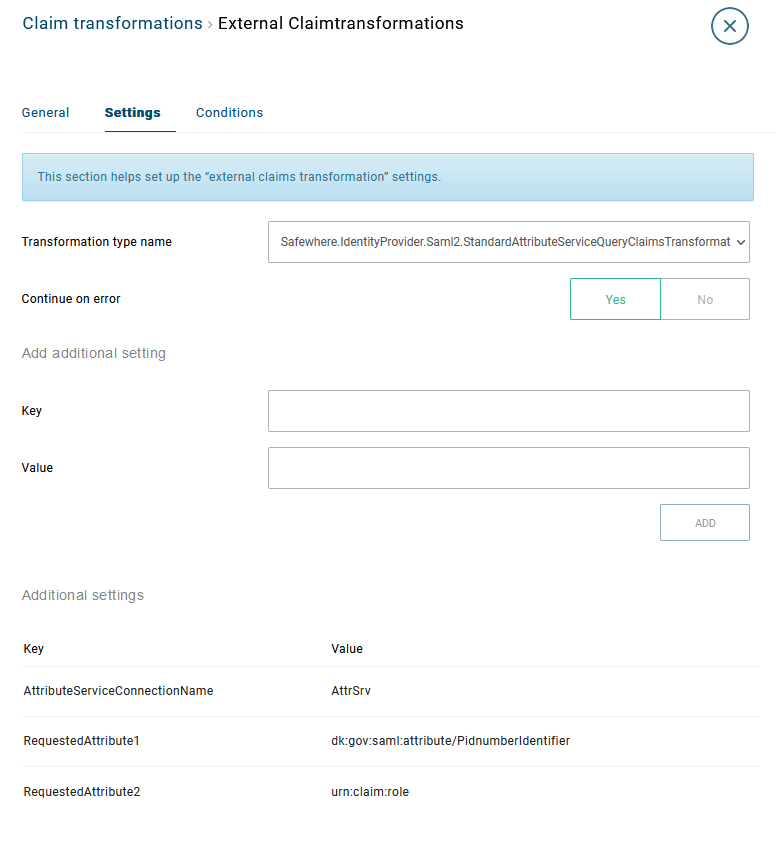
- Transformation type name: select Safewhere.IdentityProvider.Saml2.StandardAttributeServiceQueryClaimsTransformation, Safewhere.IdentityProvider.Saml2
- Continue on error: true
- Additional settings:
- Mapping 1:
- Key: AttributeServiceConnectionName
- Value: input attribute service name you created at step 1
- Mapping 2
- Key: RequestedAttribute1
- Value: input claimType that you need to query value
- Mapping 1:
If you have more than one queried attribute, you can add more mapping the same mapping 2 with key RequestedAttribute2, RequestedAttribute3, etc
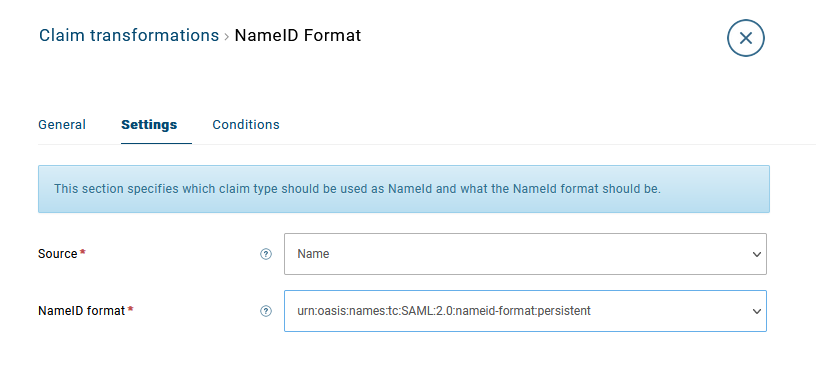
3. Create NameID Transformation
Create an NameID transformation like this:
4. Apply transformations to Saml2 Authentication connection
Open the SAML2.0 authentication connection which we use on this login flow, add 2 claim transformations that we created at the step above:

5. Create SAML2.0 Protocol connection at AttributeService IdP
Create a SAML2.0 Protocol connection at AttributeService Identify instance and import metadata of the Identify SP to it.
Note: you need to specify the Attribute name which specifies subject claim type/ Default subject claim type in the SAML2.0 Protocol settings to specify user by information from Attribute Query Subject. Otherwise, AttributeService IdP will throw error exception because it cannot find user.
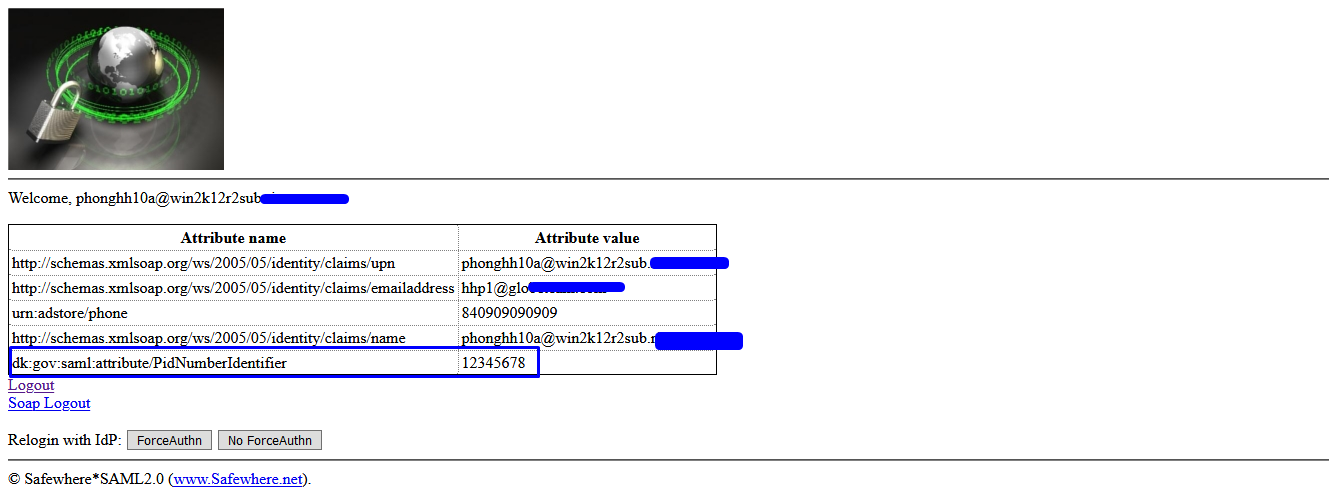
6. Run flow and check the result