How to configure SQL Server Reporting Service (SSRS) for Safewhere Identify reports
Introduction
In this article, we will show you how to install and configure the SQL Server Reporting Service (SSRS) in SQL Server 2016 to send out Safewhere Identify reports to target audience eventually using the Email subscription feature.
Install and Configure SSRS
Prerequisites
You have the same SQL Server version installation media that was used when the SQL Server is being installed.
- Create a new service account for Reporting Service. (Microsoft recommends to specify and use a separate account for each SQL Server service)
- Specify the authentication type and the account that have permission to connect to the database server. (Will be used during configuring the Report Server DB)
- Specify the authentication type and the account that the report server will use to connect to the report server database. (Will be used during configuring the Report Server DB)
SSRS Installation
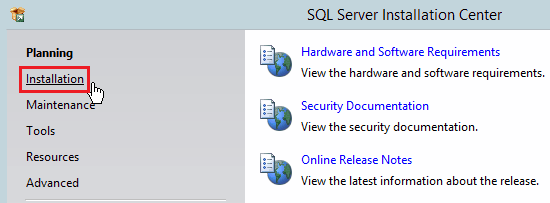
Run the SQL installation file and select Installation
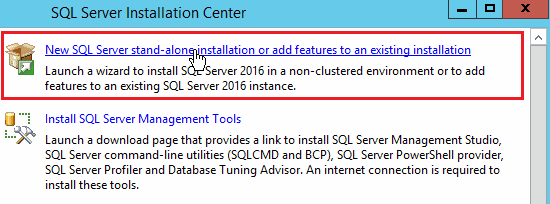
Click New SQL Server stand-alone installation or add features to an existing installation.
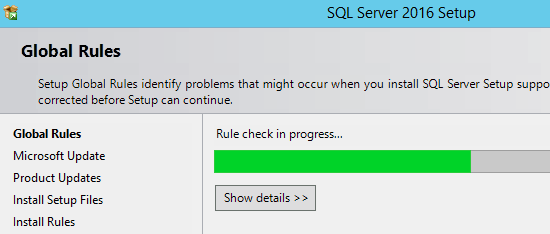
In Global Rules, wait for checking the problem that might occur when installing SQL Server setup files. Failure must be corrected to continue.
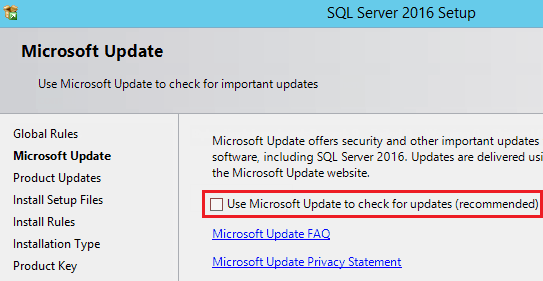
In Microsoft Update, it's recommended to check the Microsoft update for security and important updates but at the end, it's up to you to check it or not.
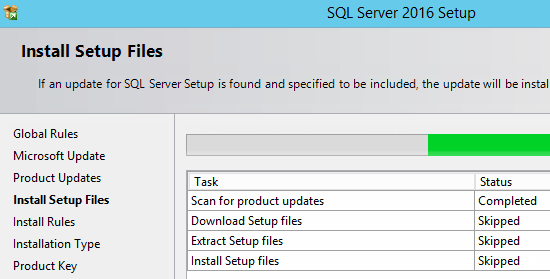
In Install Setup files, if an update for SQL Server setup is found and specified to be included the updated will be installed.
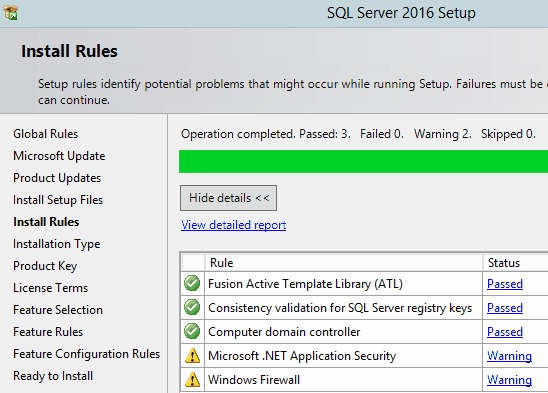
In Install Rules, wait for checking the potential problems that might occur while running setup. Failure must be corrected to continue.
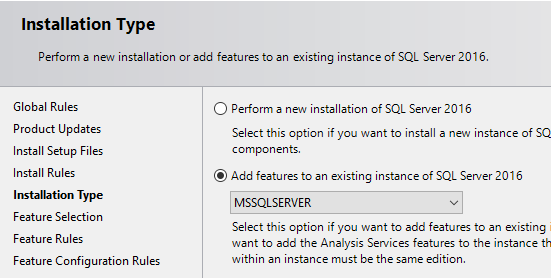
In Installation type, specify add features to an existing instance of SQL Server 2016.
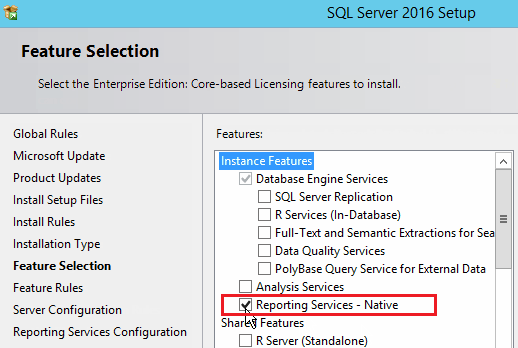
In Feature Selection, check Reporting Service - Native.
In Server Configuration, specify a separate Service account for Reporting Service mentioned in Prerequisites.

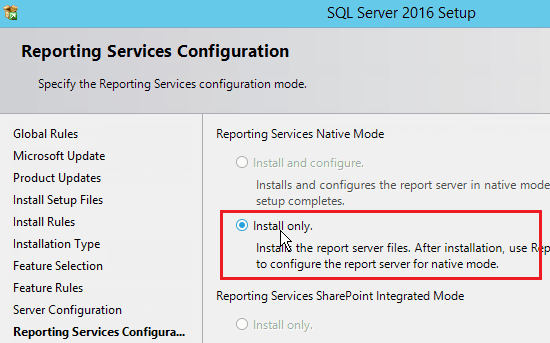
In Reporting Service Configuration, specify the Install only configuration mode.
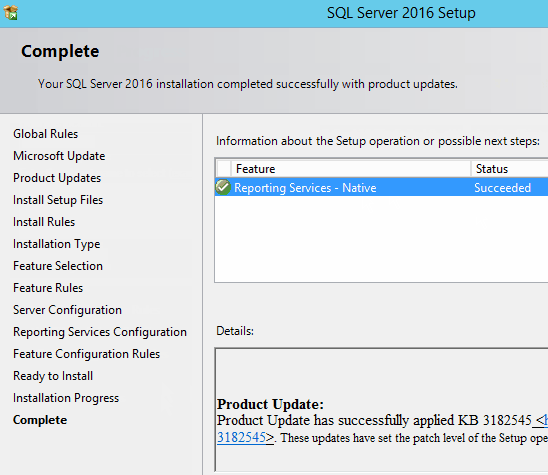
Finally, click Next to run the setup then wait till the installation is completed successfully.
SSRS Configuration
General Settings
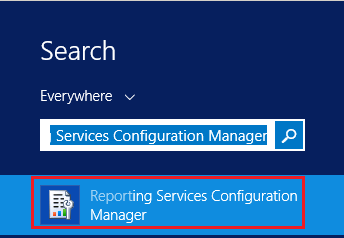
Once the SSRS feature is installed successfully, open Reporting Service Configuration Manager
Connect to the Report Server Instance.

Review Report Server Status and make sure it's started.

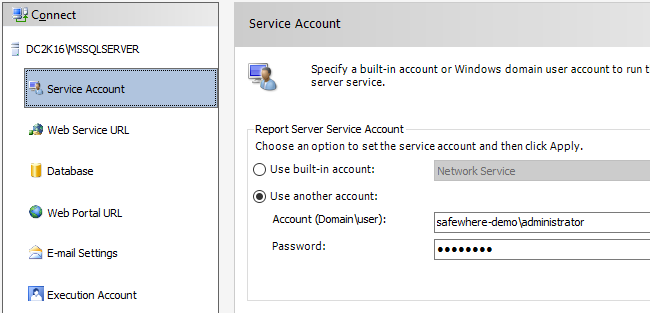
In Service Account, you will find the report server service account that runs the Report Server Service.
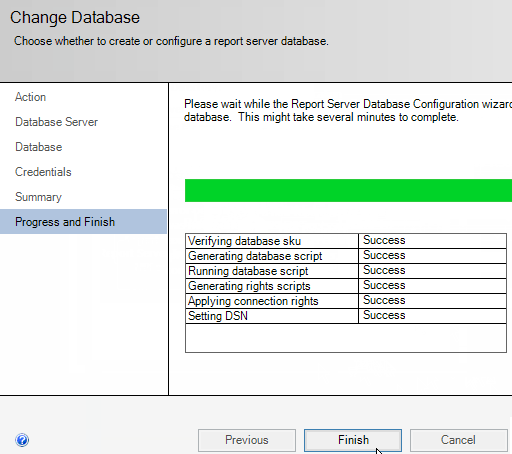
Go first to the Database section to configure the database that holds the all report server content and application data. Click Change Database to create the report server database for the first time.
Check Create a new report server database then click Next

Make sure the database server is correct. Set the authentication type as (Integrated User or SQL Server account). Note: this account must have permission to connect to the database server. Provide the correct account credentials.
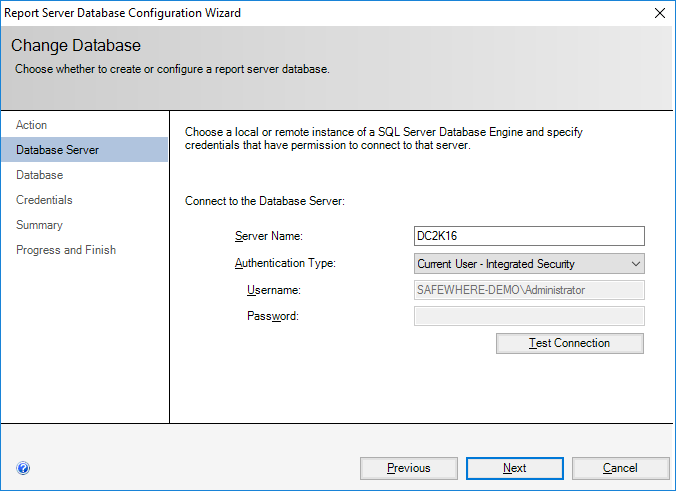
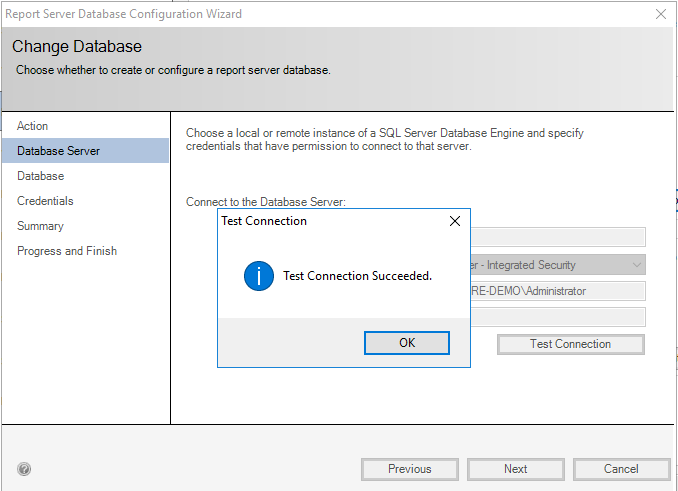
Test and make sure that the connection is established successfully.
Specify the Database Name as you prefer.

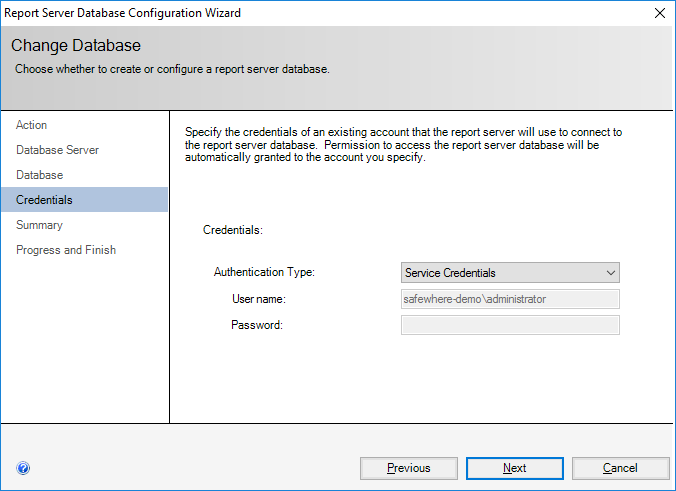
Specify the credentials of an existing account that the report server will use to connect to the report server database.
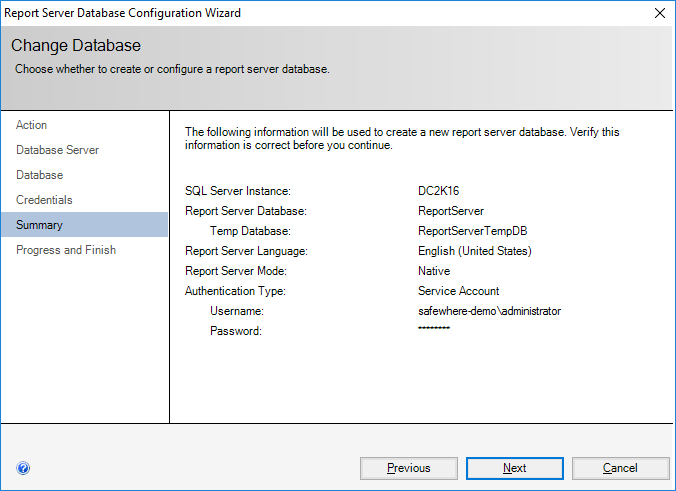
Review the summary information, and make sure that everything is set properly before proceeding.
Wait while the report server database wizard configures the database then click Finish.
Go back to configure the Web Service URL.
- Set the Report Server Web Service Virtual Directory.
- Set the Report Server Web Service Site identification based on your requirements then click Apply.
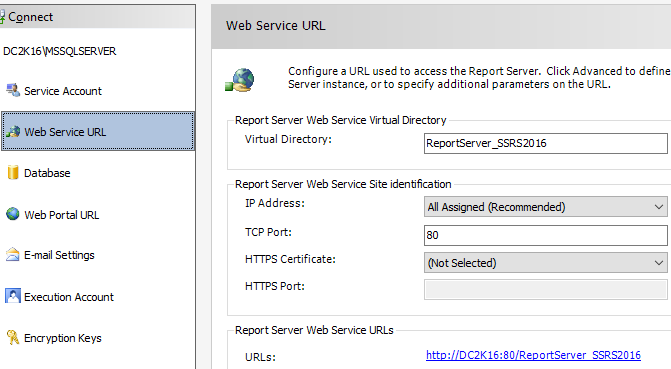
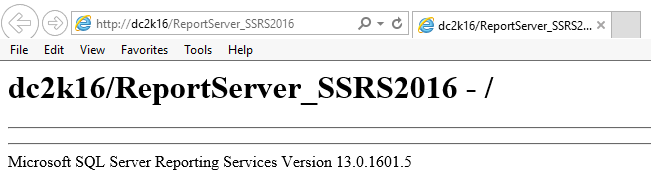
Test the Report Server Web Service URL that should be now browsed properly.
Go now to the Report Manager URL, specify the virtual directory as you prefer then click Apply to configure it.
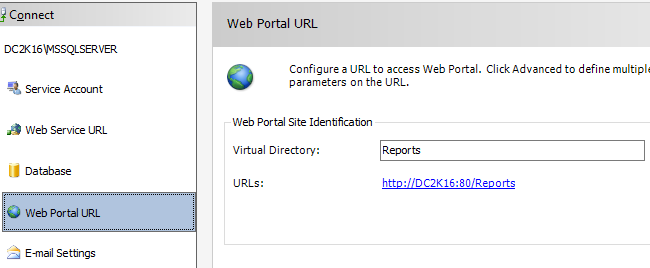
Once the Report Manager Completed Successfully, Click the Report Manager URL to test and ensure it should be now browsed properly.
Go to the Encryption keys to take a backup of the symmetric key that used to encrypt sensitive data in the report server database like connection strings, credentials ...etc. it will be helpful in case you migrate or move the report server installation to another server, you can restore this key to regain access to the encrypted content.

E-mail Settings for subscription
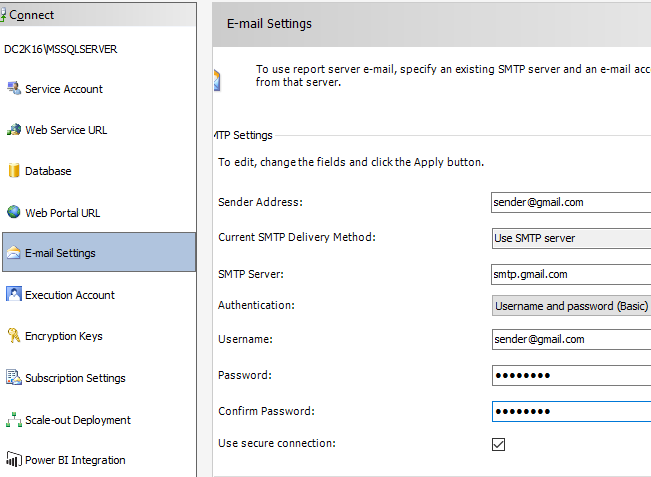
Go to the E-mail Settings section to configure the SMTP settings to be used to send reports out. Following settings need to be filled in:
- Sender Address: fill in the sender’s email address
- SMTP Server: fill in the name or IP Address of the SMTP server used to send reports
- Email credential: fill in the Username, Password and Confirm Password.
- Use secure connection: check this if the SMTP server requires SSL encryption
Note: it is recommended that outbound rules should be added in Windows Firewalls to allow using SMTP port (default 25 for non secure and 587 for secure connections - ask system administrator if you do not know what ports are using)
Install Report Builder
The Report Builder is used to create and collect Safewhere Identify Reports. Download link: https://www.microsoft.com/en-us/download/details.aspx?id=53613 Run "ReportBuilder3" installation file and follow the installation steps till complete. Once installation is successful, you can launch Report Build from the Report Manager web site (Web Portal).
Configure Safewhere Identify reports
Admin portal settings
It is required that Safewhere Identify logs must be written to SQL Server in order to generate reports. The following steps will show you how to configure it. Login to Admin portal, go to System Setup > Logging
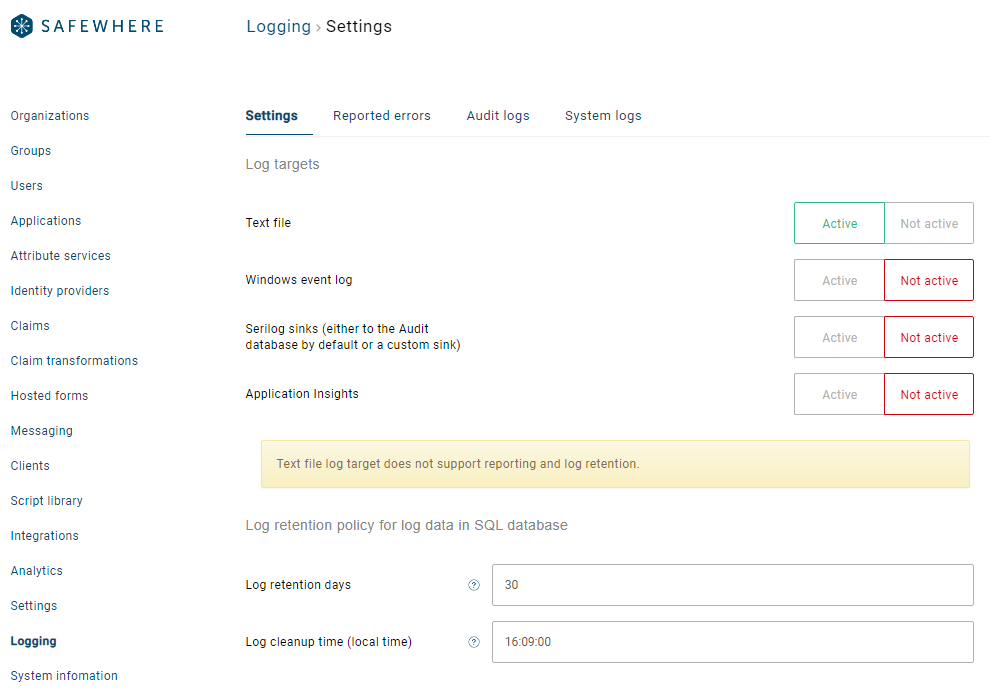
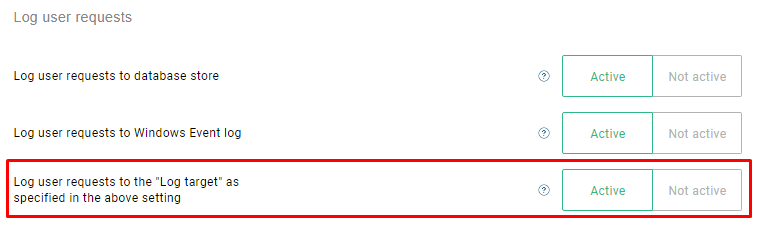
In Log User Requests section, check Log user requests to the "Log target" as specified in the setting below
In Log target section, select the SerilogSinks option
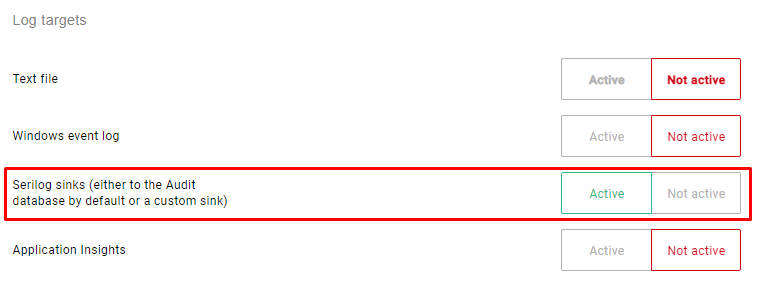
Then click button ”Save to save the settings.
Add reports for Safewhere Identify
Add reports from scratch
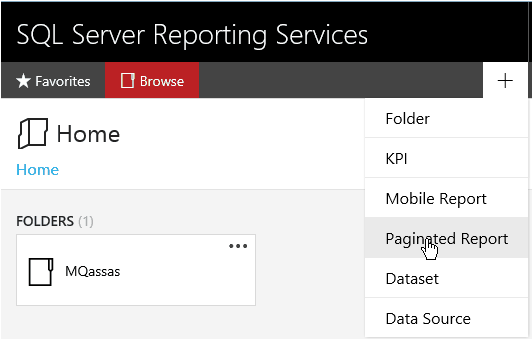
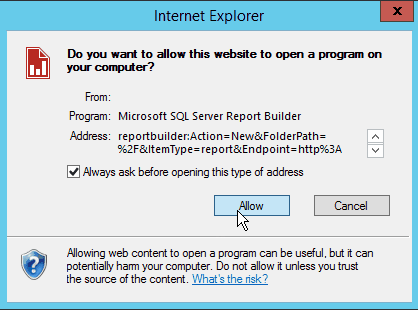
Allow the report builder to open
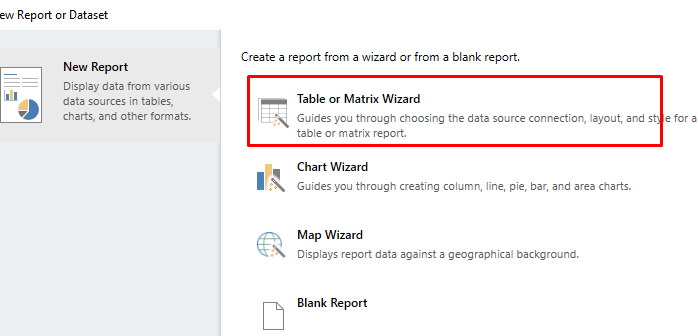
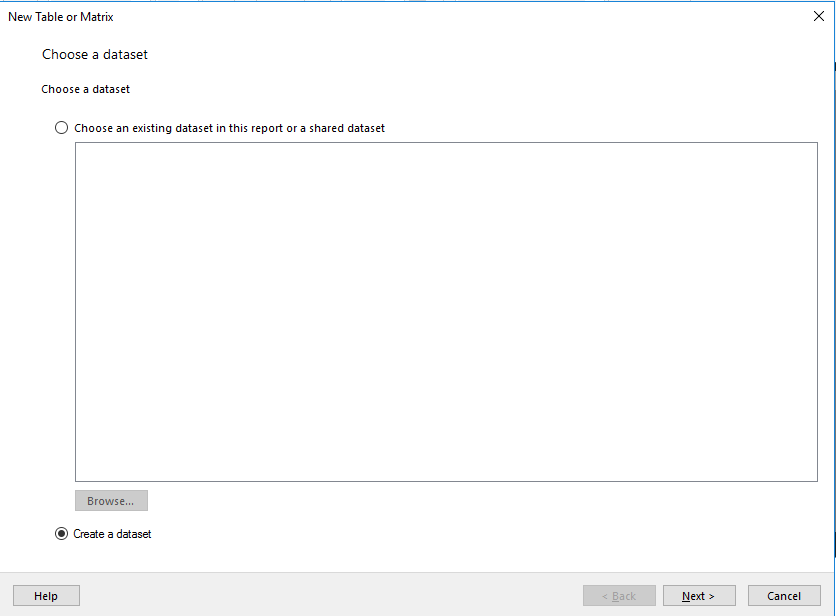
Select Table or Matrix Wizard
Select Create new dataset
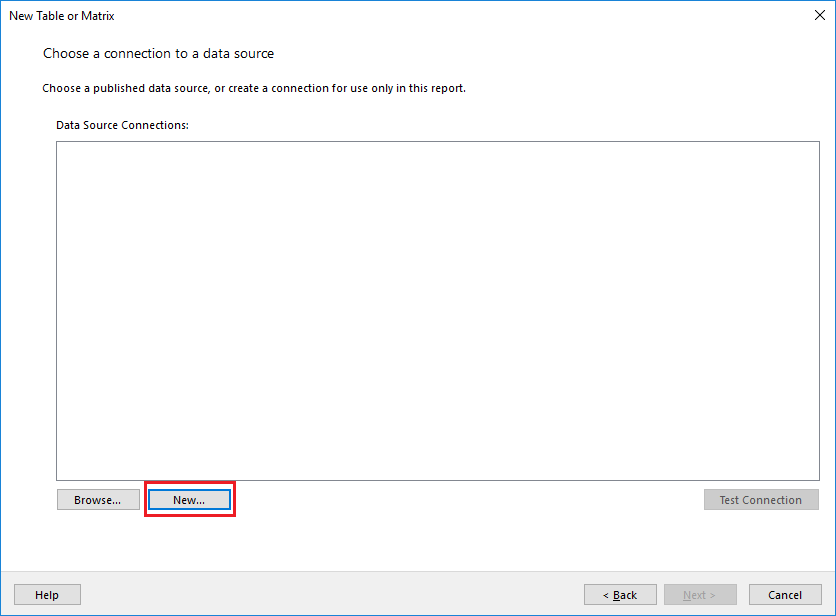
In Data Source Connection, select New to add connection string
Fill in the Name for the Report and click button Build to build the new connection string or edit the existing one. Select the connection type depends on your system environment (Identify only supports Microsoft SQL Server and Microsoft Azure SQL Database). In this article we use Microsoft SQL Server.
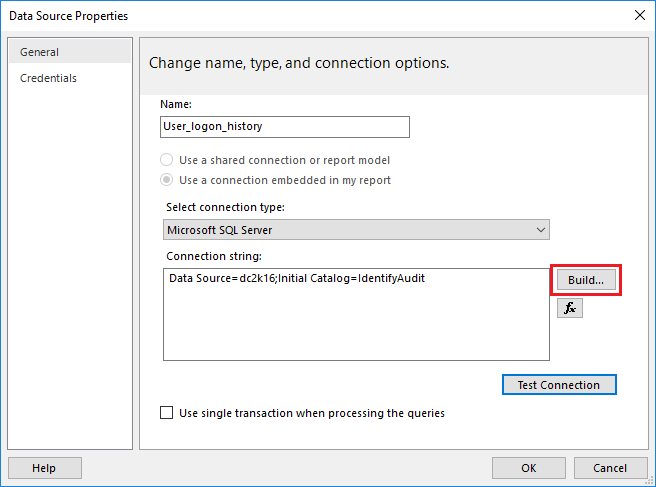
- Data source: select Microsoft SQL Server (SqlClient)
- Server name: fill in your SQL Server name
- Log on to the server: chose the logon method and fill in the credential.
- Connection to a database: select IdentifyAudit
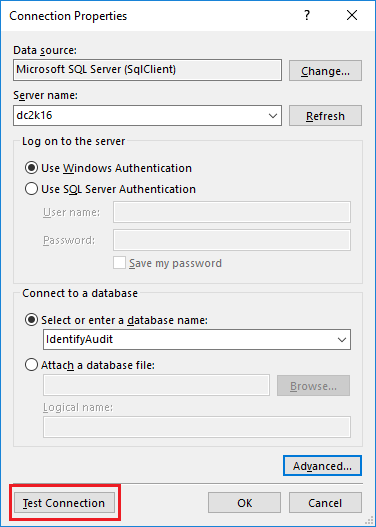
Click Test Connection button to ensure that Connection string is valid. Click OK then complete the setting for Data Source Connection. Click Next on the next screen In the Design a query window add settings then click Next:
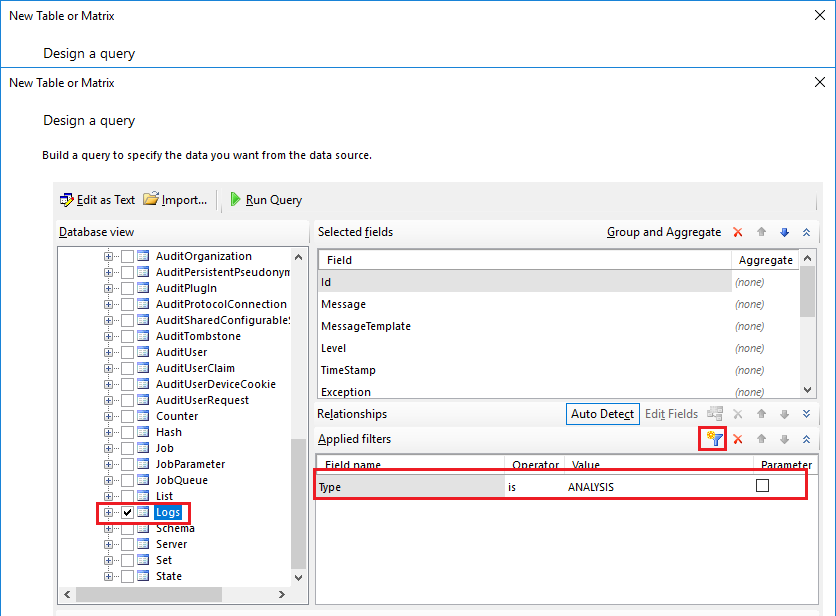
Database view window, select the Identify instance (dev for this article) then expand to check the Logs table
Click the Filter button to add filter
- Field name is Type
- Value is ANALYSIS
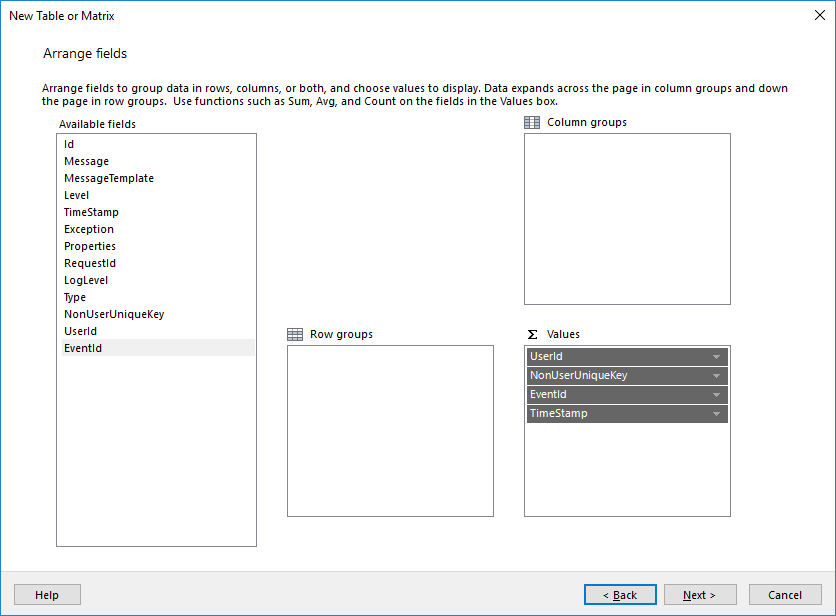
In the Arrange fields drag & drop what fields (Available fields) you wants to display in the user logon history report to the Values then click Next
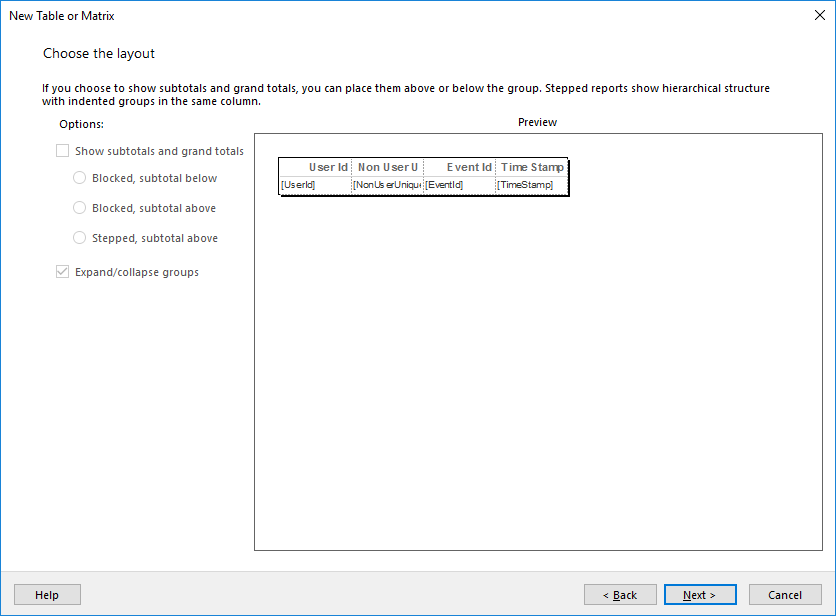
Click Next and preview the settings
Click Next then click Finish to complete the report builder In Report Builders windows, click to add the report title and click File > Save As or Save to save the report
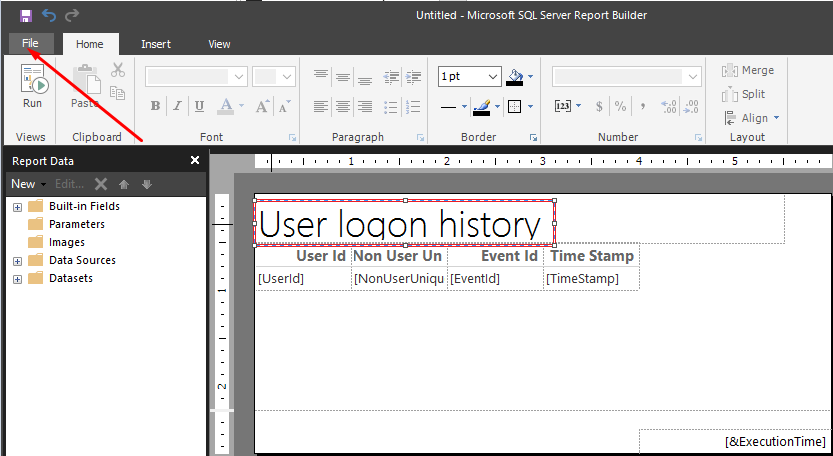
You can also click the Run button under File menu to see how report is generated
Close the Report Builders application and back to Report Manager page, the new added report is displayed
Add reports using existing *.rdl files
We created some sample reports in *.rdl files which can be modified using Report Builder then uploaded to the SQL Server Reporting Service to generate reports
- User logon history - all.rdl: User’s logon history report
- User consent history - all.rdl: User’s consent history report
Edit *.rdl report files
Using Report Builders to open the *.rdl file, you need to modify the Data Sources and Datasets by double clicking on sub items.
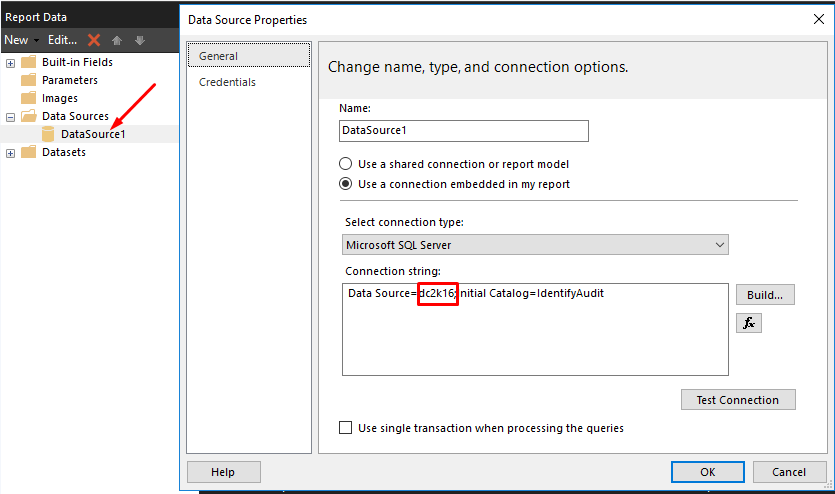
Data Source: It is recommend that you need to update the Data Source value (replace dc2k16 by the SQL Server instance name) and the Credentials then clicking on Test Connection button to test new settings.
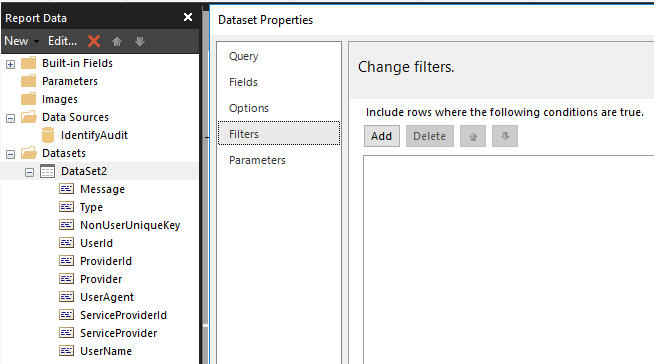
Dataset: in dataset properties you can modify the Query, add/remove fields or set new Filter as you wish.
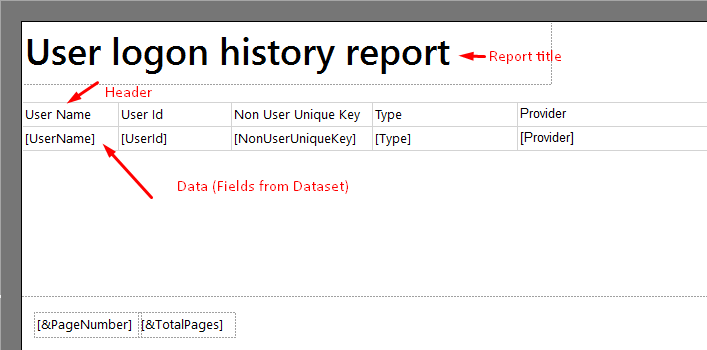
Data Region: where you can modify the Report tile, report data (the first row is report header, second row is report data which value is the field name in Dataset)
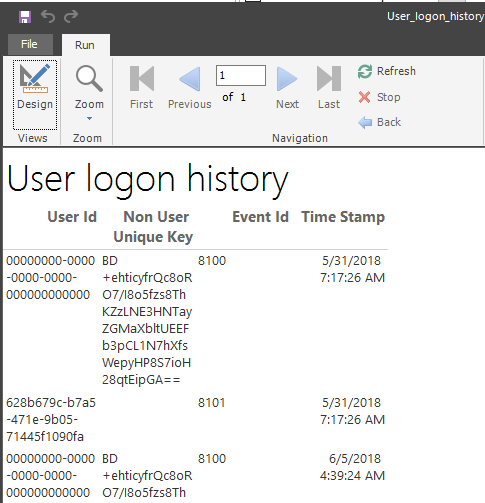
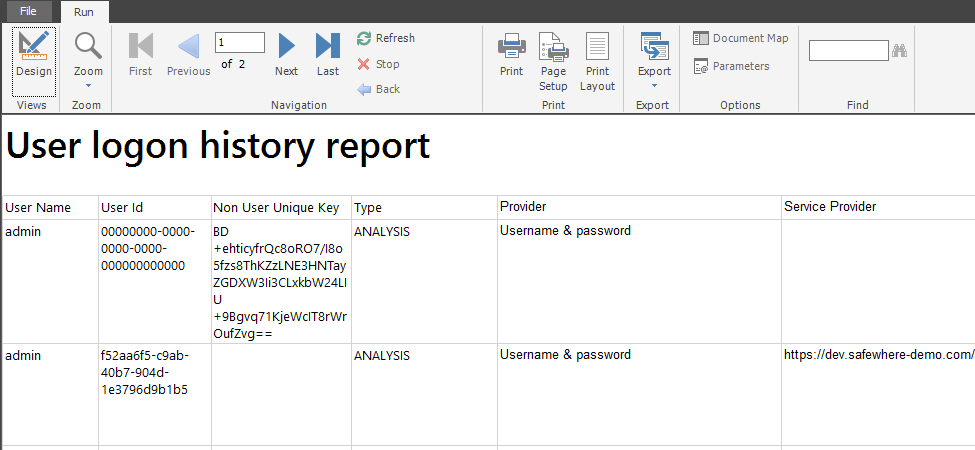
After completing modify the *.rdl file in Report Builder, you can click the Run button to generate report, following is sample report generated
Upload to SQL Server Reporting Service
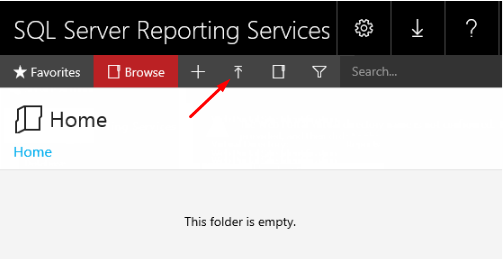
Click on the Upload button, point to *.rdl report file then complete the upload process.
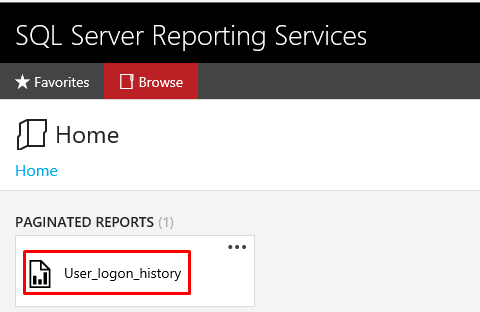
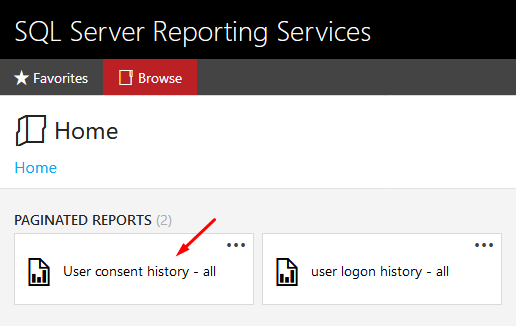
The new uploaded report will be displayed
You can click on the report to generate the report data or configure to export it to other file format (e.g. PDF) and send out via email as following instruction.
Email subscription settings for each report
Before doing that, ensure that the SQL Server Agent (MSSQLSERVER) service is started and running.

Open the Report Manager web site Click on the “...” link and click MANAGE to edit the Subscription email setting
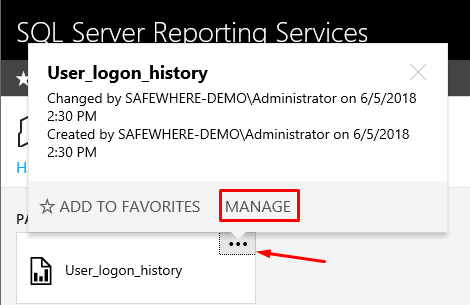
Click on “ Subscriptions menu on the left hand side
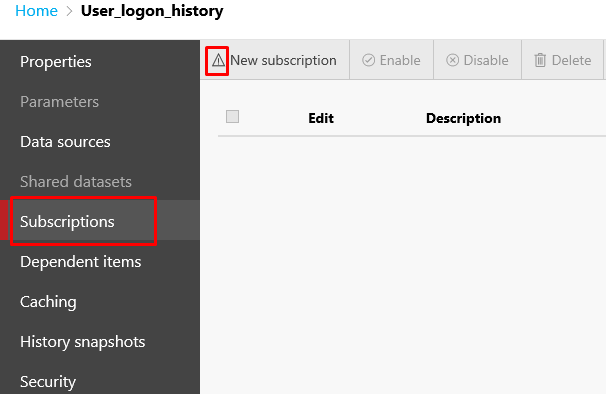
In case you see the exclamation icon next to New subscription, it is usually because the credential to access data source is invalid, do the following steps to correct it.
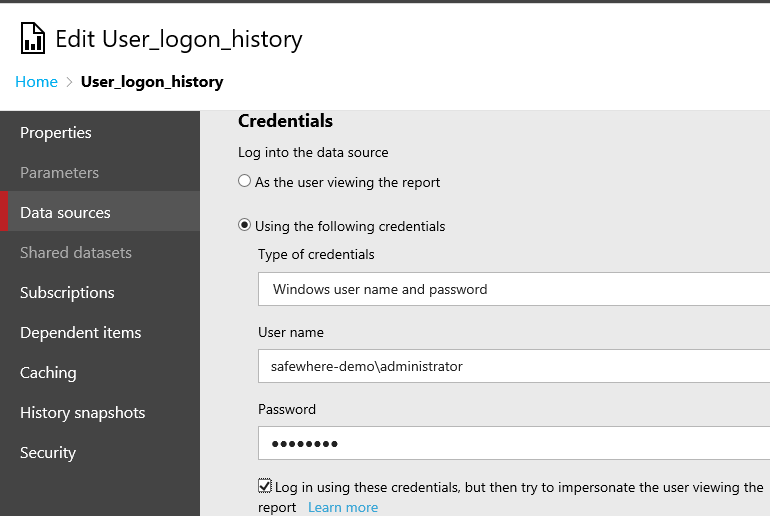
Click the Data sources menu, ensure the A custom datasource choice is selected and go Credential section Select Using the following credential and fill in your credential then click the Test Connection button to ensure that your credential is valid. (It will also store the credential securely into report server)
Save and back to Subscriptions page. This time the icon will be changed to +
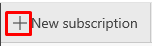
Click New subscription to add email subscription
- Fill in ”Description
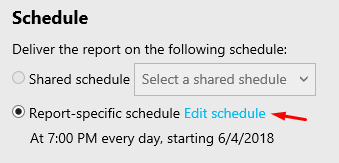
- In the Schedule section select Report-specific schedule and click Edit schedule link.
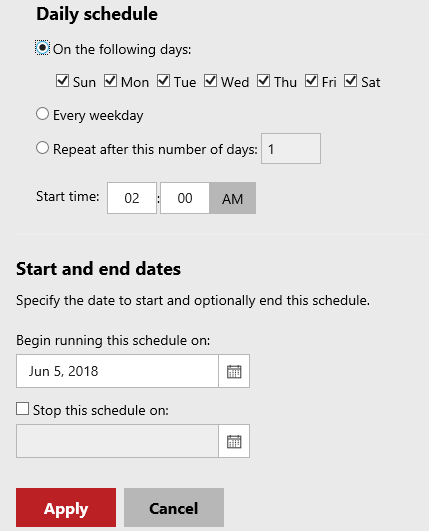
Modify your settings then click Apply to complete edit schedule
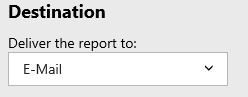
In Destination section, select E-mail option
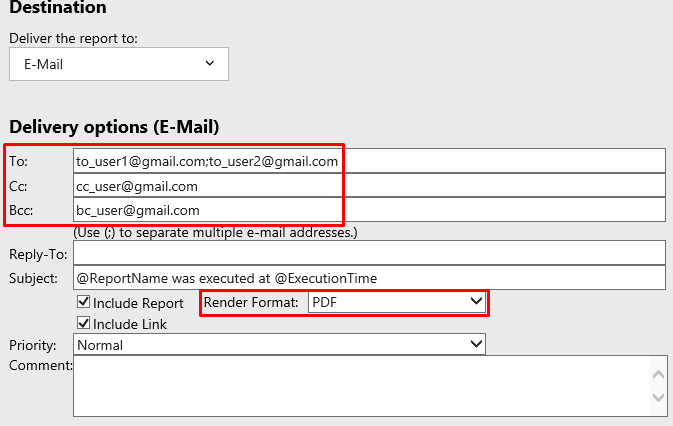
In the Destination section, fill in the email addresses and select Render Format - PDF option, you can also modify the subject
Click Create Subscription button to complete.