How to move database files to another location in SQL Server Always On Availability Groups
Prerequisites
You have an Identify deployment that uses SQL cluster.
Note: remember to back your databases up before proceeding.
Move database files to another location
In this example, we choose to move files of the IdentifyAudit database to D:\data. Firstly, verify the current data files path using command: sp_helpdb 'IdentifyAudit'
- Primary Replica data file locations

- Secondary Replica data file locations

Step 1: Suspend data movement
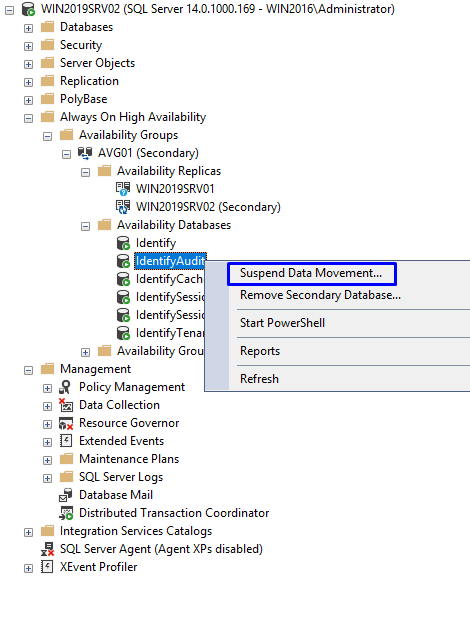
Connect to the Secondary replica and go to Always on High Availability. Expand the High Availability and right-click on the database and choose Suspend Data Movement.
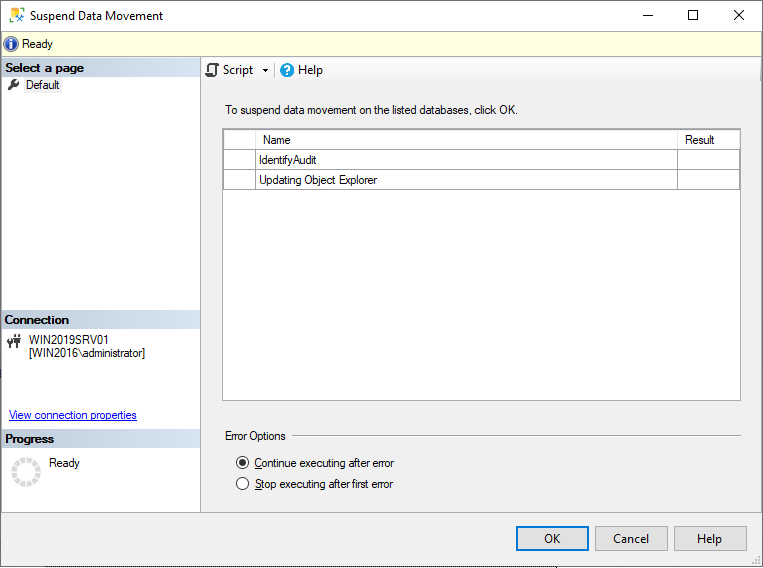
The Suspend Data Movement wizard opens, click OK button
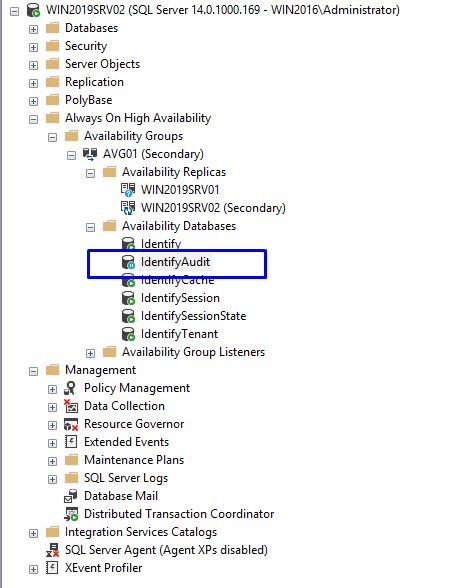
Once it is completed, you can see its Pause status
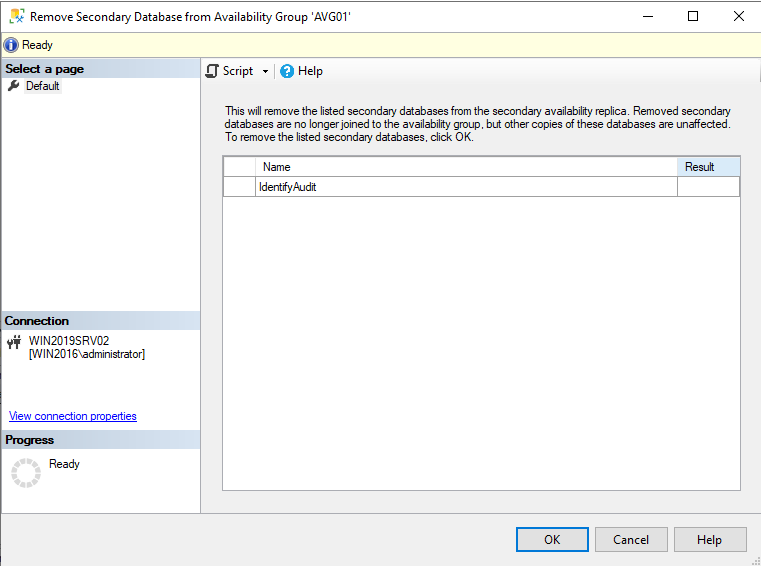
Step 2: Remove secondary database
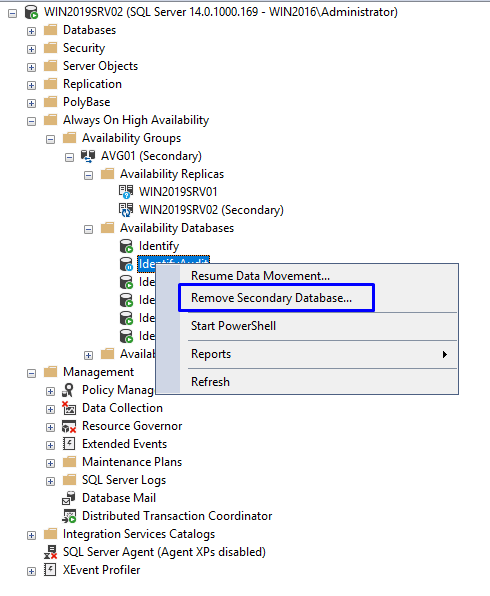
In this step, you must remove the database out of the Always on Availability Group of the secondary replica. Right-click on the database and choose Remove Secondary Database.
After the wizard below opens, click OK
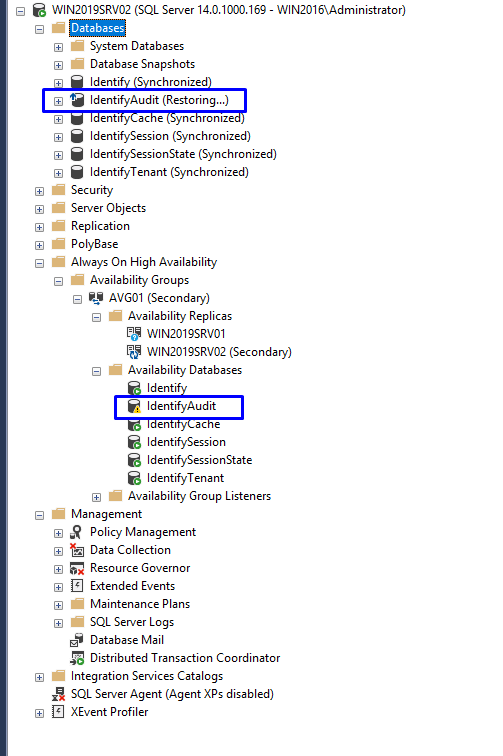
Once it is done, you can see the new status of the IdentifyAudit database:
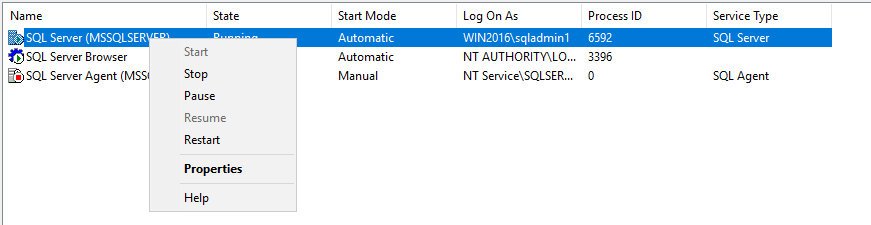
Step 3: Stop SQL service
Stop the SQL Service on the secondary replica using the SQL Server Configuration Manager.
Step 4: Move data files to the new location
Move database files to the new location and start the SQL Service again.
Step 5: Tell SQLServer that you want to move files to a new location
Script:
ALTER DATABASE IdentifyAudit
MODIFY FILE ( NAME = IdentifyAudit,
              FILENAME = 'D:\data\IdentifyAudit.mdf');
GO
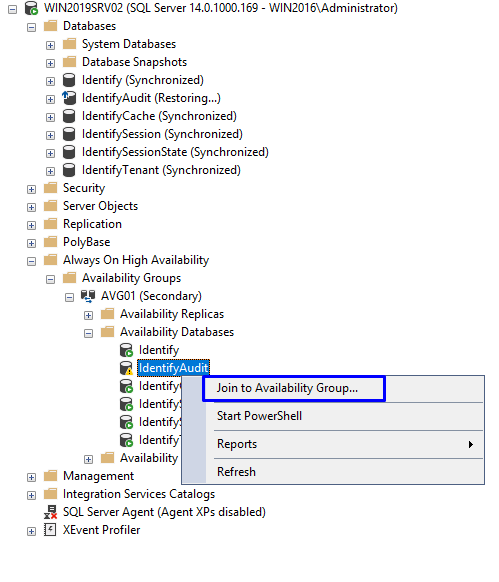
Step 6: Join it to Availability group
On the secondary replica, right-click on the database and choose Join to Availability Group.
Step 7: Promote the secondary replica to be the primary replica
After this step is done, the previous primary replica has become the new secondary replica.

Step 8: Repeat the 1st step to 7th step on new secondary replica
Repeat Step 1 to Step 7 on the new secondary replica. After that, you can switch their roles back if you want to.
After moving the IdentifyAudit database's data files, you can verify that everything works well:
- Access an Identify instance and perform a login to its Admin site.
- Use the Identify Configurator to create/upgrade/remove/replicate an instance.