How to use ARM template to provision Identify environment
Introduction
The purpose of this document is to help an user use Azure Resource Manager (ARM) templates to easily and quickly create a full infrastructure of Identify environment in Azure. The ARM template supports to provision Azure resources only, including Network and Public IP Address. To install Identify and other products, you need manually download installation files and install them.
ARM templates
You can find the ARM templates at https://github.com/Safewhere/Azure-resources.
Depending on specifics need of an environment that you are provisioning, different templates can be used:
- azure-identify-one-vm-with-service-bus-template.json: This template is used to provision the minimum resources that require for Identify as one Virtual machine, one SQL Server (Azure SQL Databases) and one Service Bus. It fully supports Partner Portal, OneInstaller and Safewhere Admin. You will have only one Virtual machine after provisioning and need to install all Identify products on that virtual machine.
- azure-identify-two-vm-with-service-bus-template.json: This template is used to provision the minimum resources in redundancy mode with Virtual machines instead one. You need to install all Identify products on both virtual machines.
- azure-identify-two-vm-without-service-bus-template.json: This template provisions two Virtual machines as what azure-identify-two-vm-with-service-bus-template.json template does but doesn’t support Partner Portal and OneInstaller because of no Service Bus. In most cases when you are provisioning a production environment, this is the template for you to try out.
How to provision
At first, you need to choose the correct ARM template and prepare an Azure Portal account that has at least Contributor role to create Azure resources.
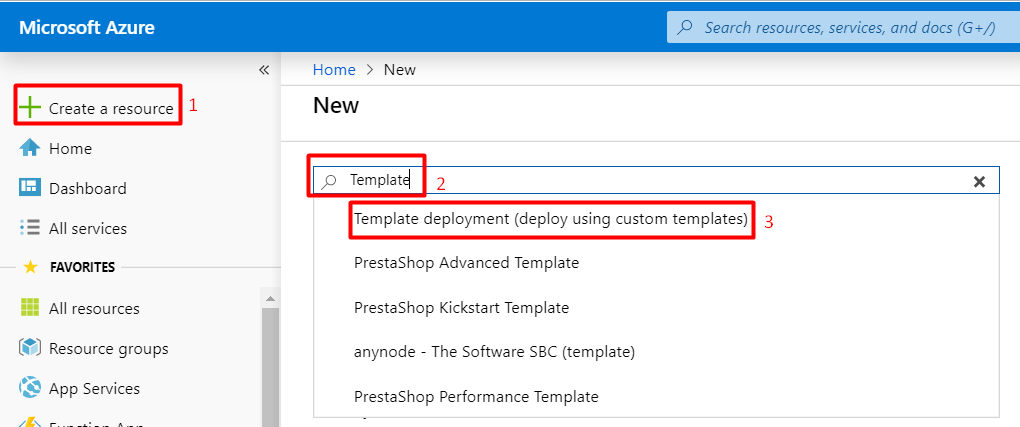
Login to Azure Portal https://portal.azure.com and select Create a resource.
Type in "Template" and select Template deployment (deploy using custom templates) then click Create.
Select Build your own template in the editor -> Load file: Choose your correct ARM template (JSON file)
In the Edit template page, you can modify some default settings (defaultValue) e.g. environment tag, virtual machine name or credential then click Save.
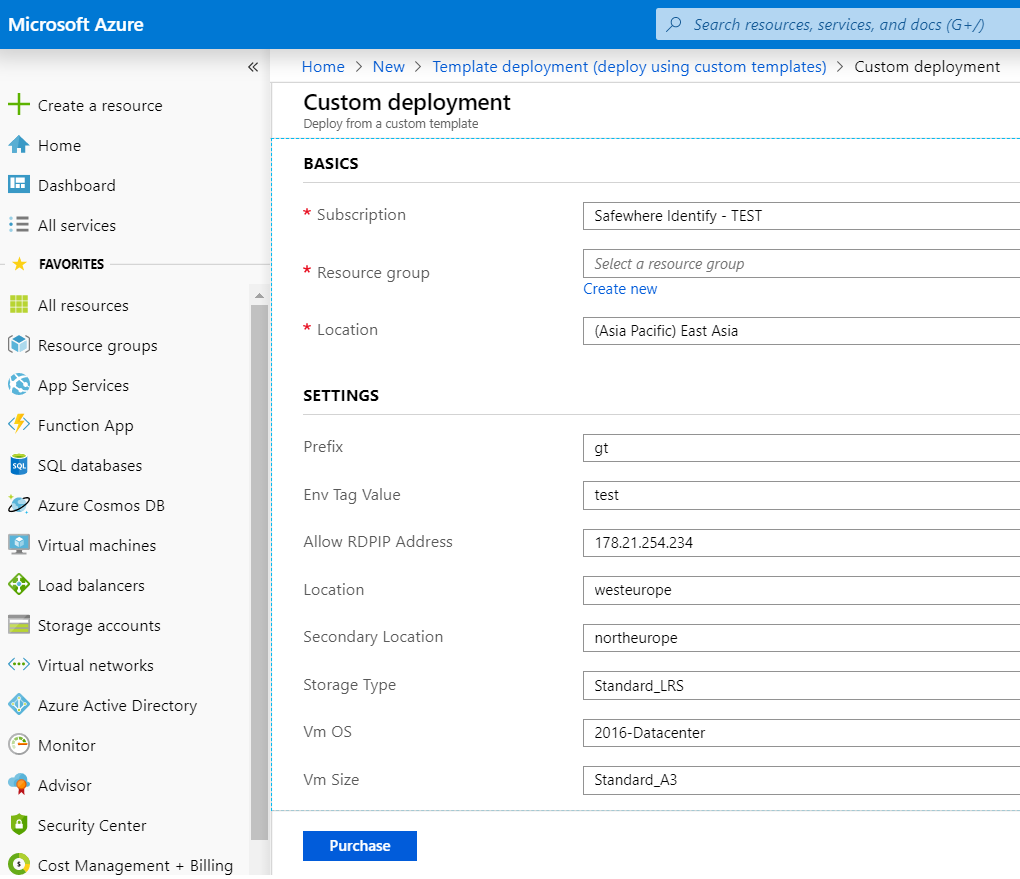
In the Customized template page, you need to choose correct Subscription, Resource Group and Location and fill in your custom value in setting section.
- You need to pay attention to the Allow RDPIP Address parameter, this is the only allowed IP address to remote desktop so you need to fill in your pubic IP address, mostly the out IP when you turned on VPN connection.
- You need to enter the Env Tag Value. This parameter is used to categorize resources and manage cost.
Choose "I agree..." checkbox and click Purchase to start provisioning progress.
The progress may take about 5 minutes to 10 minutes to complete everything. You will see the notification on the right bar after it finished, either failed or succeeded
Once the provisioning progress is done, we can go to Virtual machine and remote desktop connect to start manually installing Identify products.
If you are familiar with Azure PowerShell and you already installed Azure PowerShell Cmdlets, you can use this guideline to provision Azure resources using ARM template https://docs.microsoft.com/en-us/azure/azure-resource-manager/resource-group-template-deploy
Known issues and troubleshooting
Depend on which Region you are using, Azure supports different resource types and resource sizes. For example, the A1 size Virtual machine is supported in Asia region, but might not be supported in North Europe. We recommend that you should read notifications on the upper right corner carefully and follow their instructions.
Reference
https://docs.microsoft.com/en-us/azure/azure-resource-manager/resource-group-template-deploy