Getting started with Identify using MariaDB guidelines
Introduction
MariaDB Server is a widely used open-source relational database management system for a various applications. Whether you are new to MariaDB or familiar with it, this guide will walk you through step-by-step instructions and best practices for setting up and configuring Identify with MariaDB Server on a variety of environments, including Windows (on-premises), Linux (on-premises), and Azure (Cloud).
How to Set Up MariaDB Server for Windows, Linux and Azure cloud
1. Set up MariaDB Server on Windows
In this section, we will provide step-by-step instructions for installing and configuring MariaDB Server on Windows:
Step 1: Download MariaDB Server
Visit the official MariaDB website at download MariaDB Server to download the appropriate version of MariaDB for your operating system. It is recommended to use version 10.9.x for optimal compatibility and performance.
Note: Version 10.10++ includes some breaking changes that are not compatible with the current library.
Download the MariaDB Server installer package for your operating system.
Step 2: Install MariaDB Server
Run the MariaDB Server installer package that you downloaded in the previous step.
Follow the on-screen instructions to complete the installation process.
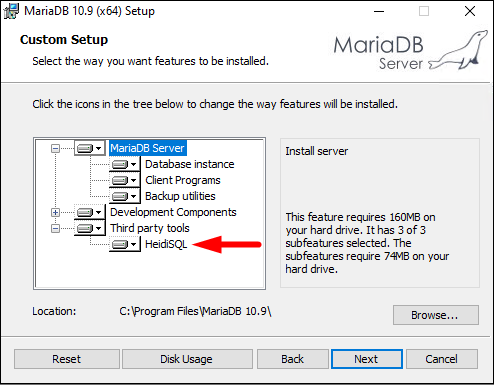
Note: You can install HeidiSQL as a powerful, easy and free MySQL, MariaDB GUI client.
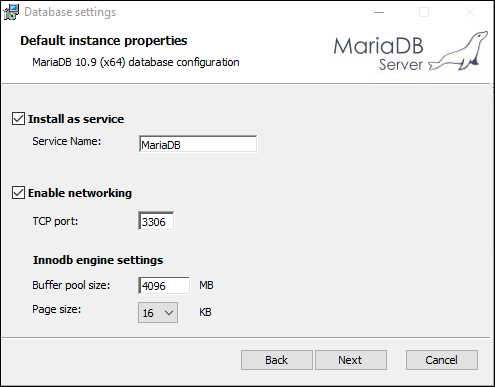
During the installation, configure the necessary settings such as the root password, port number, and data directory as per your requirements.

Step 3: Start MariaDB Server
Once the installation is complete, start the MariaDB Server service.

Depending on your operating system, you may need to start the service using a command line or a graphical user interface (GUI) tool. If you are using HeidiSQL, you can refer to the example below for the connection information.

Verify that MariaDB Server is running and accessible on the specified port (3306) as follows:

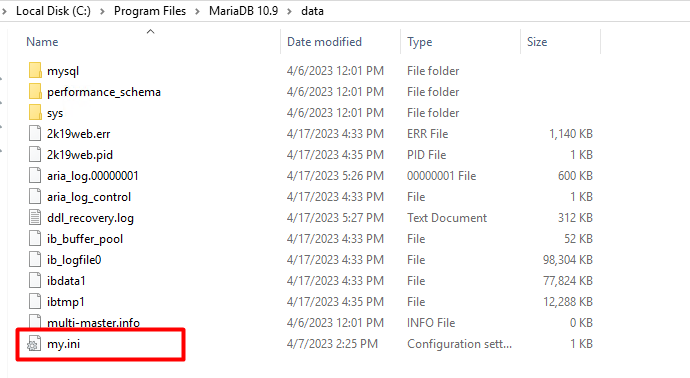
Step 4: Configure MariaDB Server
Open the MariaDB Server configuration file my.ini, typically located in the installation directory or /data directory, depending on your operating system.
Configure the necessary settings such as the mysqld version, character set, and storage engine as per your requirements.
[mysqld]
character-set-server=utf8mb4
version=10.9.5[client]
default-character-set=utf8mb4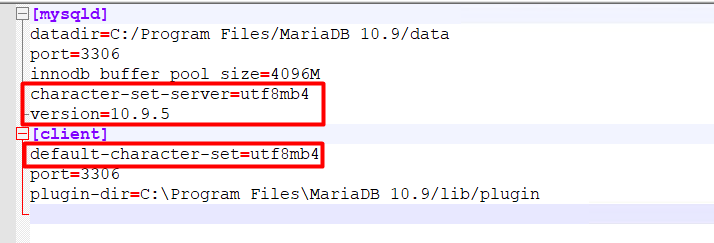
Note: These settings are required due to a technical limitation of the MySQL EF Provider.
Save and close the configuration file.
Restart MariaDB service
2. Set up MariaDB Server on Linux
Prerequisites:
Before installing Docker and WSL2, please enable VMProcess using PowerShell on your host machine to configure nested virtualization. Make sure to turn off any virtual machines in advance.
Set-VMProcessor -VMName <VMName> -ExposeVirtualizationExtensions $true
For more information, please refer to the documentation provided at Install WSL on Windows Server.
Step 1: Install a Linux Distribution
Enable the Windows Subsystem for Linux:
- Open PowerShell as Administrator (Start menu > PowerShell > right-click > Run as Administrator) and enter this command:
dism.exe /online /enable-feature /featurename:Microsoft-Windows-Subsystem-Linux /all /norestartEnable Virtual Machine feature:
Before installing WSL 2, you must enable the Virtual Machine Platform optional feature. Your machine will require virtualization capabilities to use this feature. Open PowerShell as Administrator and run:
dism.exe /online /enable-feature /featurename:VirtualMachinePlatform /all /norestartYou can now install everything you need to run WSL with a single command. Open PowerShell or Windows Command Prompt in administrator mode by right-clicking and selecting Run as administrator, enter the
wsl --installcommand, then restart your machine.
Download the Linux kernel update package.
- Download the appropriate package from this page.
- Run the update package downloaded in the previous step.
Set WSL 2 as your default version.
wsl --set-default-version 2Download distributions
Install distribution
Once the distribution has been downloaded, navigate to the folder containing the download and run the following command in that directory, where app-name is the name of the Linux distribution .appx file.
Add-AppxPackage .\app_name.appxAdd your Linux distribution path to the Windows environment PATH (C:\Users\Administrator\Ubuntu in this example), using PowerShell:
$userenv = [System.Environment]::GetEnvironmentVariable("Path", "User") [System.Environment]::SetEnvironmentVariable("PATH", $userenv + ";C:\Users\Administrator\Ubuntu", "User")
Once your distribution is installed, follow the instructions to create a user account and password for your new Linux distribution.
Step 2: Install Docker Desktop on Windows Server
Refer to this Install Docker on Windows
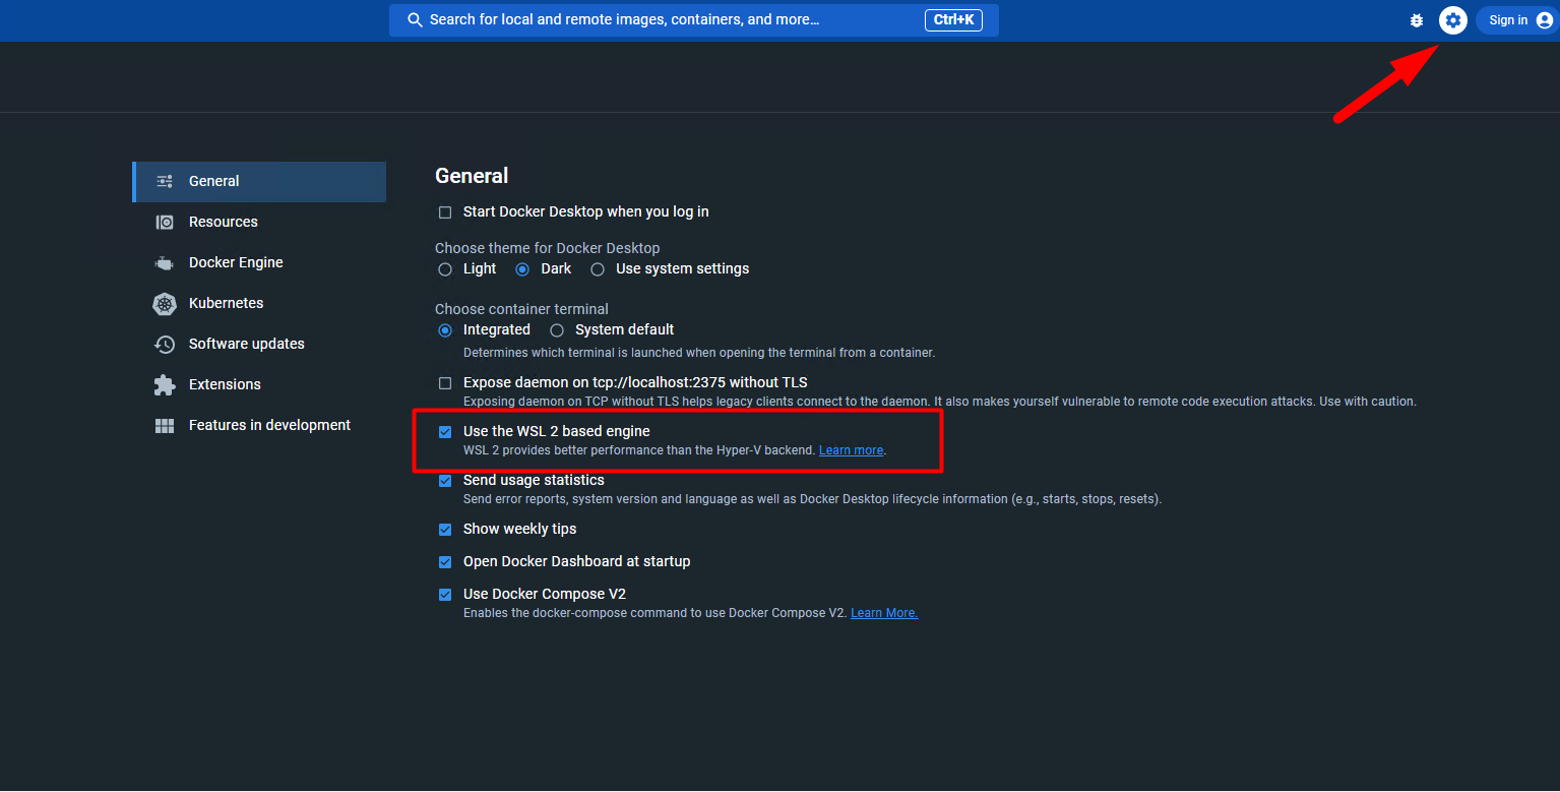
While installing Docker Desktop, select the option to use the WSL2 instead of Hyper-V

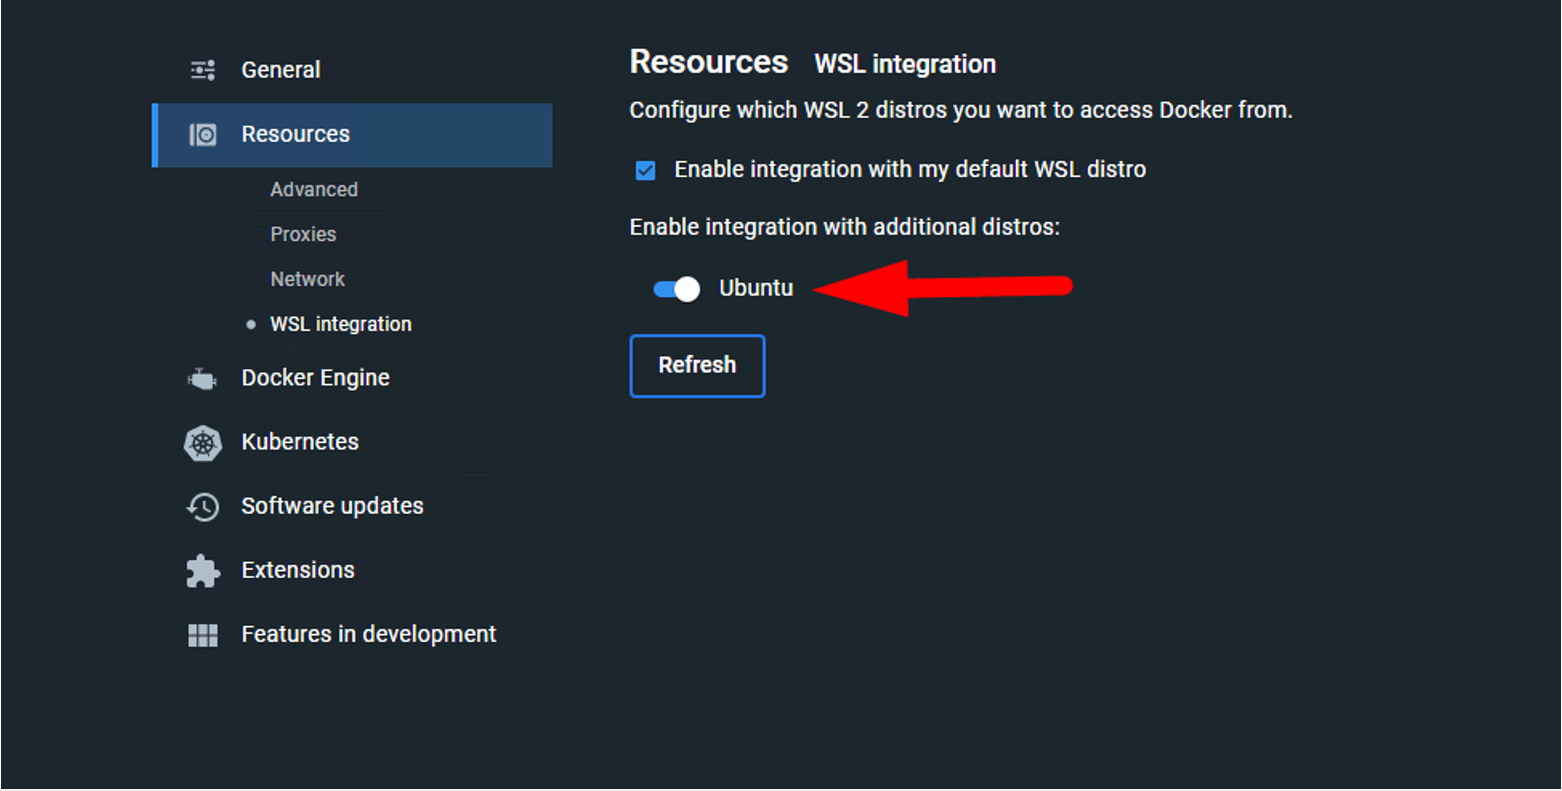
After successfully installing Docker Desktop, open the application and configure the settings as follows:
Step 3: Set up & Configure MariaDB Server on Linux
Open Ubuntu distro then run command:
sudo docker pull mariadb:10.9.5Run docker using command:
docker run -p 3306:3306 --name mdb -e MARIADB_ROOT_PASSWORD=Test123! -d mariadb:10.9.5Open file 50-server.cnf located in the directory /etc/mysql/mariadb.conf.d/
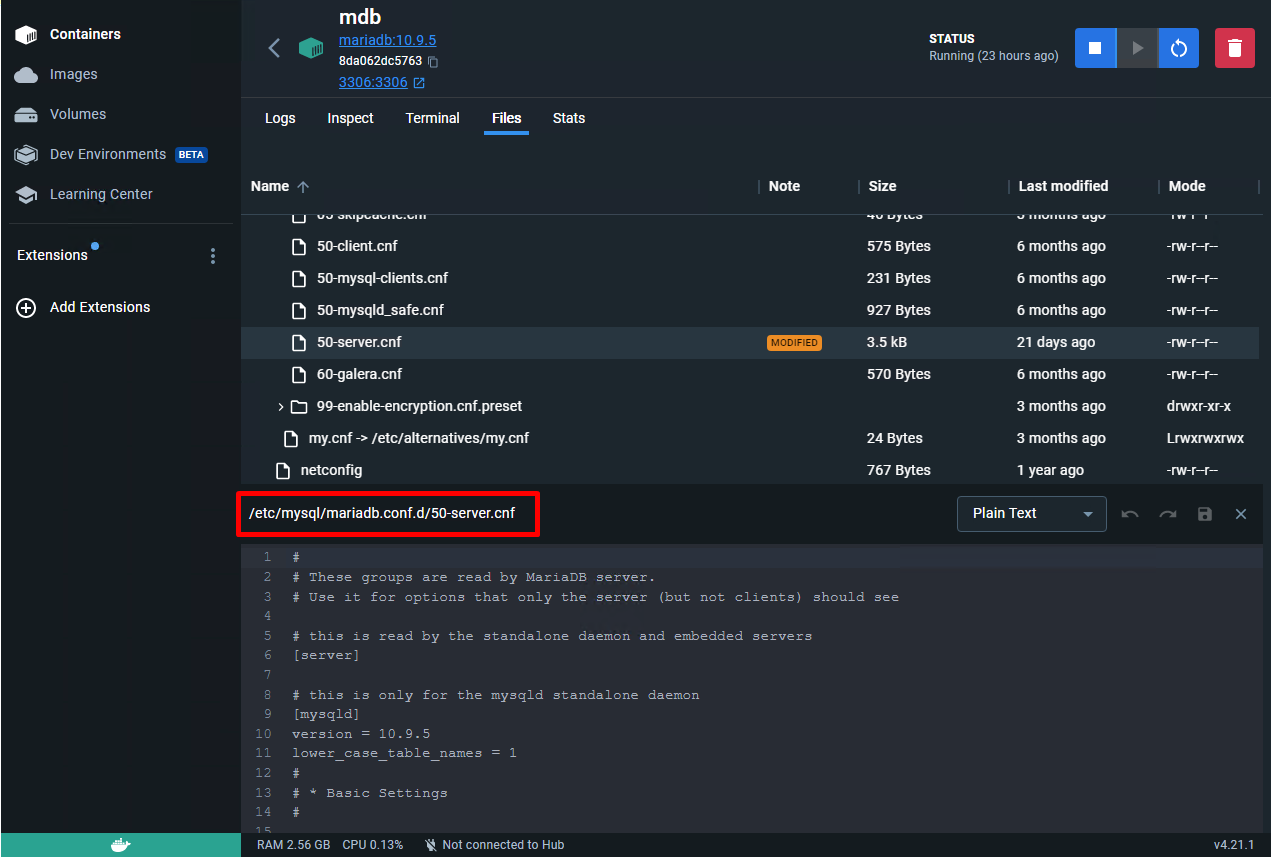
Update it as follows:
- version = 10.9.5
- lower_case_table_names = 1
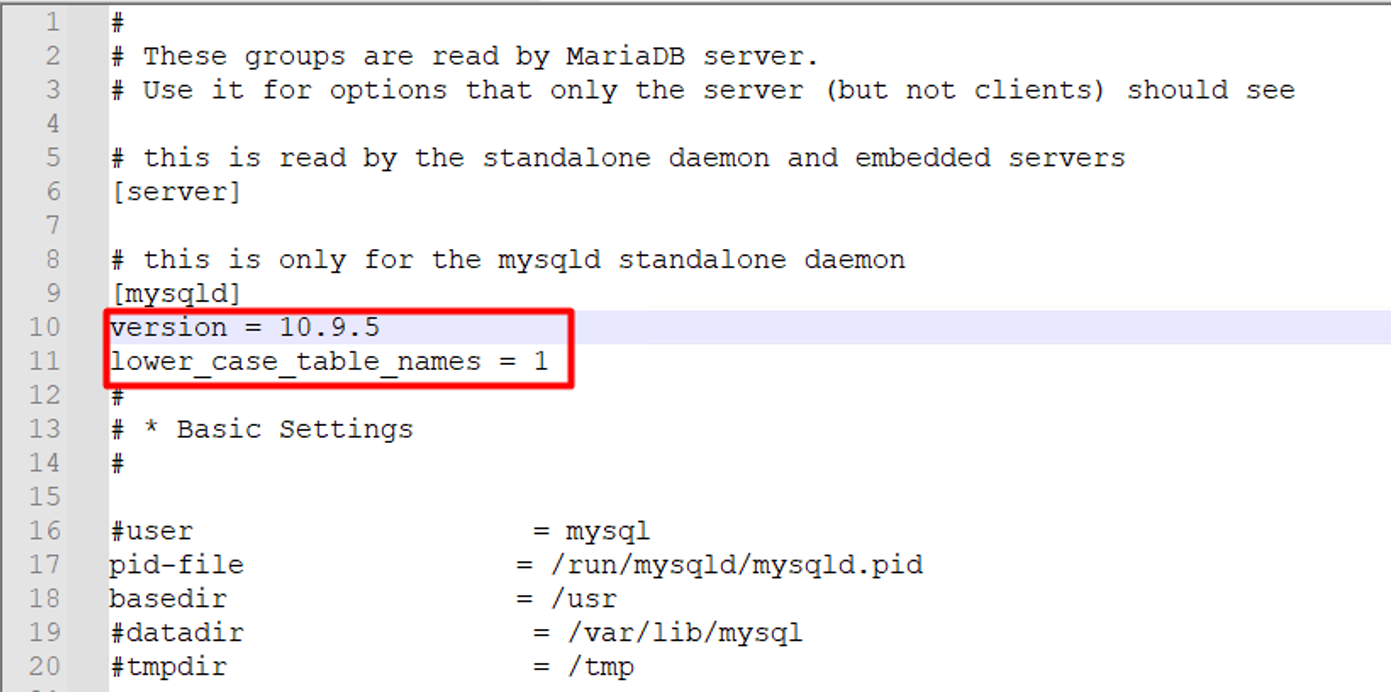
Note: Once you have configured MariaDB in the Linux environment, the value of lower_case_table_names is set to 0 by default, which treats table names, aliases, and database names as case-sensitive. To enable case-insensitive comparisons for table names and ensure seamless integration with our data access layer, you should set the value of lower_case_table_names to 1. For detailed instructions, please refer to the following URL: MariaDB Documentation on lower_case_table_names
Restart the Docker
Connect Heidi to MariaDB server, open Variables tab then double-check variables follows:

3. Set up MariaDB Server with Azure
Step 1: Step-by-step instructions for integrating MariaDB Server with Azure:
- Please refer to this Quickstart: Create an Azure Database for MariaDB server by using the Azure portal
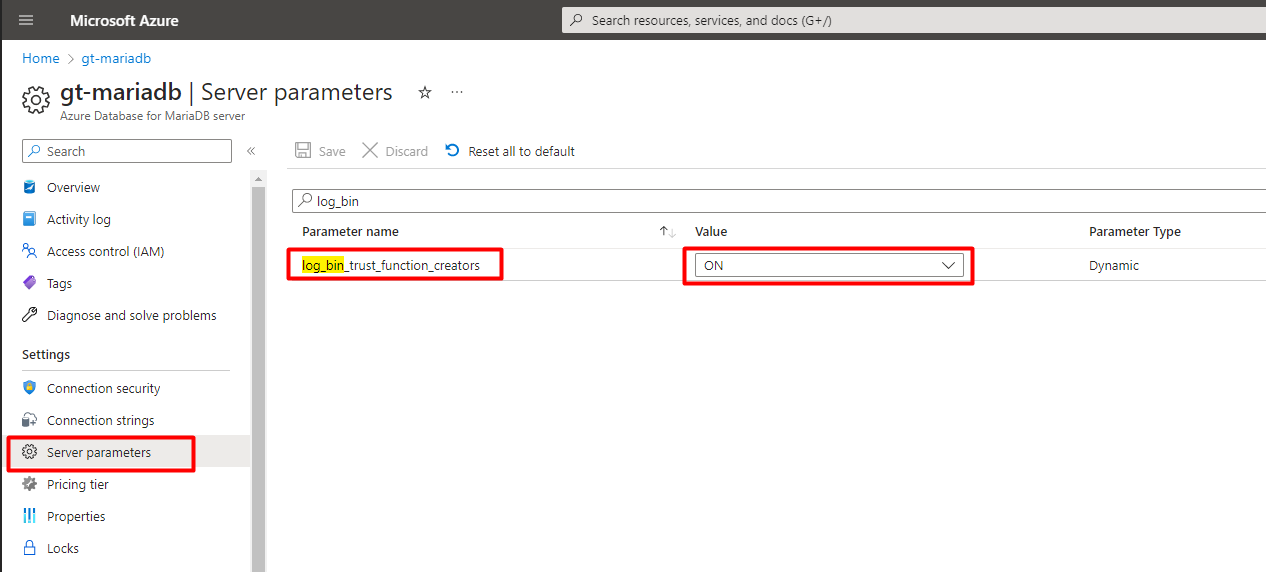
Step 2: Configure connection settings
Go to Server parameters then search for log_bin_trust_function_creators
Set its value to ON
Permissions for the MariaDB Account
To set up permissions for the MariaDB account, follow these steps:
- Open the HeidiSQL tool and connect to the MariaDB Server.
- Use the following MariaDB script:
-- Create a new user
CREATE USER 'your_username'@'%' IDENTIFIED BY 'your_password';

-- Grant minimum privileges to create user and set his permissions
GRANT  CREATE USER, RELOAD ON *.* TO 'your_username'@'%' WITH GRANT OPTION;

-- Grant global privileges to Identify databases
GRANT ALL PRIVILEGES ON `identify%`.* TO 'your_username'@'%' WITH GRANT OPTION;

-- Refresh the privileges
FLUSH PRIVILEGES;
In the script above, replace 'your_username' with the desired username for the user and 'your_password' with the corresponding password.
Once the user is created, you can use it to log in to MariaDB when using Identify configurator or the Identify command-line interface (CLI)
Create a new Identify instance using MariaDB
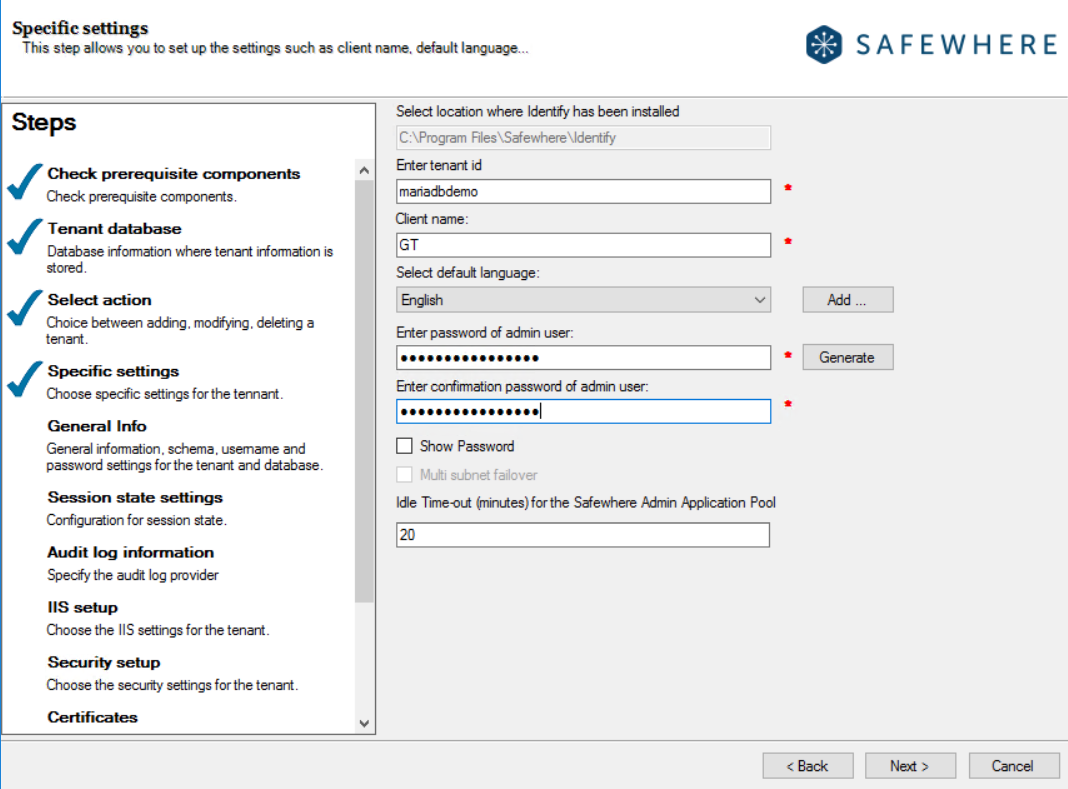
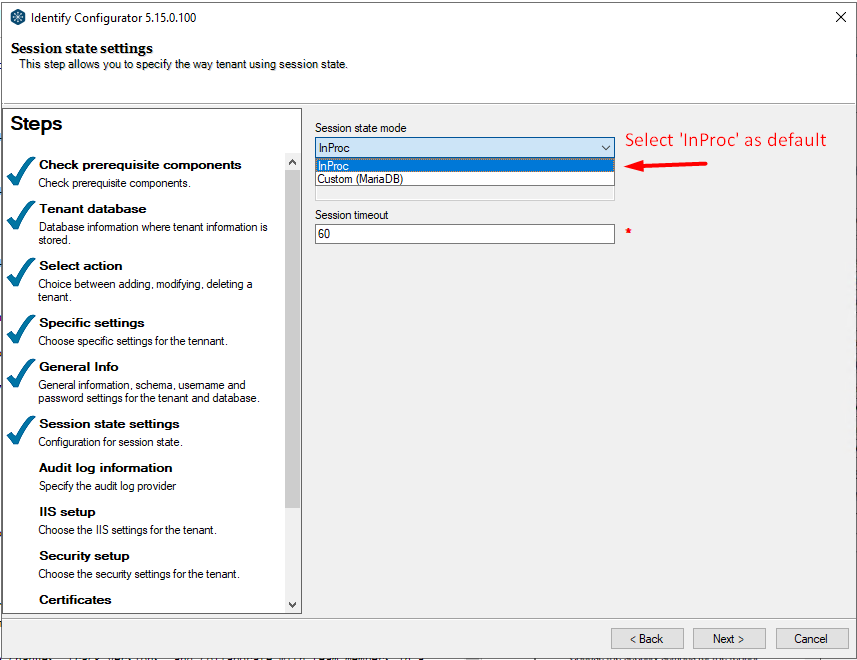
Step 1. Execute the Identify Configurator and create new instace
- Prerequisites: Install Identify installer that supports MariaDB
Select provider as MariaDB then input database information

Choose to create a new instance
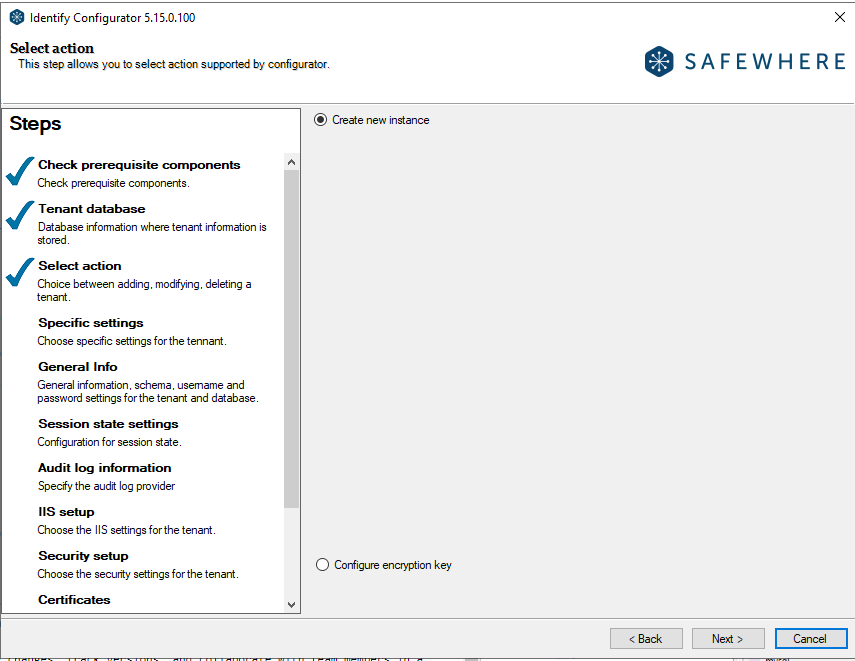
Proceed to the next steps to complete the creation of the instance
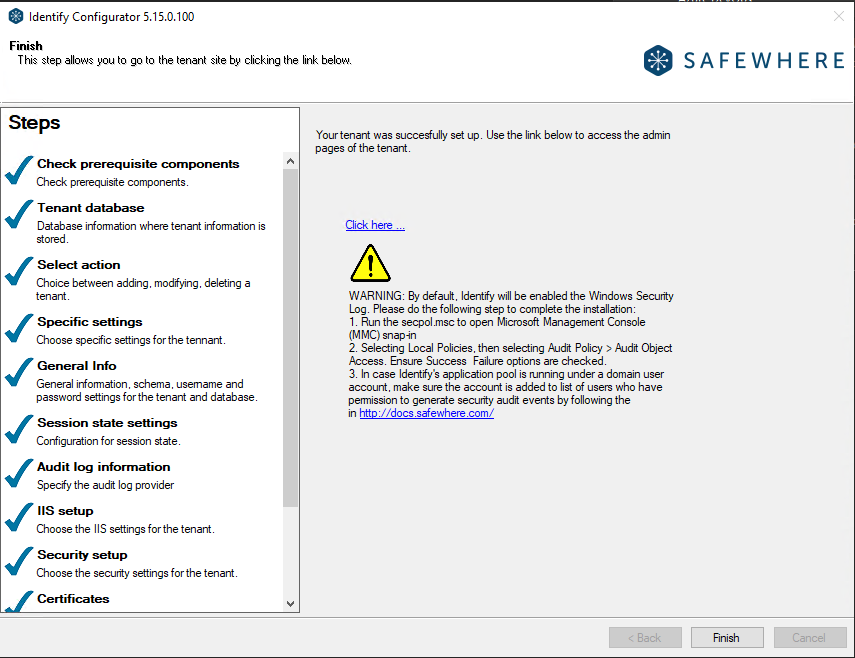
Step 2. Verify the instance works well with MariaDB Server
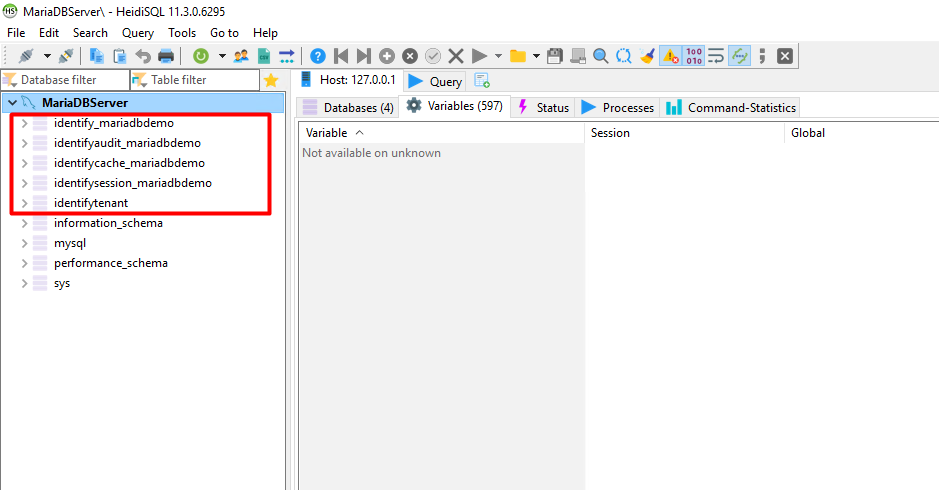
Back to GUI tool to view the newly created database instance
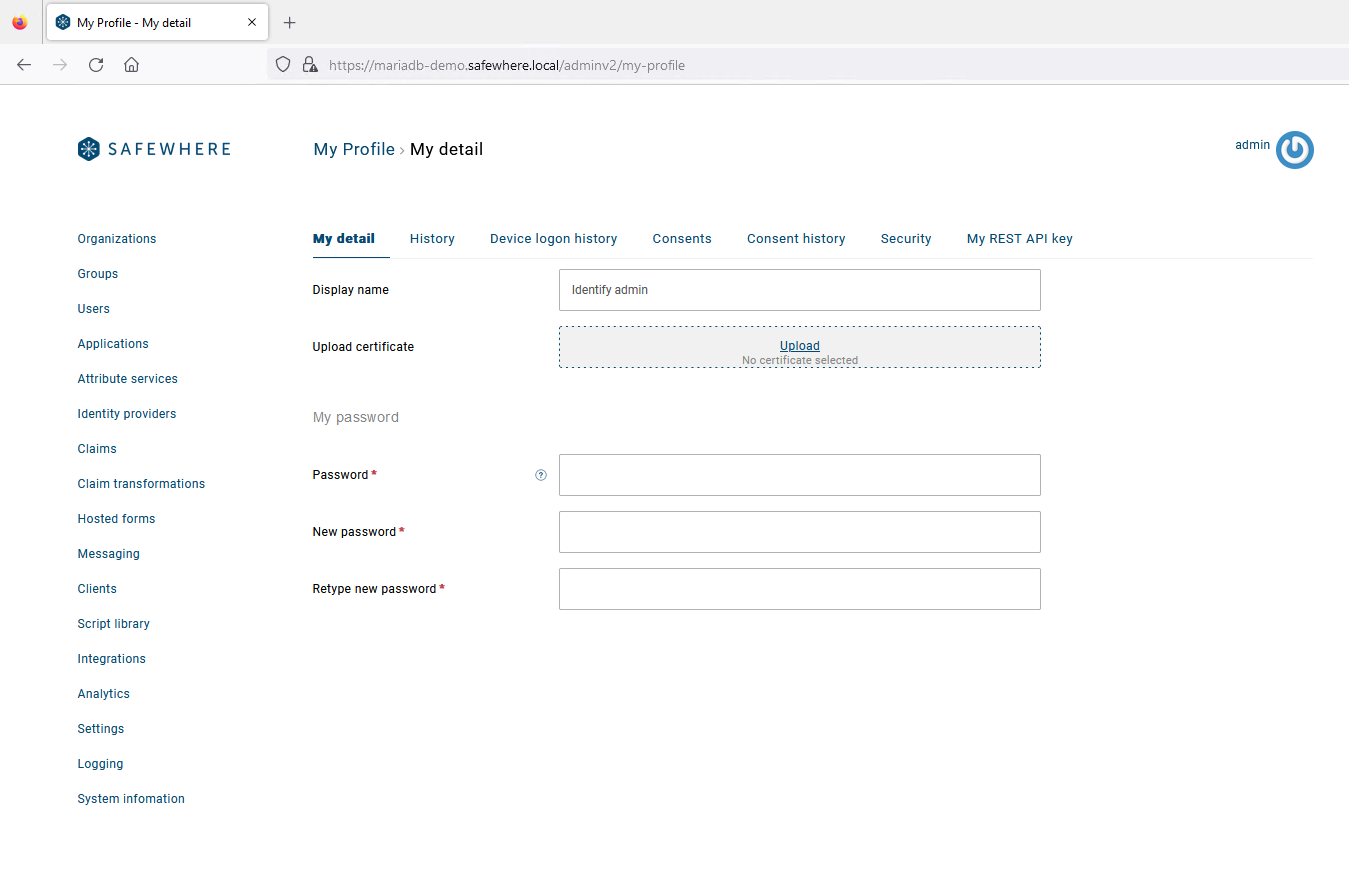
Open the instance then access to Identify Admin
Perform tests to ensure the other Configurator's features, such as upgrading, deleting, reconfiguring instance, etc. are functioning properly with MariaDB Server.
Indices of an Identify instance
The Identify and IdentifyAudit databases can contain a large amount of data and having neccessary indices is essential for querying data efficiently.
List of indices on the Identify database is:
| Table | Index name |
|---|---|
| attributeserviceconnection | IX_AttributeServiceConnection__ConfigurationId |
| claimdefinition | IXU_ClaimDef__ClaimType |
| claimmappingtransformation | IXU_ClaimMappingTransformation__Id_Source_Destination |
| claimsset | IXU_ClaimsSet__Name |
| claimstransformationauthenticationconnection | IXU_CTAC__AuthenticationConnectionId_Index |
| claimstransformationprotocolconnection | IXU_CTPC__ProtocolConnectionId_Index |
| claimtransformation | IXU_ClaimTransformation__Name |
| connection | IXU_Connection__Name |
| connectionuserconsent | IX_ConnectionUserConsent__UserId |
| connectionuserconsent | IX_ConnectionUserConsent__ConnectionId |
| connectionuserconsent | IX_ConnectionUserConsent__NonUserUniqueKey |
| datastore | IXU_DataStore_DataType_Key |
| datastore | IX_DataStore__Key_Status_DataType_LatestCheck |
| deviceauthorizationresponse | IX_DeviceAuthorizationResponse__HashedUserCode |
| deviceauthorizationresponse | IX_DeviceAuthorizationResponse__HashedDeviceCode |
| discreteclaimoption | IXU_DiscreteClaimOption__ClaimDefinitionId_Value |
| discretegroupclaimvalue | IXU_DiscreteGroupClaimValue__GroupId_ClaimId |
| discreteuserclaimvalue | IXU_DiscreteUserClaimValue__DiscreteClaimId_UserId |
| freeuserclaimvalue | IX_FreeUserClaimValue_UserId_IsPrimary_ClaimDefinitionId |
| freeuserclaimvalue | IXU_FreeUserClaimValue__UserId_FreeClaimId |
| issuedartifact | IXU_IssuedArtifact__MessageHandle |
| ldapattributedefinition | IXU_LdapAttributeDefinition__LdapName |
| metadatamonitoring | IX_MetadataMonitoring__ConnectionId |
| nonuserrestrictedactionattempt | IX_NonUserRestrictedActionAttempt__Key_Type_AuthId |
| oauthaccesstoken | IX_OAuthAccessToken__HashedCode |
| oauthaccesstoken | IX_OAuthAccessToken__ProtocolConnectionId |
| oauthaccesstoken | IX_OAuthAccessToken_ExpirationDate_RefreshTokenExpirationDate |
| oauthaccesstoken | IX_OAuthAccessToken__UserInfoSessionId |
| oauthaccesstoken | IX_OAuthAccessToken_ProtocolConnId_ExpDate_RefreshTokenExpDate |
| oauthaccesstoken | IX_OAuthAccessToken__UserId_ProtocolConnId |
| passwordhistory | IX_PasswordHistory__UserId_InsertedDate |
| persistentpseudonym | IXU_PP__UserId_ProtocolConnectionId |
| resetpasswordoutcome | IX_ResetPasswordOutcome__UserId |
| sharedconfigurablesetting | IXU_SharedConfigurableSetting__Name |
| user | IX_User__ExternalId |
| user | IX_User__Enabled |
| useraccountupdatetransformation | IXU_UserAccountUpdateTransformation__Ids |
| usercertificate | IXU_UserCertificate__CertificateThumbprint |
| usercertificate | IX_UserCertificate__UserId |
| userrestrictedactionattempt | IX_UserRestrictedActionAttempt__UserId_Type_AuthId |
| usersecondfactorcode | IX_UserSecondFactorCode__OtpConnectionId |
| usersecondfactorcode | IX_UserSecondFactorCode__UserId |
| usersecondfactordeviceregistration | IX_DeviceRegistration__Code_User_Connection_Device_Type |
| userthirdpartydata | IX_UserThirdPartyData__LastLoggedInDateTime |
List of indices on the IdentifyAudit database is:
| Table | Index name |
|---|---|
| auditadminsiteauthentication | IX_AuditAdminSiteAuthentication__AuditEventId |
| auditattributeserviceconnection | IX_AuditAttributeServiceConnection__AuditEventId |
| auditauthenticationconnection | IX_AuditAuthenticationConnection__AuditEventId |
| auditauthenticationcontextmethodclass | IX_AuditAuthenticationContextMethodClass__AuditEventId |
| auditclaimdefinition | IX_AuditClaimDefinition__AuditEventId |
| auditclaimset | IX_AuditClaimSet__AuditEventId |
| auditclaimsissuance | IX_AuditClaimsIssuance__AuditEventId |
| auditclaimtransformation | IX_AuditClaimTransformation__AuditEventId |
| auditconnectionclaimsets | IX_AuditConnectionClaimSets__ConnectionId |
| auditconnectionuserconsent | IX_AuditConnectionUserConsent__UserId |
| auditconnectionuserconsent | IX_AuditConnectionUserConsent__ConnectionId |
| auditconnectionuserconsent | IX_AuditConnectionUserConsent__NonUserUniqueKey |
| auditcorrelationerror | IX_AuditCorrelationError__AuditEventId |
| auditcryptokey | IX_AuditCryptoKey__AuditEventId |
| auditdatastore | IX_AuditDataStore__AuditEventId |
| auditdeviceauthorizationresponse | IX_AuditDeviceAuthorizationResponse__DeviceCode |
| auditdeviceauthorizationresponse | IX_AuditDeviceAuthorizationResponse__AuditEventId |
| auditdeviceauthorizationresponse | IX_AuditDeviceAuthorizationResponse__UserCode |
| auditdiscreteclaimvaluespace | IX_AuditDiscreteClaimValueSpace__AuditEventId |
| auditevent | IX_AuditEvent__UtcTimestamp_Id_EventType |
| auditgroup | IX_AuditGroup__AuditEventId |
| auditidentityproviderconfiguration | IX_AuditIdentityProviderConfiguration__AuditEventId |
| auditincomingassertion | IX_AuditIncomingAssertion__AuditEventId |
| auditissuedartifact | IX_AuditIssuedArtifact__AuditEventId |
| auditissuedclaim | IX_AuditIssuedClaim__ClaimsIssuanceId |
| auditldapattributedefinition | IX_AuditLdapAttributeDefinition__AuditEventId |
| auditmassupdateuserclaimvalue | IX_AuditMassUpdateUserClaimValue__AuditEventId |
| auditnonuserrestrictedactionattempt | IX_AuditNonUserRestrictedActionAttempt__AuditEventId |
| auditnonuserrestrictedactionattempt | IX_AuthenticationConnectionId__NonUserUniqueKey_ActionType |
| auditoauthaccesstoken | IX_AuditOAuthAccessToken__AuditEventId |
| auditoauthaccesstoken | IX_AuditOAuthAccessToken__ExpDate_RefreshTokenExpDate |
| auditorganization | IX_AuditOrganization__AuditEventId |
| auditpersistentpseudonym | IX_AuditPersistentPseudonym__AuditEventId |
| auditplugin | IX_AuditPlugIn__AuditEventId |
| auditprotocolconnection | IX_AuditProtocolConnection__AuditEventId |
| auditsharedconfigurablesetting | IX_AuditSharedConfigurableSetting__AuditEventId |
| audittombstone | IX_AuditTombstone__AuditEventId |
| audituser | IX_AuditUser__UserName |
| audituser | IX_AuditUser__AuditEventId |
| audituserclaim | IX_AuditUserClaim__UserId |
| audituserdevicecookie | IX_AuditUserDeviceCookie__AuditEventId |
| audituserrequest | IX_AuditUserRequest__AuditEventId |
| audituserrequest | IX_AuditUserRequest__UserRequestEventId |
| audituserrestrictedactionattempt | IX_AuthenticationConnectionId_UserId__ActionType |
| audituserrestrictedactionattempt | IX_AuditUserRestrictedActionAttempt__AuditEventId |
| auditusersecondfactorcode | IX_AuditUserSecondFactorCode__UserId |
| auditusersecondfactorcode | IX_AuditUserSecondFactorCode__AuditEventId |
| auditusersecondfactorcode | IX_AuditUserSecondFactorCode__OtpConnectionId |
| logs | IX_Logs__RequestId |
| logs | IX_Logs__EventId |
| logs | IX_Logs__TimeStamp_Type_LogLevel |
| logs | IX_Logs__UserId |
| logs | IX_Logs__Timestamp_LogLevel_LogType_EventId_Id |
Conclusion
This comprehensive documentation has provided you with step-by-step instructions and best practices for setting up and using Identify with MariaDB on various environments. By following these guidelines, you can seamlessly transition from using Identify with MSSQL to MariaDB and take advantage of this open-source relational database management system.
Known issues
Unsupported features
Because of certain inherent differences between the SQL Server provider and MariaDB provider, certain features are not supported on both Identify Configurator (IC) and Identify Command-line interface (CLI) when configuring an instance using the MariaDB provider:
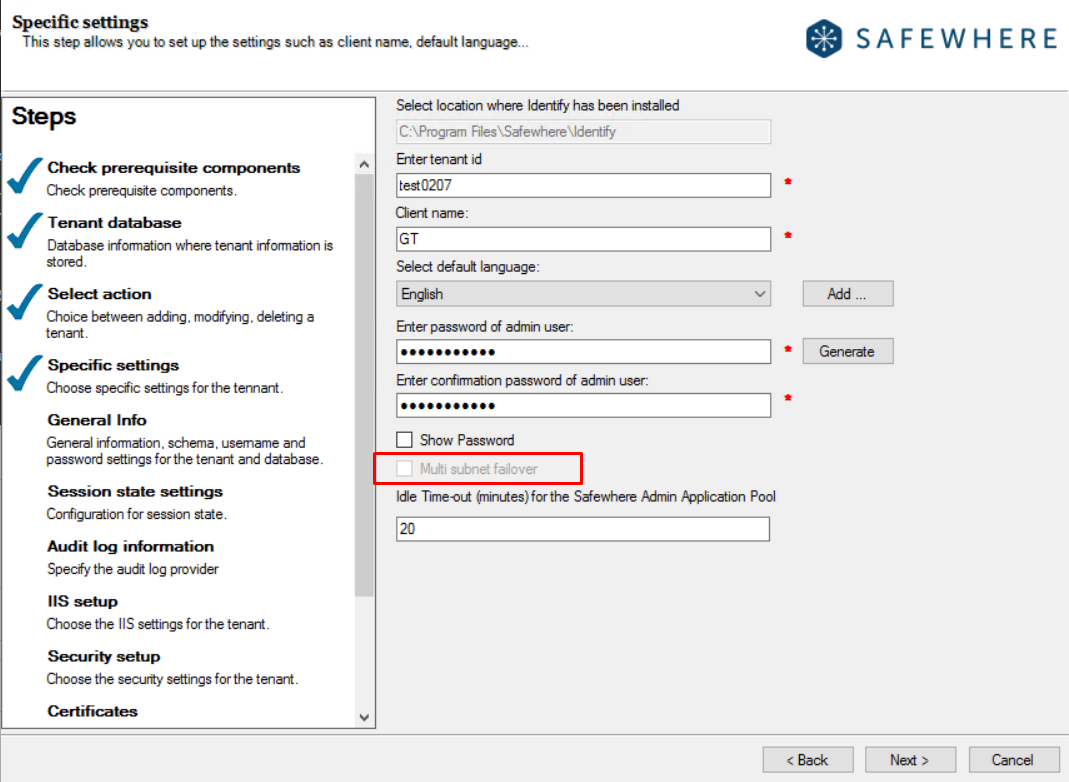
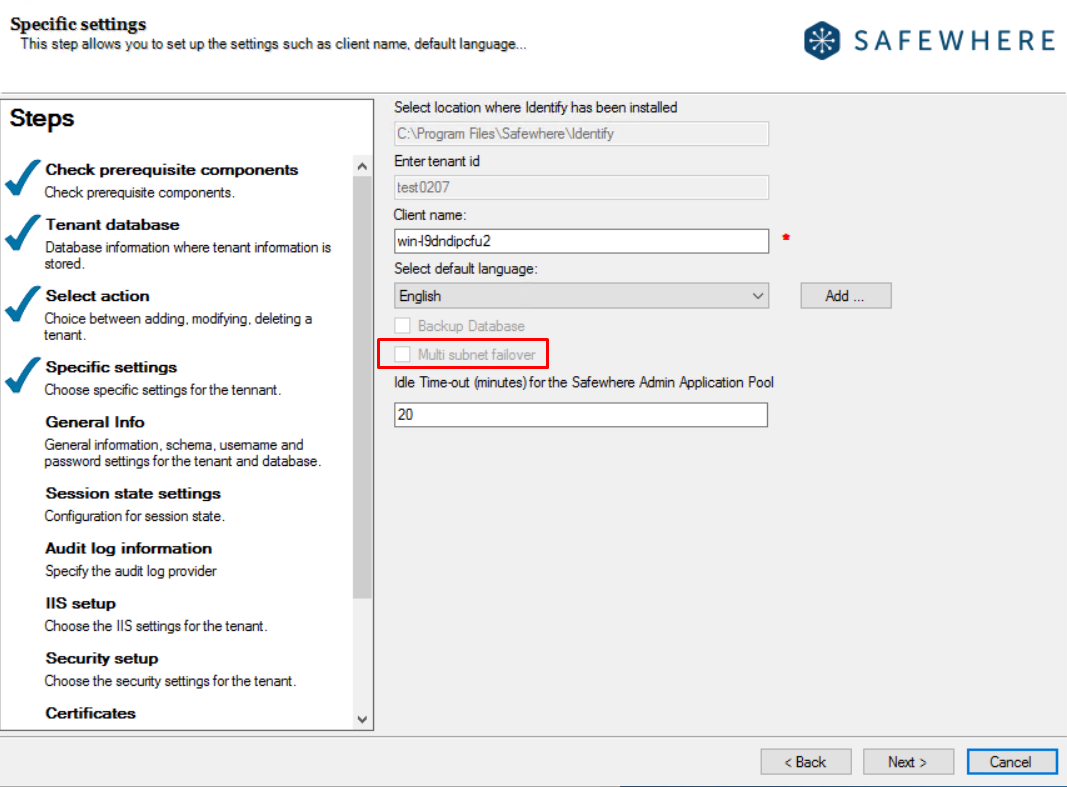
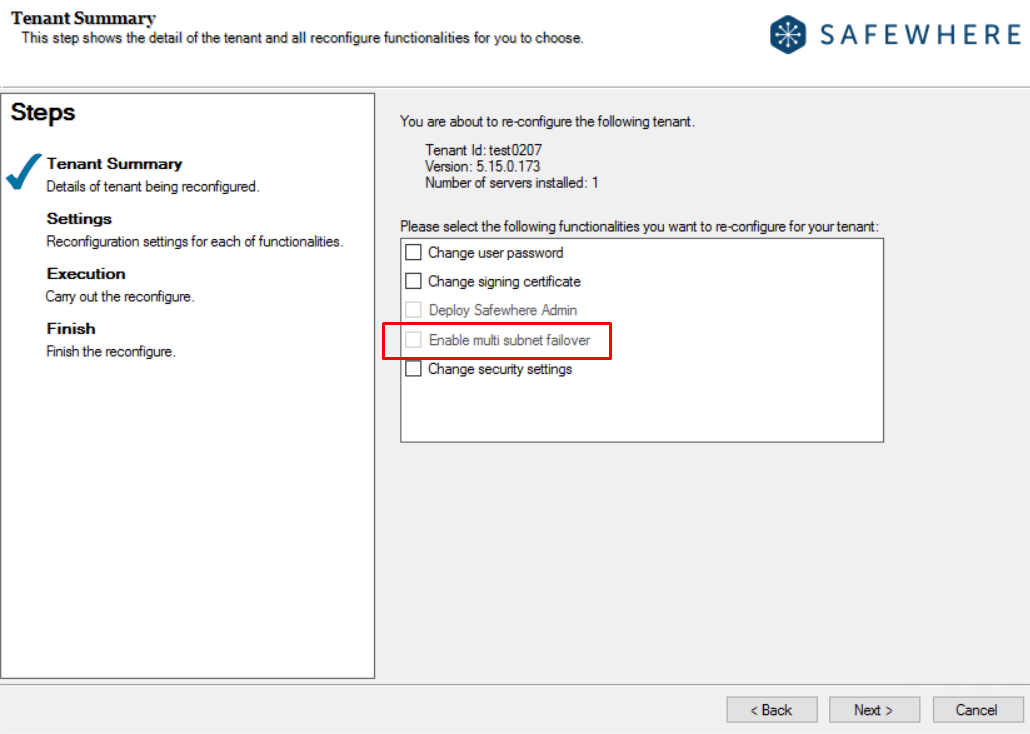
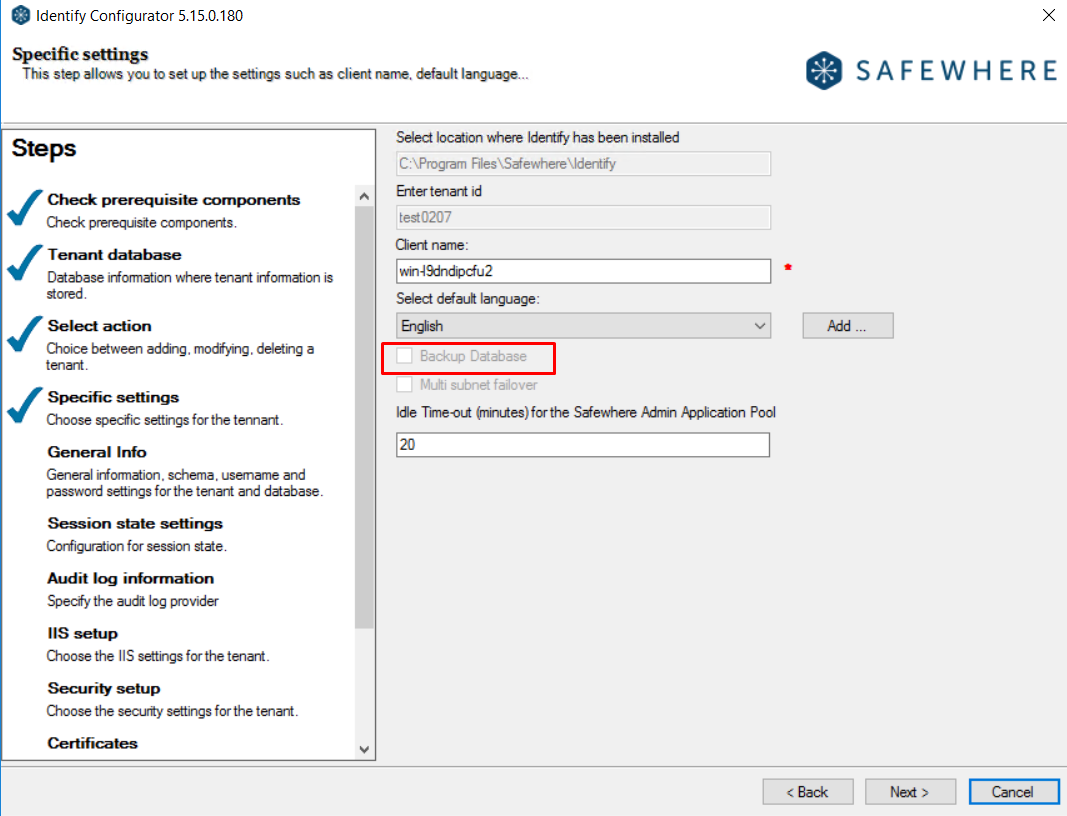
Multi-subnet failover: this option is disabled when creating a new Identify instance, upgrading and reconfiguring an existing Identify instance:
Creating new instance
Upgrading an instance
Reconfiguring an existing instance
Windows Authentication mode: the option
Select database authenticationis automatically set toSQLDatabaseAuthenticationfor MariaDB and disabled. There are no alternative choices available in this case.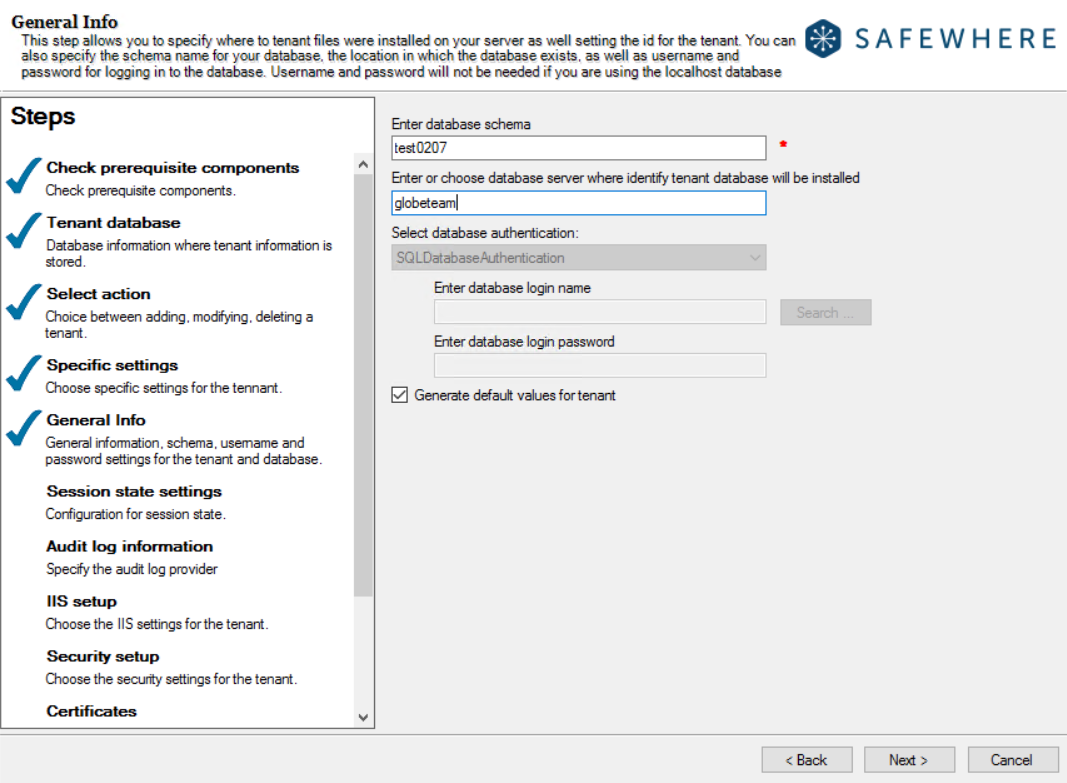
Backup Database: this option is disabled when upgrading an existing tenant
Limitations in MariaDB provider support
Identify supports both popular relational database management systems (RDBMS): MS SQL (Microsoft SQL Server) and MariaDB. However, there are some differences between them, particularly regarding certain crucial concepts such as Data types and indices:
- MariaDB does not support Index on View, leading to the absence of an index on the AuthenticationConnectionBearingClaimValue view. Additionally, the "INCLUDE" column on the Create Index command is not available in MariaDB.
- Due to the limitations of Index size in MariaDB, some columns in the Identify database are optimized and have smaller data sizes compared to the MSSQL database. As a result, certain indices in MariaDB only contain the "main" columns. For specific indices, it is possible to relocate some "included columns" to the "main columns" as long as their size falls within the allowed limits.