How to connect to NemLog-in3
This guide walks you through the process of connecting Safewhere Identify to NemLog-in3.
Setting up Safewhere Identify
NemLog-in3 requirements
In the NemLog-in3 setup, the signing certificate of your Identify instance must be an OCES3 certificate.
- For NemLog-in3's Preproduction environment, you will need a Test OCES3 certificate.
- For NemLog-in3's Production environment, you will need a Production OCES3 certificate.
Configuring the Entity Id setting
Follow these steps:
- Open the
/adminv2application. - Navigate to System > Settings, and set the Entity Id value to start with https://saml., as illustrated in the image below. Then, click Save.
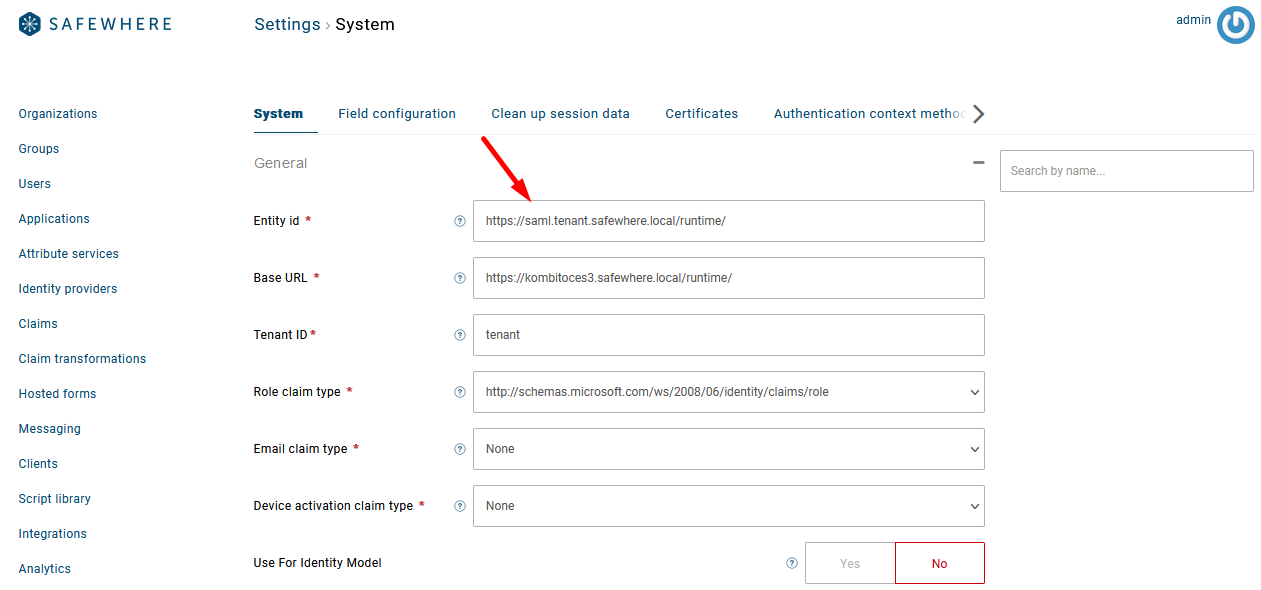
It's advisable to make this change as soon as you create a new tenant, before proceeding with any other setups. Otherwise, you might encounter encryption issues, such as with the os2faktor key in OS2faktor OTP configuration, as the Entity ID value serves as the discriminator for encryption operations.
Set up other Identify's settings
In this step, you will use the Identify Configurator to import various settings and resources into your Identify instance.
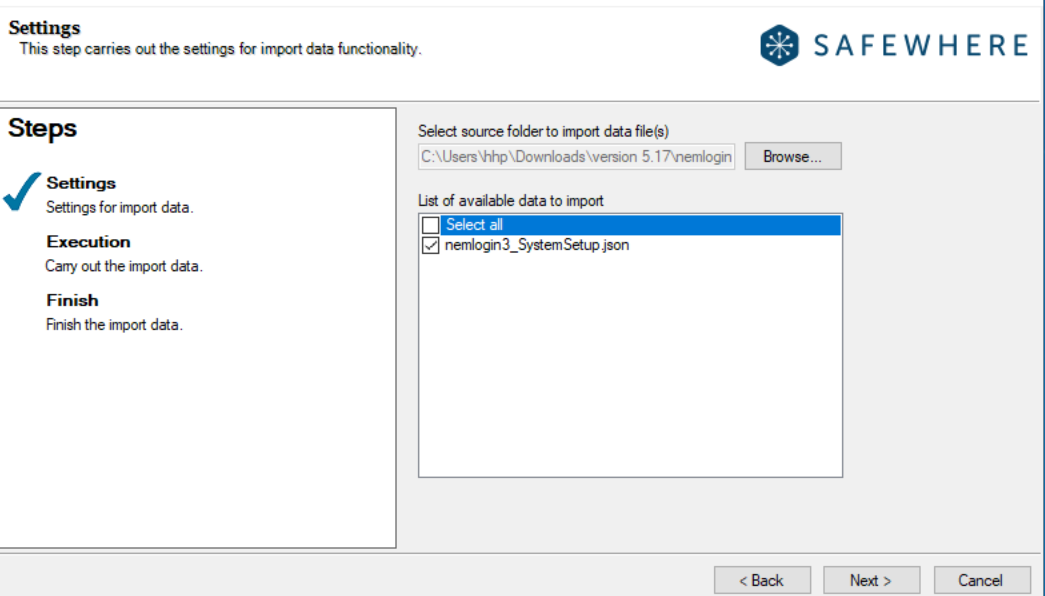
Start by downloading the configuration files into an empty folder.
- For the pre-production environment, navigate to the Preproduction, and download its content.
- For the production environment, navigate to the Production, and download its content.
Use the
Import Data to an instancefeature in the Identify Configurator to import the resources you downloaded above into your Identify instance.
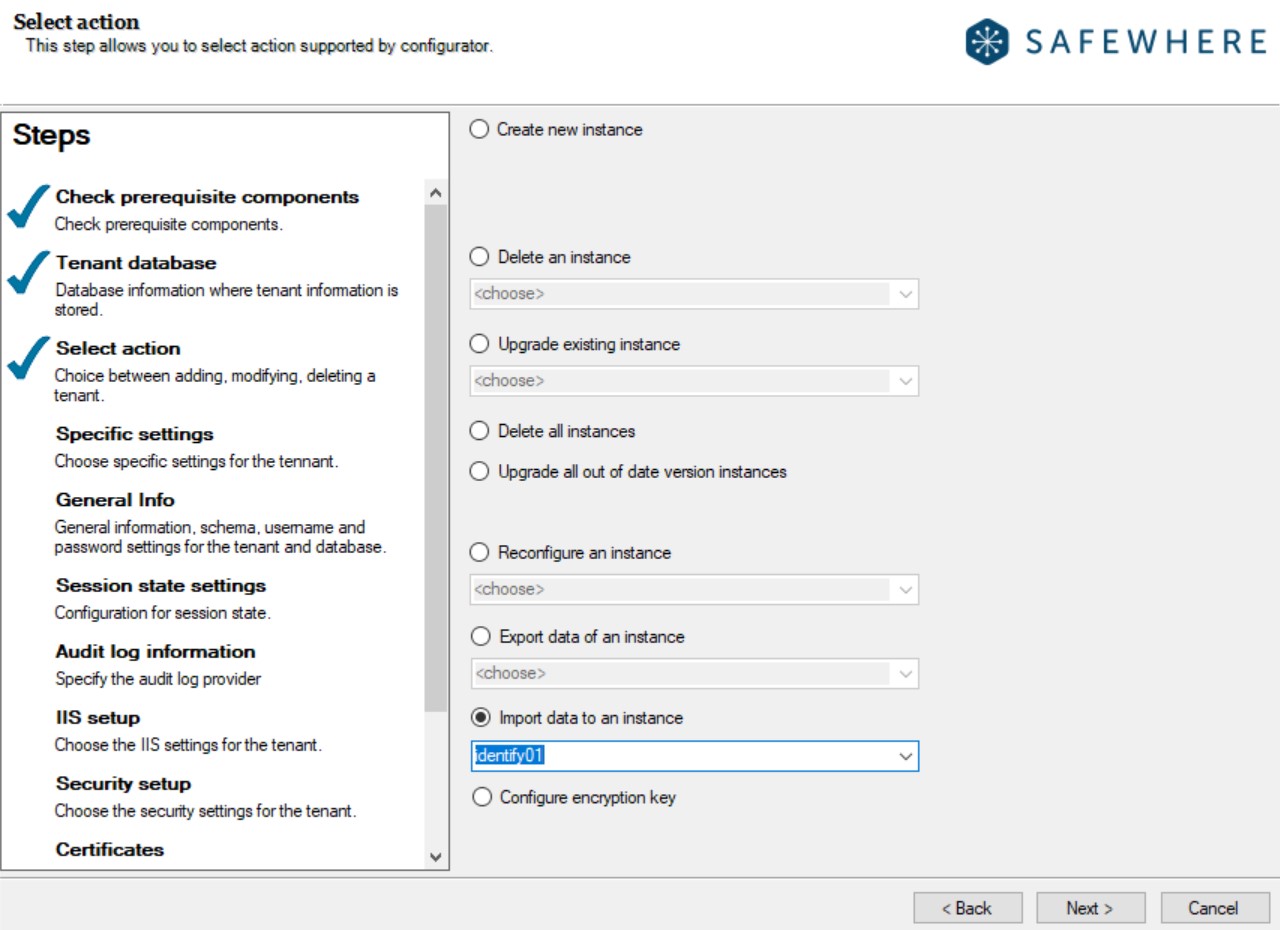
- Browse to the source folder, the script files are located in the download folder. Choose Select all, then click Next to execute the import data.
Set up NemLog-in3 Identity provider
To establish a connection with NemLog-in3 as an identity provider, follow these steps:
- Open the
/adminv2application. - Navigate to the Identity Providers list and create a SAML 2.0 Identity provider.
- Update its metadata link on the Connection tab. As of now, the links are:
- Pre-production NemLog-in3 metadata link - Used for integration testing.
- Production NemLog-in3 metadata link - Used for production.
For this example, we are using the Pre-production NemLog-in3 metadata link:
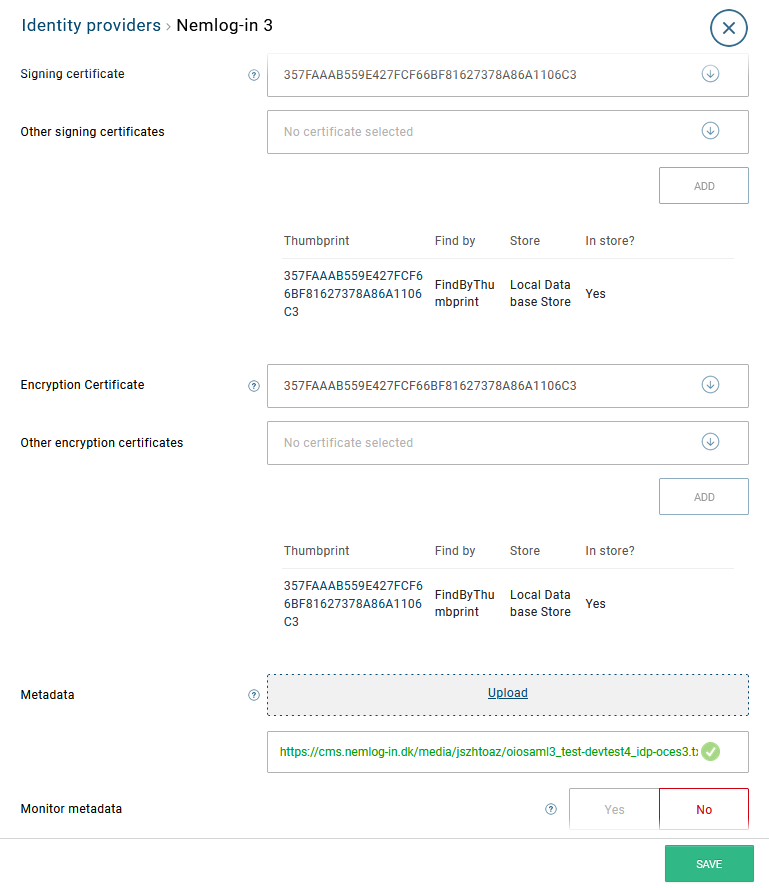
- Save this Identity provider.
NemLog-in3 configuration
Access the link and environment details here.
The metadata needed for NemLog-in3 can be obtained from the following URI: https://#yourIdentifydomain/runtime/saml2auth/metadata.idp?samlprofile=nemlogin3
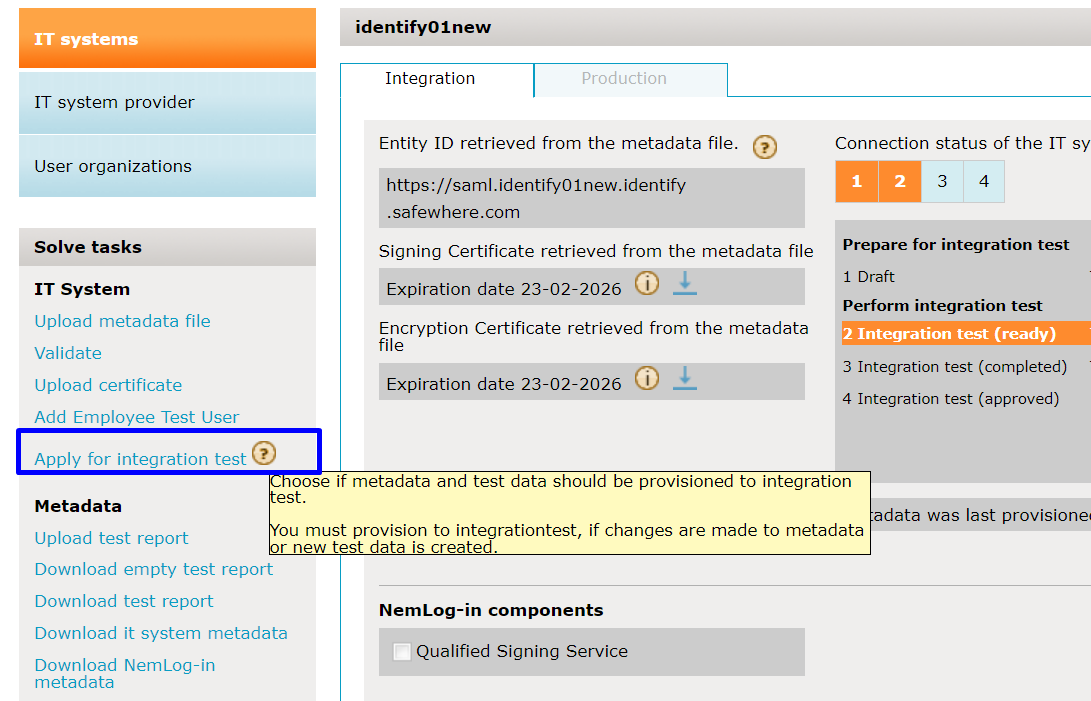
Remember, whenever you upload or change the metadata in NemLog-in3, you will need to apply again for integration testing.
References
- NemLog-in3: Pre-production environment for service providers
- Links and environment: overview
- Metadata validator: Metadata Validator
- Additional links: