Introduction
When logging in to NemLog-In 3 using an iOS or Android app, the incoming AuthnRequest message sent to NemLog-In 3 must have extra attributes, as shown in the example below. These attributes enable the app to switch to the MitID app and back. No extra attributes are required for web applications.
<AuthnRequest ...
              >
...
    <Extensions>
        <nl:AppSwitch xmlns:nl="https://data.gov.dk/eid/saml/extensions">
            <nl:Platform>Android</nl:Platform>
            <nl:ReturnURL>https://claimapp-test.sp.safewhere.com/</nl:ReturnURL>
        </nl:AppSwitch>
    </Extensions>
...
</AuthnRequest>
Solution
This guideline presumes that the typical setup is used: NemLog-in 3 -> Identify NemLog-in proxy instance -> Identify main instance -> websites and apps. The apps need to include the extra attributes in their requests to the Identify main instance. Subsequently, the Identify main instance sends these additional attributes to the Identify NemLog-In proxy instance, which, in turn, includes them in the AuthnRequest call to NemLog-In 3.
Deployment
The app
In the following example, the app uses the WSFederation protocol to send a login request to the main Identify instance. The login request includes two additional custom parameters: platform and returnUrl. Valid values for the platform parameter are Android and iOS. Please note that the values are case-sensitive.
https://identify01.identify.safewhere.com/runtime/WSFederation/WSFederation.idp?wa=wsignin1.0&wtrealm=https%3a%2f%2fclaimapp-test.sp.safewhere.com%2f&wctx=rm%3d0%26id%3dpassive%26ru%3d%252f&wct=2024-01-25T08%3a17%3a02Z&platform=Android&returnUrl=https%3a%2f%2fclaimapp-test.sp.safewhere.com%2f
Identify main instance
You need to configure the main instance to send the extra attributes to the upstream Identify proxy instance by following the steps below:
- Open the Admin application of the Identify main instance.
- In the Script library list, create a new script with the following details:
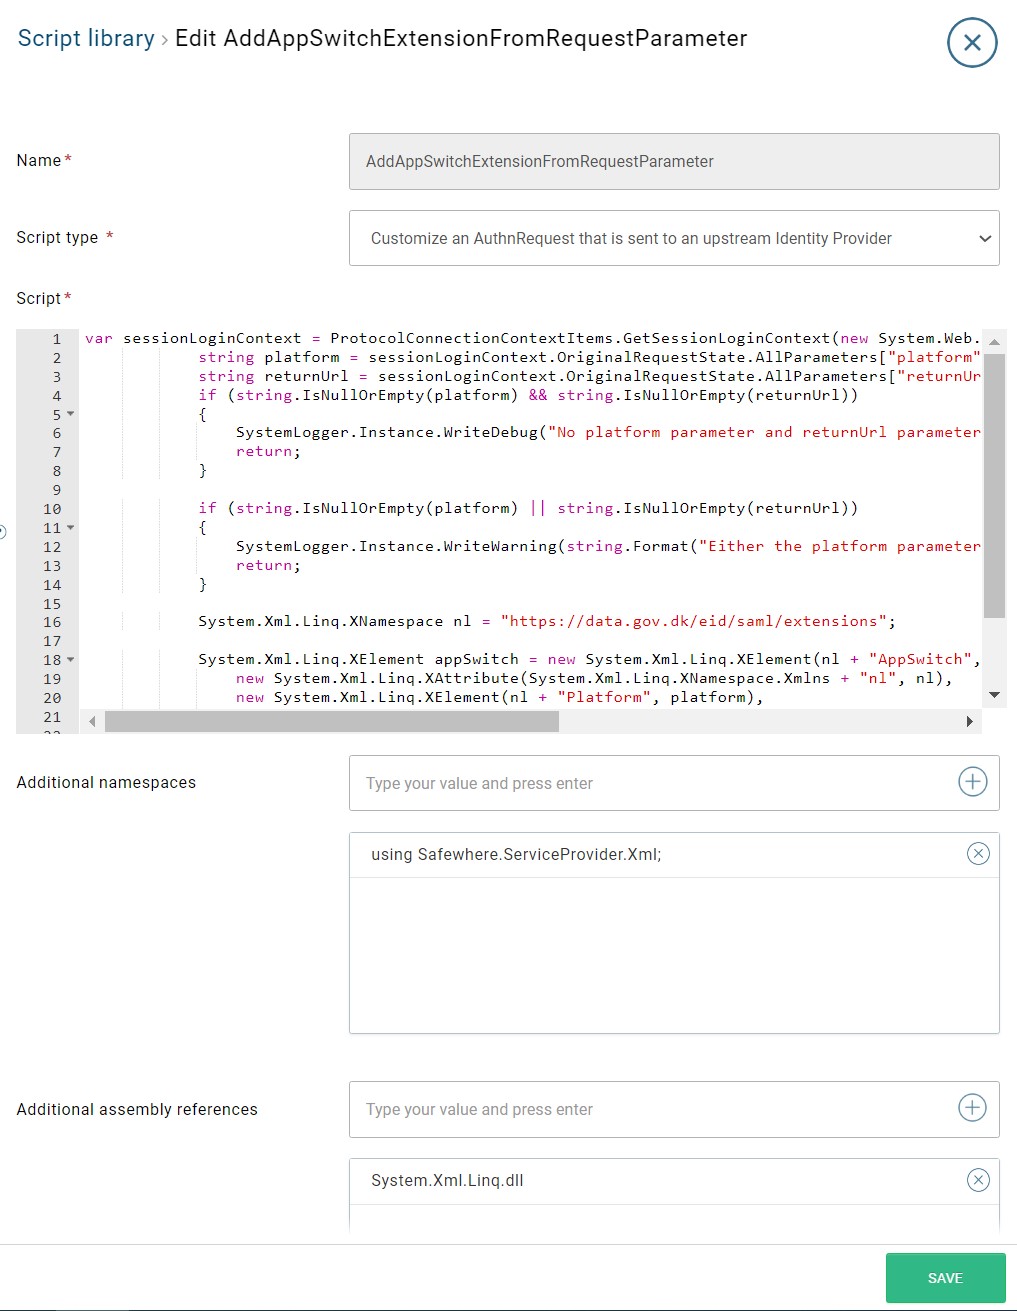
- Script name:
AddAppSwitchExtensionFromRequestParameter - Script type:
Customize an AuthnRequest that is sent to an upstream Identity Provider - Script: Add the script below:
var sessionLoginContext = ProtocolConnectionContextItems.GetSessionLoginContext(new System.Web.HttpContextWrapper(System.Web.HttpContext.Current));
string platform = sessionLoginContext.OriginalRequestState.AllParameters["platform"];
string returnUrl = sessionLoginContext.OriginalRequestState.AllParameters["returnUrl"]; // warning: Beware of naming clashes. "returnUrl" is a commonly used parameter.
if (string.IsNullOrEmpty(platform) && string.IsNullOrEmpty(returnUrl))
{
    SystemLogger.Instance.WriteDebug("No platform parameter and returnUrl parameter found.");
    return;
}

if (string.IsNullOrEmpty(platform) || string.IsNullOrEmpty(returnUrl))
{
    SystemLogger.Instance.WriteWarning(string.Format("Either the platform parameter {0} or the returnUrl parameter {1} does not have a value.", platform, returnUrl));
    return;
}

System.Xml.Linq.XNamespace nl = "https://data.gov.dk/eid/saml/extensions";

System.Xml.Linq.XElement appSwitch = new System.Xml.Linq.XElement(nl + "AppSwitch",
    new System.Xml.Linq.XAttribute(System.Xml.Linq.XNamespace.Xmlns + "nl", nl),
    new System.Xml.Linq.XElement(nl + "Platform", platform),
    new System.Xml.Linq.XElement(nl + "ReturnURL", returnUrl)
);

authnRequest.Extension = new Safewhere.ServiceProvider.Xml.Extension("urn:oasis:names:tc:SAML:2.0:protocol");
authnRequest.Extension.AnyField.Add(appSwitch);
- Additional namespaces: Add the following namespaces:
using Safewhere.ServiceProvider.Xml;
- Additional assembly references: Add the following references:
System.Xml.Linq.dll
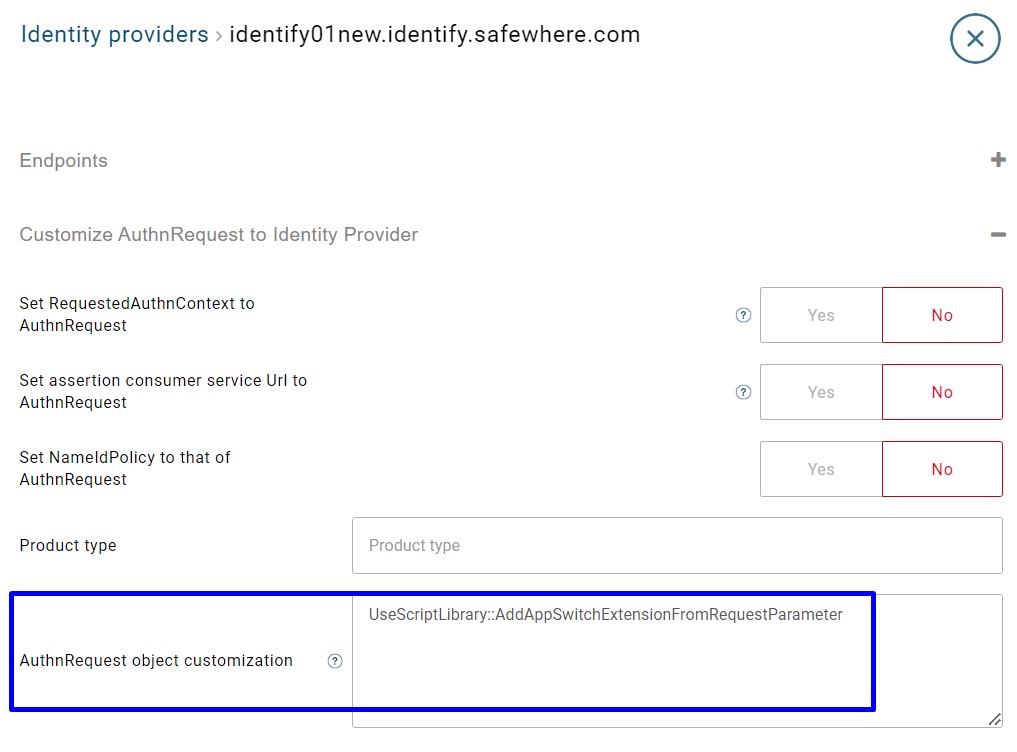
- In the Identity Provider list, choose to edit the Identity Provider connection to the Identify NemLog-In proxy instance. Add the following script to the
AuthnRequest object customizationsetting on its Connection tab:
UseScriptLibrary::AddAppSwitchExtensionFromRequestParameter
Identify NemLog-In proxy instance
To let the proxy instance to send the extra attributes to NemLog-In 3, follow these steps:
- Open the Admin application of the Identify NemLog-in proxy instance.
- In the Script library list, create a new script with the following details:

- Script name:
AddAppSwitchExtensionFromIncomingAuthnRequest - Script type:
Customize an AuthnRequest that is sent to an upstream Identity Provider - Script: Add the script below:
var requestInformation = ProtocolConnectionContextItems.GetRequestInformation(new System.Web.HttpContextWrapper(System.Web.HttpContext.Current));

AuthnRequest originalAuthnRequest = requestInformation.MessageObject as AuthnRequest;

if (originalAuthnRequest == null)
{
    SystemLogger.Instance.WriteDebug("The originalAuthnRequest is not an AuthnRequest. Skip processing");
    return;
}

Safewhere.ServiceProvider.Xml.Extension extension = originalAuthnRequest.Extension;

if (extension == null)
{
    SystemLogger.Instance.WriteDebug("No extension is found in incoming AuthnRequest.");
    return;
}

var extensionElement = extension.AnyField.FirstOrDefault();

if (extensionElement == null)
{
    SystemLogger.Instance.WriteDebug("The extension element has no child element.");
    return;
}

var appSwitch = new System.Xml.Linq.XElement(extensionElement);

authnRequest.Extension = new Safewhere.ServiceProvider.Xml.Extension("urn:oasis:names:tc:SAML:2.0:protocol");
authnRequest.Extension.AnyField.Add(appSwitch);
- Additional namespaces: Add the following namespaces:
using Safewhere.ServiceProvider.Xml;
- Additional assembly references: Add the following references:
System.Xml.Linq.dll
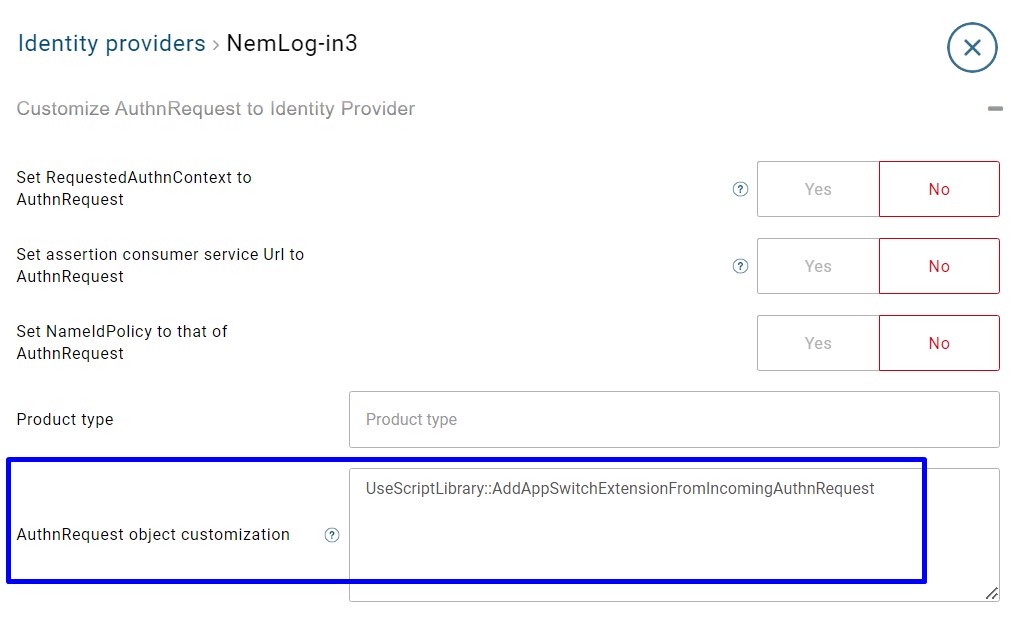
- In the Identity Provider list, choose to edit the Identity Provider connection to NemLog-In 3. Add the following script to the
AuthnRequest object customizationsetting on its Connection tab:
UseScriptLibrary::AddAppSwitchExtensionFromIncomingAuthnRequest
Deployment verification
To ensure everything is working as expected, you can prepare a WSFederation application and append the extra attributes (platform and returnUrl) to its request to the Identify main instance. Here is an example of the HTTP request:
https://identify01.identify.safewhere.com/runtime/WSFederation/WSFederation.idp?wa=wsignin1.0&wtrealm=https%3a%2f%2fclaimapp-test.sp.safewhere.com%2f&wctx=rm%3d0%26id%3dpassive%26ru%3d%252f&wct=2024-01-25T08%3a17%3a02Z&platform=Android&returnUrl=https%3a%2f%2fclaimapp-test.sp.safewhere.com%2f
After that, you can verify the AuthnRequest sent from the Identify main instance to the Identify NemLog-In proxy instance. It should look like the following:
<AuthnRequest ...
              >
...
    <Extensions>
        <nl:AppSwitch xmlns:nl="https://data.gov.dk/eid/saml/extensions">
            <nl:Platform>Android</nl:Platform>
            <nl:ReturnURL>https://claimapp-test.sp.safewhere.com/</nl:ReturnURL>
        </nl:AppSwitch>
    </Extensions>
...
</AuthnRequest>
Finally, verify the AuthnRequest from the Identify NemLog-In proxy instance to NemLog-In 3. It should look like the following:
<AuthnRequest ...
              >
...
    <Extensions>
        <nl:AppSwitch xmlns:nl="https://data.gov.dk/eid/saml/extensions">
            <nl:Platform>Android</nl:Platform>
            <nl:ReturnURL>https://claimapp-test.sp.safewhere.com/</nl:ReturnURL>
        </nl:AppSwitch>
    </Extensions>
...
</AuthnRequest>