Set up and use custom database text resource
Introduction
In addition to editing text resource files, you can store your custom text resources in the database which has some unique advantages:
- Your custom text resources persist through version upgrades.
- You do not need to make changes in multiple servers when you use redundant setup.
Concepts
Container
In database-based text resources context, a container is a bag of text resources and is the corresponding concept to a text resource file.
When you need to customize a built-in text resource of a text resource file or add a new language for it, for example, RuntimeModelResources.resx, you can create a RuntimeModelResources container and add your custom text resources there.
We can call them built-in containers because they are containers for built-in text resource files.
A container can be language-neutral or language-specific. To specify a language for a container, you can use 2-letter ISO language codes, for example, RuntimeModelResources.da
| Container name |
|---|
| CommonServiceModelResources |
| CrossDomainIdentityManagementResources |
| GenericProviderResources |
| LdapResources |
| NemIdResources |
| OAuth2Resources |
| OtpResources |
| RuntimeModelResources |
| Saml2Resources |
| StsResources |
| UserNamePasswordResources |
| WSFederationResources |
| ModelResources |
| Saml2ServiceResources |
| WSFederationServiceResources |
| WcfResources |
| ClaimSelectorResources |
| DataManagementServiceResources |
| ExternalSamplesResources |
| OAuth2ServiceResources |
| RuntimeDiagnosticsResources |
| SafeNetIntegration |
Note that the NemIdResources container has been removed in version 5.18 and above.
GlobalTextResources container
When you need to add a new text resource, you need to use the GlobalTextResources container. You can use the GlobalTextResources container for both Razor views and Liquid hosted forms.
Note that Container name, Language code, and Resource Key are all case-insensitive.
Setting Up Containers with the REST API Using Swagger
In this section, we will use the Swagger tool to demonstrate how to work with all the new endpoints for custom text resources.
Retrieve all custom containers
You can retrieve all custom containers from an Identify instance:
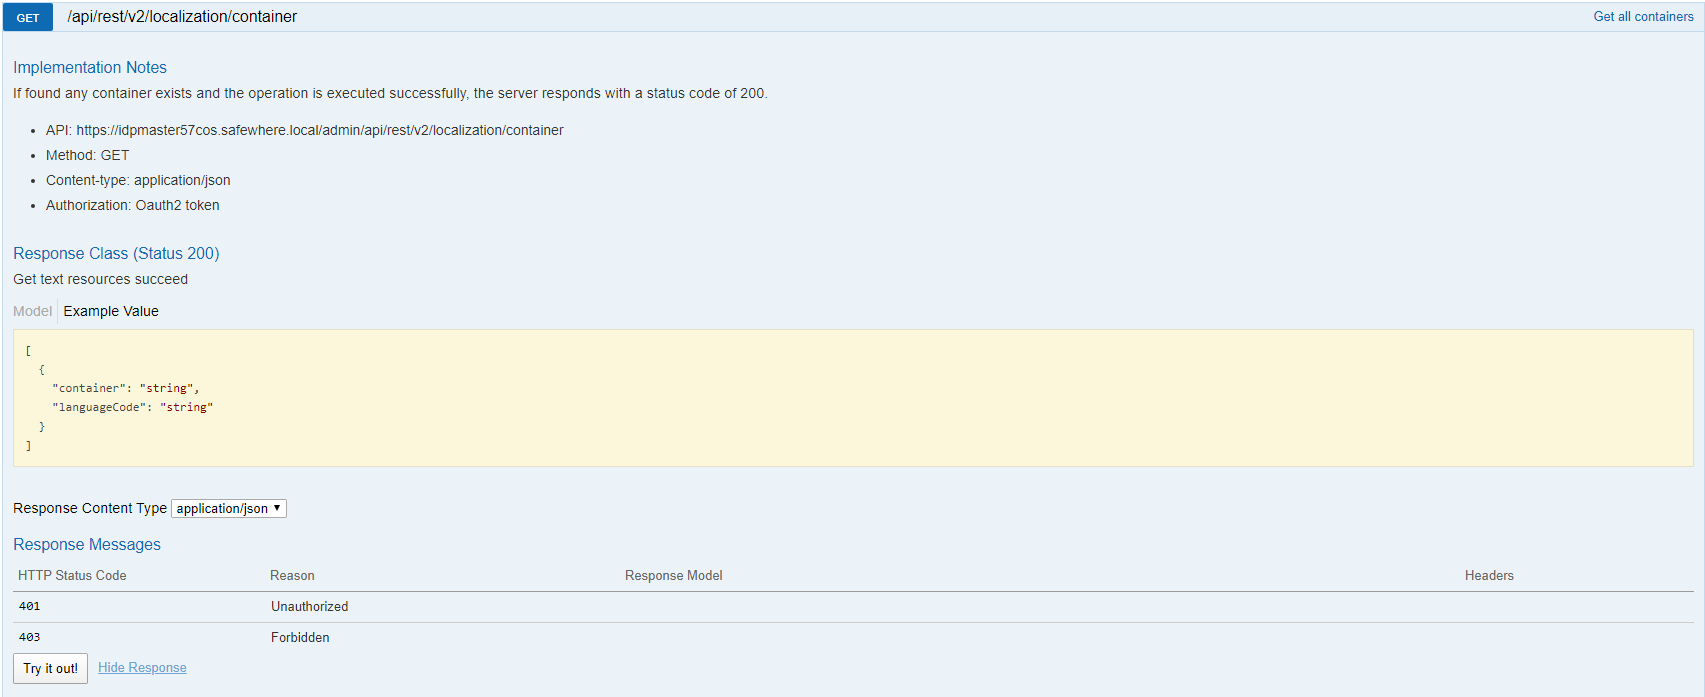
Request URL:
GET https://#yourdomain/admin/api/rest/v2/localization/container
Content-Type: application/json
Response body:
{
  "totalResults": 7,
  "resources": [
    {
      "Container": "GlobalTextResources",
      "LanguageCode": ""
    },
    {
      "Container": "GlobalTextResources",
      "LanguageCode": "da"
    },
    {
      "Container": "GlobalTextResources",
      "LanguageCode": "en"
    },
    {
      "Container": "GlobalTextResources",
      "LanguageCode": "nl"
    },
    {
      "Container": "RuntimeModelResources",
      "LanguageCode": "da"
    },
    {
      "Container": "RuntimeModelResources",
      "LanguageCode": "de"
    },
    {
      "Container": "RuntimeModelResources",
      "LanguageCode": "nl"
    }
  ]
}
Retrieve all keys and values in a specific container
You can retrieve all keys and their values within a specific container.
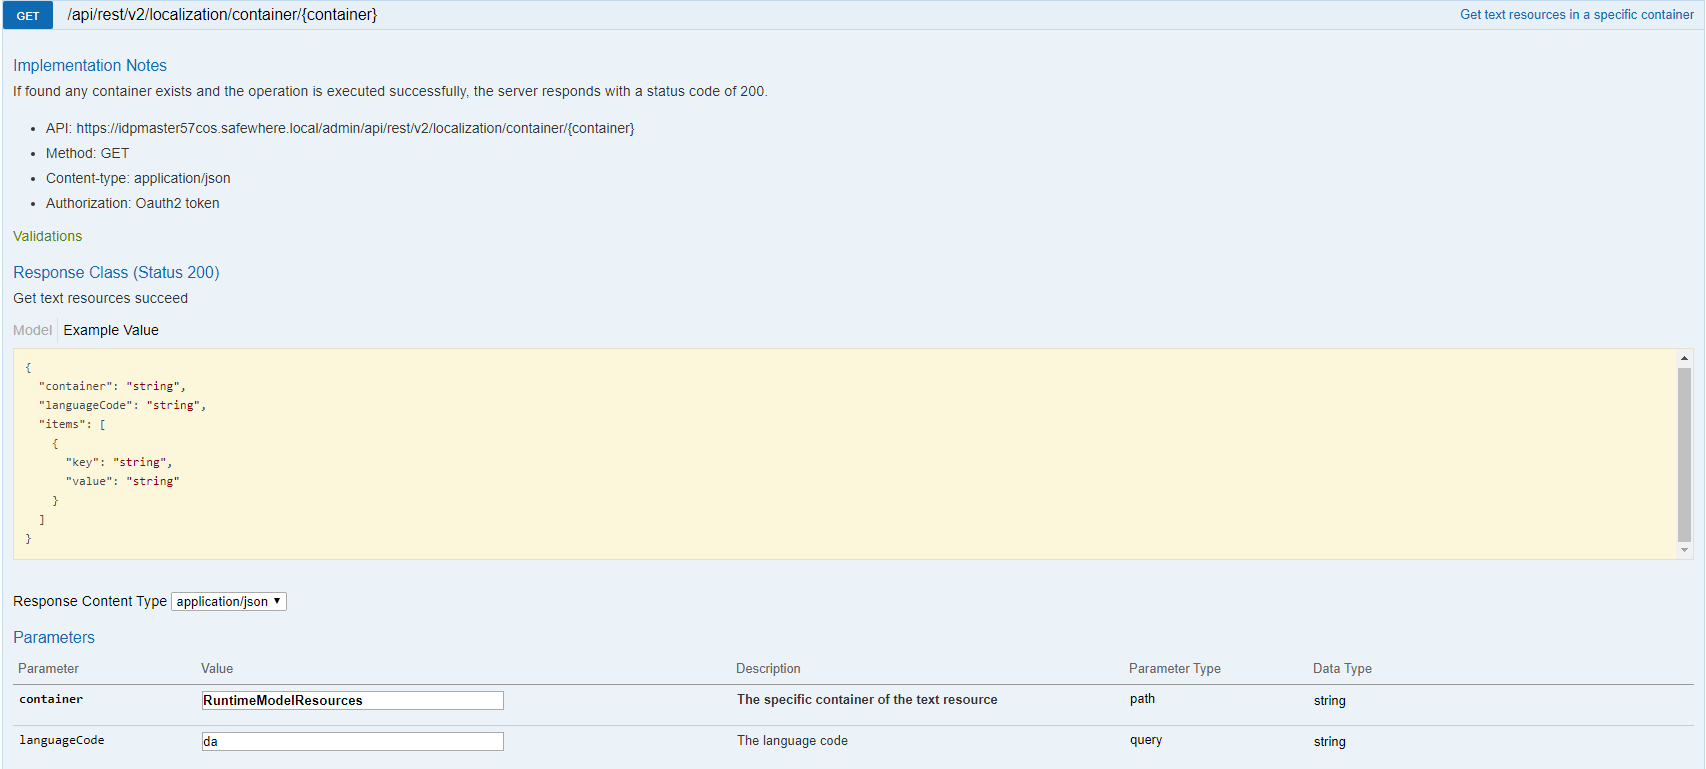
Request URL:
GET https://#yourdomain/admin/api/rest/v2/localization/container/{container}
URI parameters:
| Parameter | Description | Data Type | Parameter Type |
|---|---|---|---|
| container | The container to get | string | path |
| languageCode | The language code | string | query |
Request body example:
https://#yourdomain/admin/api/rest/v2/localization/container/RuntimeModelResources?languageCode=da
Response body:
{
  "Container": "RuntimeModelResources",
  "LanguageCode": "da",
  "Items": [
    {
      "Key": "AuthenticationList_UserNamePasswordPasswordLabel1",
      "Value": "Adgangskode - RuntimeModelResources - DA"
    },
    {
      "Key": "RuntimeModelAuthenticationConnectionIdMismatch",
      "Value": "Uoverensstemmelse i autentificeringsforbindelses ID: Autentificeringsforbindelse ID fundet i endpoint konteksten ({0}) matcher hverken den der er fundet i  kontekst ({1})."
    },
    {
      "Key": "RuntimeModelAuthenticationConnectionMissingInSessionStateError",
      "Value": "Brugeren er autentificeret men har ingen ibrugtaget autentificeringsforbindelse. Hans session kan være udløbet eller et login link blev manuelt indsat i browseren."
    },
    {
      "Key": "UserNamePasswordHelloUser",
      "Value": "Hej - DA"
    }
  ]
}
Add a text resource to a container
You can add a text resource directly to a container without creating it in advance.
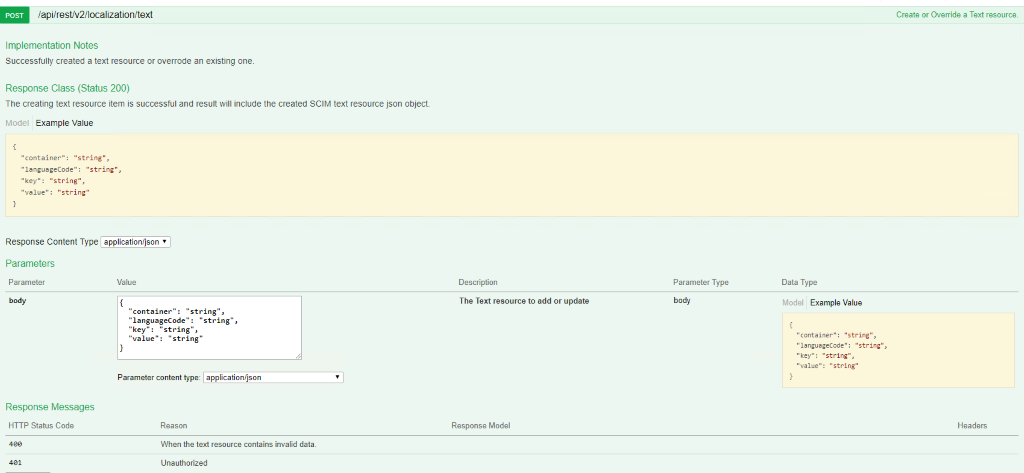
Request URL:
POST https://#yourdomain/admin/api/rest/v2/localization/text
Content-Type: application/json
Request body example:
{
  "container": "GlobalTextResources",
  "languageCode": "en",
  "key": "HelloUser",
  "value": "Hello user"
}
Response body:
{
  "container": "GlobalTextResources",
  "languageCode": "en",
  "key": "HelloUser",
  "value": "Hello user"
}
Add multiple text resources to multi containers
You can add multiple text resources directly to multiple containers without creating them in advance.

Request URL:
POST https://#yourdomain/admin/api/rest/v2/localization/text/bulkinsert
Content-Type: application/json
Request body example:
[
  {
    "container": "GlobalTextResources",
    "languageCode": "nl",
    "key": "HelloUser",
    "value": "Hej"
  },
  {
    "container": "ClaimSelectorResources",
    "languageCode": "en",
    "key": "SelectClaim",
    "value": "Select a claim"
  }
]
Response body:
[
  {
    "Container": "GlobalTextResources",
    "LanguageCode": "nl",
    "Key": "HelloUser",
    "Value": "Hej"
  },
  {
    "container": "ClaimSelectorResources",
    "languageCode": "en",
    "key": "SelectClaim",
    "value": "Select a claim"
  }
]
Note: The response currently does not fully comply with the SCIM specification. This will be addressed in a future version.
Add a text resource container
You can add multiple text resources to a single container. This can also be achieved using the Add Multiple Text Resources endpoint.
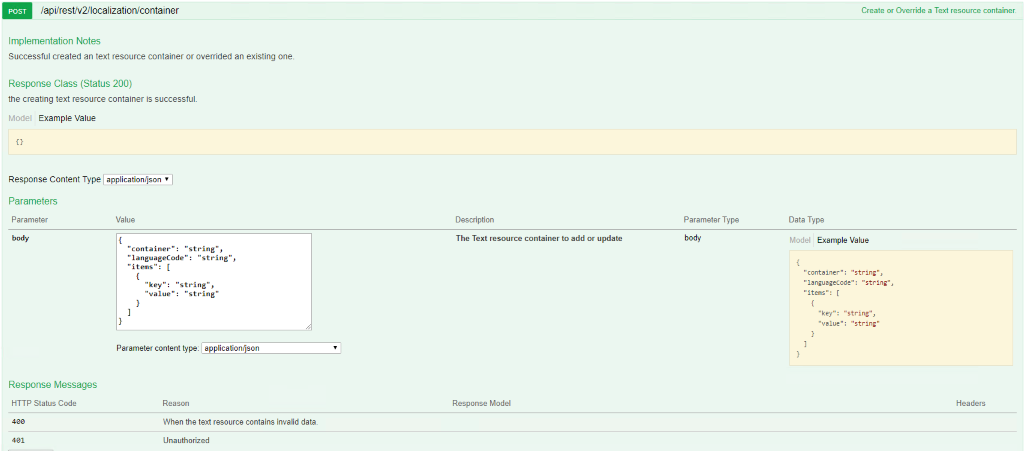
Request URL:
POST https://#yourdomain/admin/api/rest/v2/localization/container
Content-Type: application/json
Request body example:
{
  "container": "GlobalTextResources",
  "languageCode": "da",
  "items": [
    {
      "key": "HelloUser",
      "value": "Hej"
    }
  ]
}
Response body:
{
  "container": "GlobalTextResources",
  "languageCode": "da",
  "items": [
    {
      "key": "HelloUser",
      "value": "Hej"
    }
  ]
}
Warning: While you can create containers with any name, we strongly recommend placing all custom text resource keys into the GlobalTextResources container. The ability to create containers with arbitrary names will be removed in a future version.
Import text resources from a .resx file
You can import text resources from a .resx file.

Request URL:
POST https://#yourdomain/admin/api/rest/v2/localization/container/import
Content-Type: multipart/form-data
Request body example:
.resx file content
Response body:
{
  "container": "ClaimSelectorResources",
  "languageCode": "",
  "items": [
    {
      "key": "ChooseAccountTitle",
      "value": "konto"
    }
  ]
}
Delete a text resource
You can delete a text resource from the specific container.
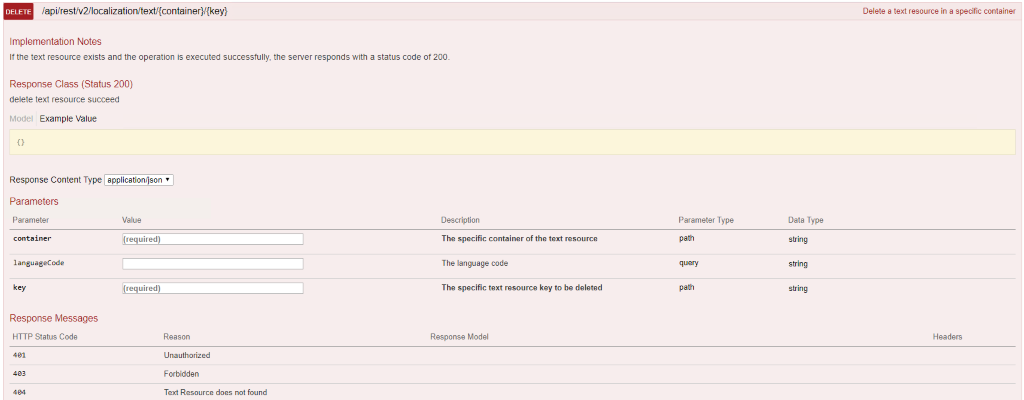
Request URL:
DELETE https://#yourdomain/admin/api/rest/v2/localization/text/{container}/{key}
URI parameters:
| Parameter | Description | Data Type | Parameter Type |
|---|---|---|---|
| container | The specific container of the text resource | string | path |
| languageCode | The language code | string | query |
| key | The specific text resource key to delete | string | path |
Request URL example:
https://#yourdomain/admin/api/rest/v2/localization/text/ClaimSelectorResources/ChooseAccountTitle?languageCode=en
Response body:
no content
Delete a text resource container
You can delete a specific container.
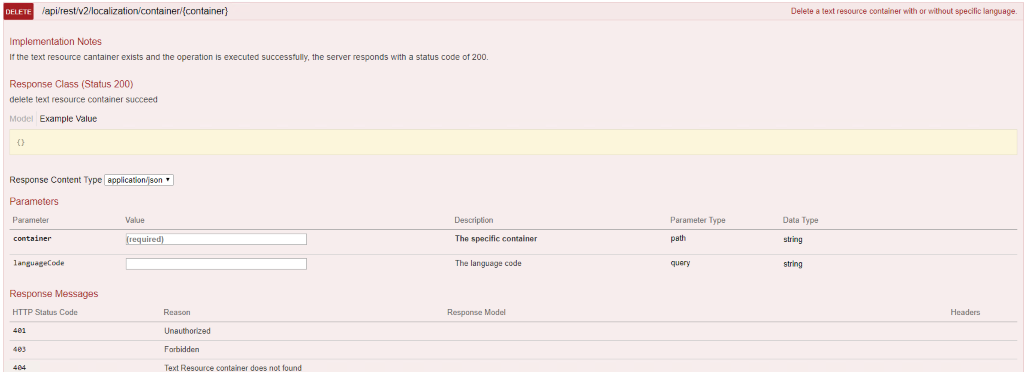
Request URL:
DELETE https://#yourdomain/admin/api/rest/v2/localization/container/{container}
URI parameters:
| Parameter | Description | Data Type | Parameter Type |
|---|---|---|---|
| container | The container to delete | string | path |
| languageCode | The language code | string | query |
Request URL example:
https://#yourdomain/admin/api/rest/v2/localization/container/ClaimSelectorResources?languageCode=da
Response body:
no content
Setting up containers with the Identify Admin
Identify Admin provides a user-friendly interface for customizing container settings. This guide walks you through the steps to edit text resources for individual containers or multiple containers simultaneously.
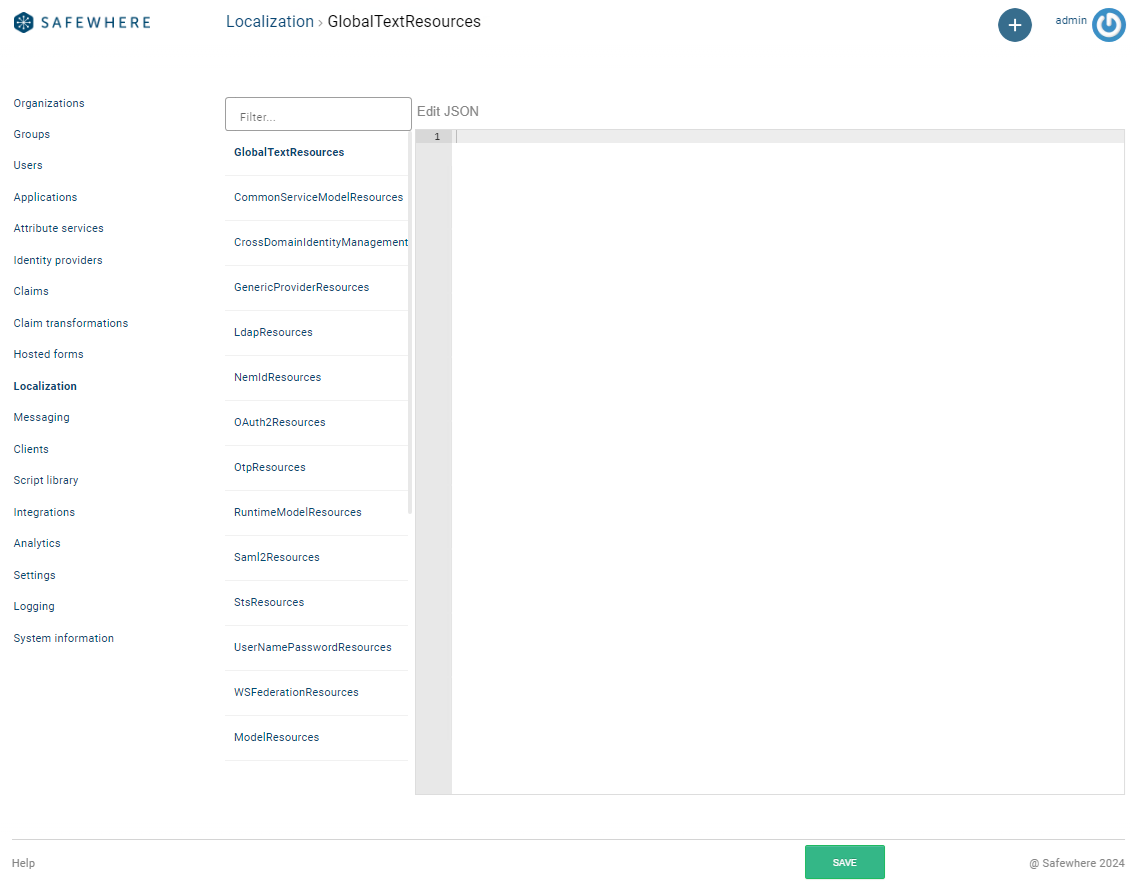
Localization list
Filter containers
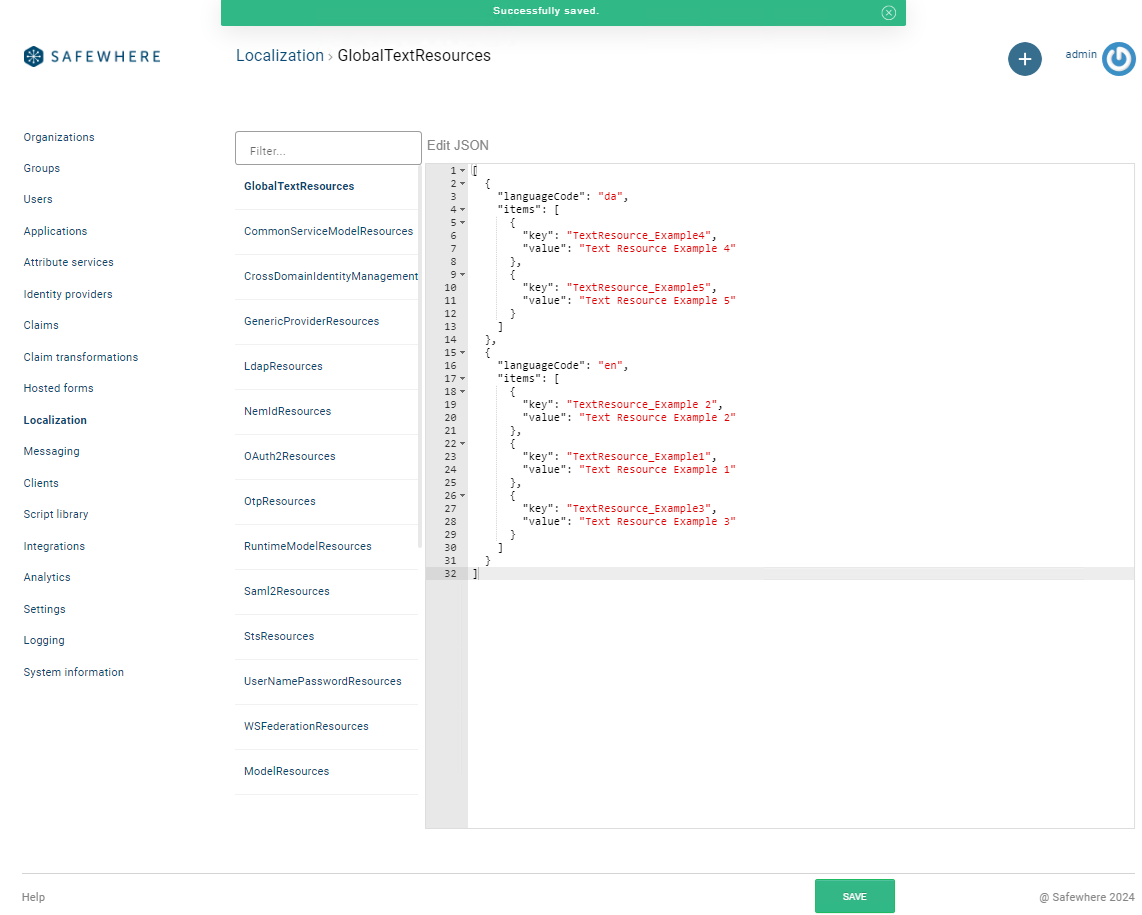
Use the text box in the top left to search for and choose the container you want to edit.
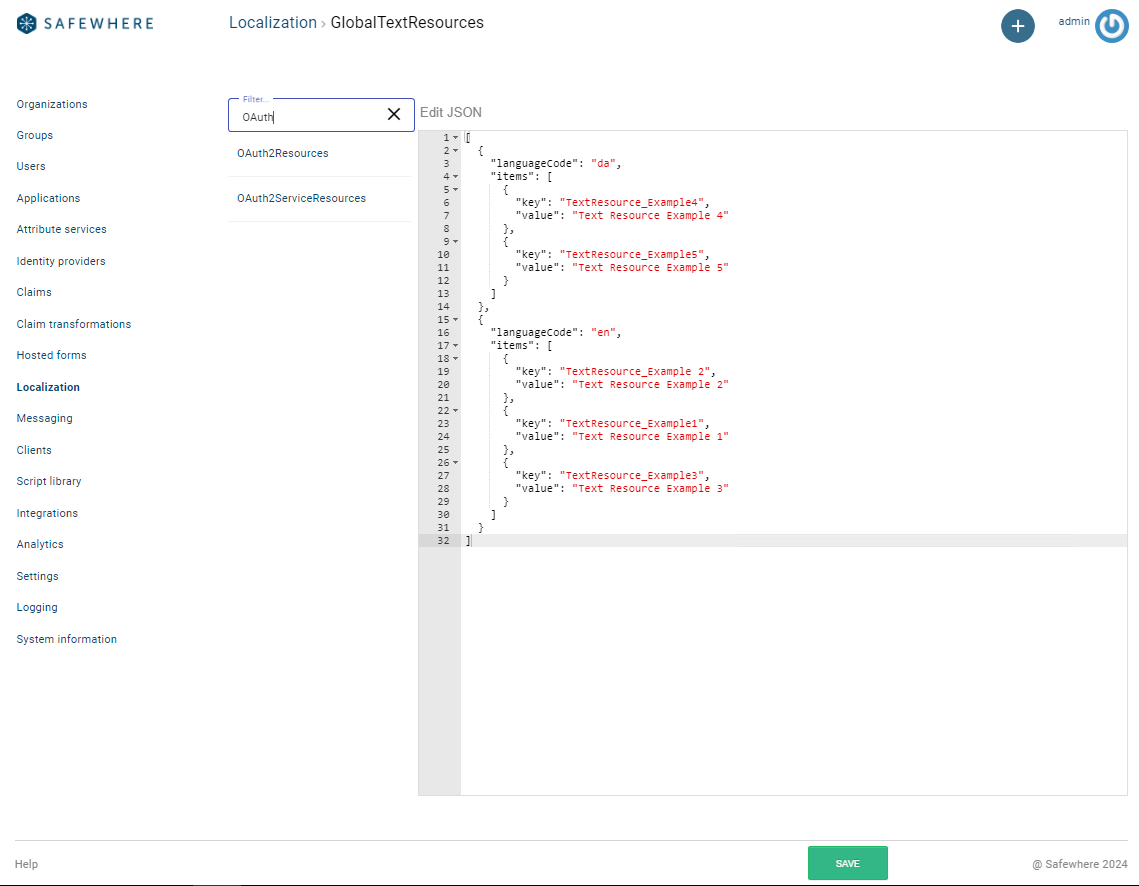
Add/Edit a container
Update the text resources in JSON format. The template below demonstrates how to specify different languages and resource items.
[
  {
    "languageCode": "",
    "items": [
      {
        "key": "",
        "value": ""
      }
    ]
  }
]
Example:
[
  {
    "languageCode": "en",
    "items": [
      {
        "key": "TextResource_Example1",
        "value": "Text Resource Example 1"
      },
      {
        "key": "TextResource_Example2",
        "value": "Text Resource Example 2"
      },
      {
        "key": "TextResource_Example3",
        "value": "Text Resource Example 3"
      }
    ]
  },
  {
    "languageCode": "da",
    "items": [
      {
        "key": "TextResource_Example4",
        "value": "Text Resource Example 4"
      },
      {
        "key": "TextResource_Example5",
        "value": "Text Resource Example 5"
      }
    ]
  }
]
Save changes to a container
After updating the JSON, click the Save button to apply your changes to the text resources of the selected container.
Import multiple containers using Microsoft .NET Managed Resource Files (.resx)
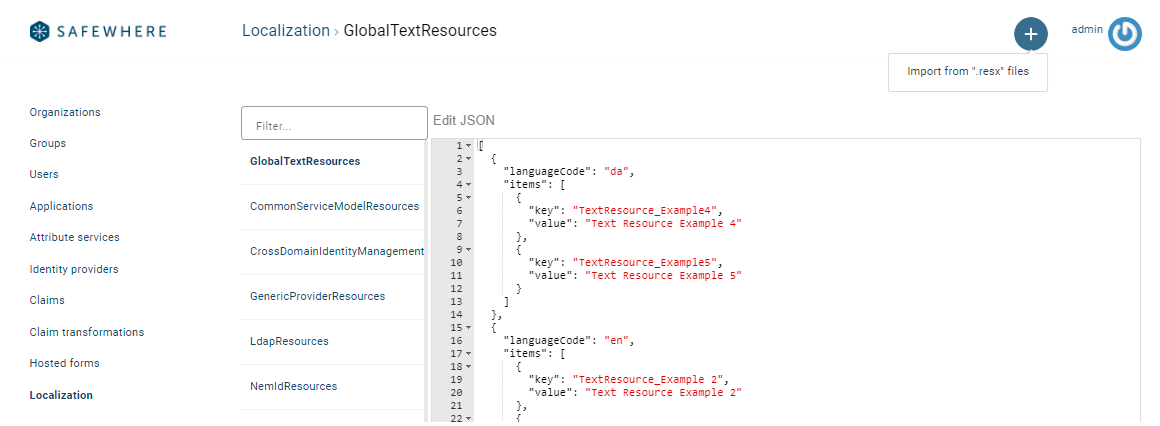
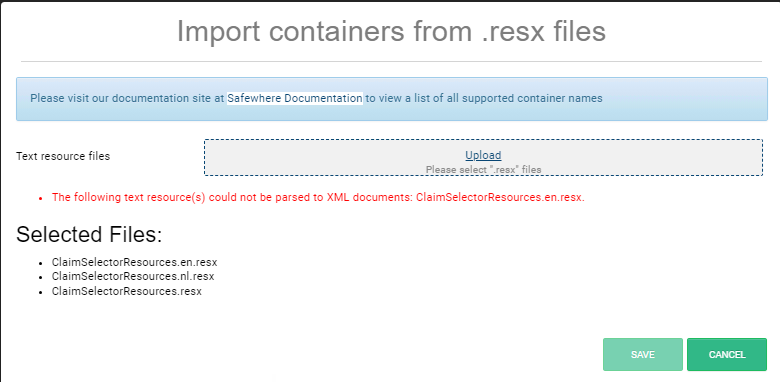
You can update text resources for multiple containers at once by importing .resx files. Click the Import from '.resx' files button to get started.
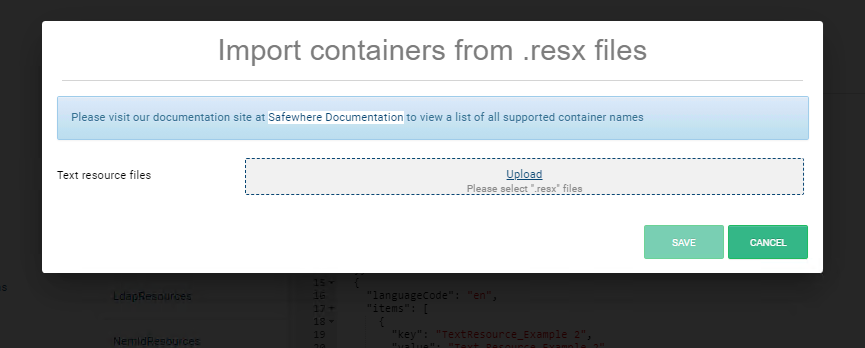
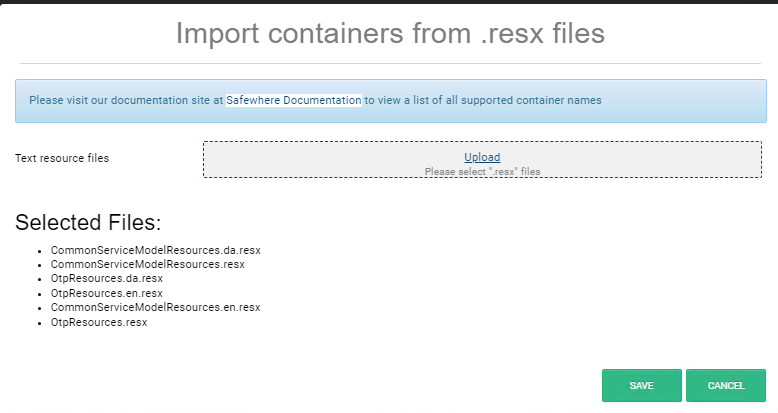
In the dialog that appears, click Upload and select the .resx files you want to import.
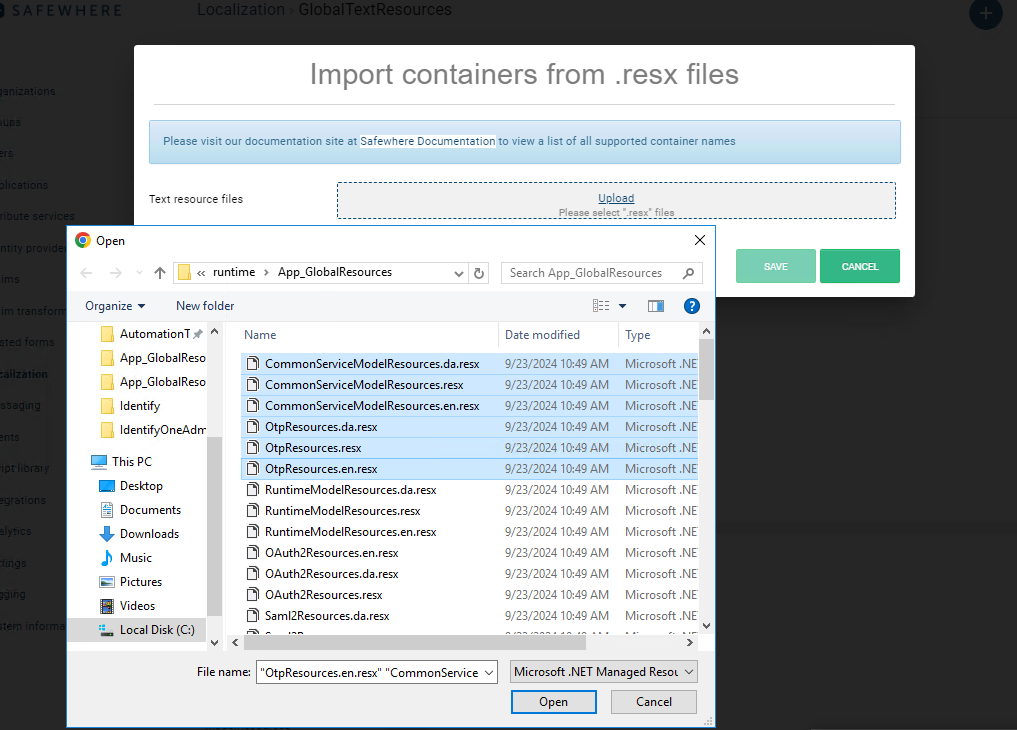
Once the files are selected, Identify Admin will check their validity. If the files are valid, the Save button will become enabled, allowing you to proceed with updating the resources.
Error handling
Identify Admin validates the imported files and displays error messages, disabling the Save button in the following cases:
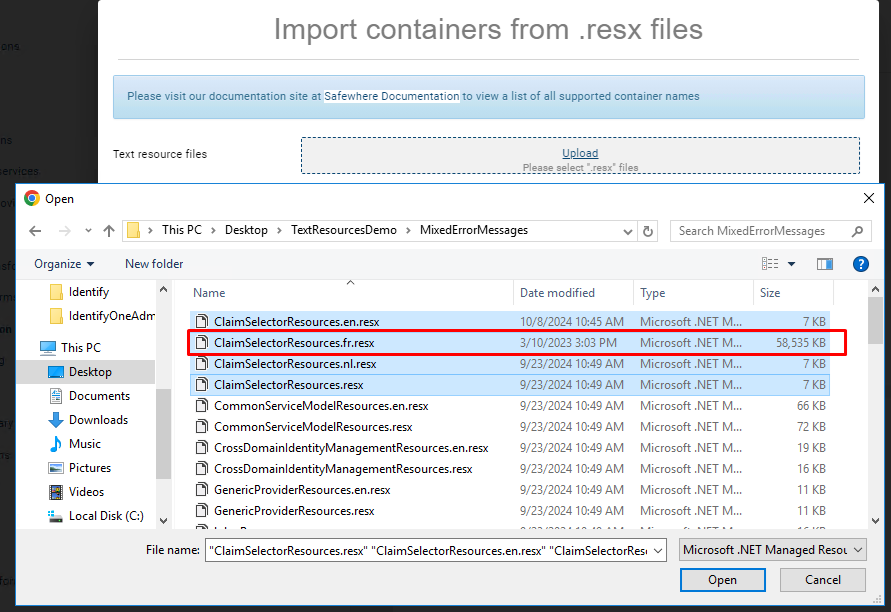
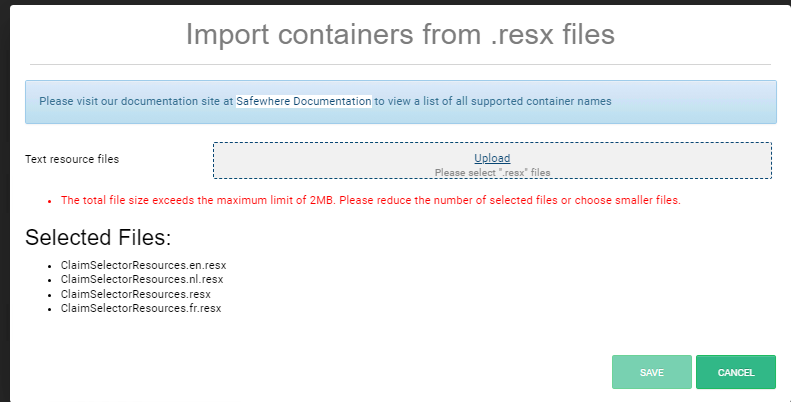
File size exceeds 2MB
If the total size of the selected files exceeds 2MB, an error message will be displayed.
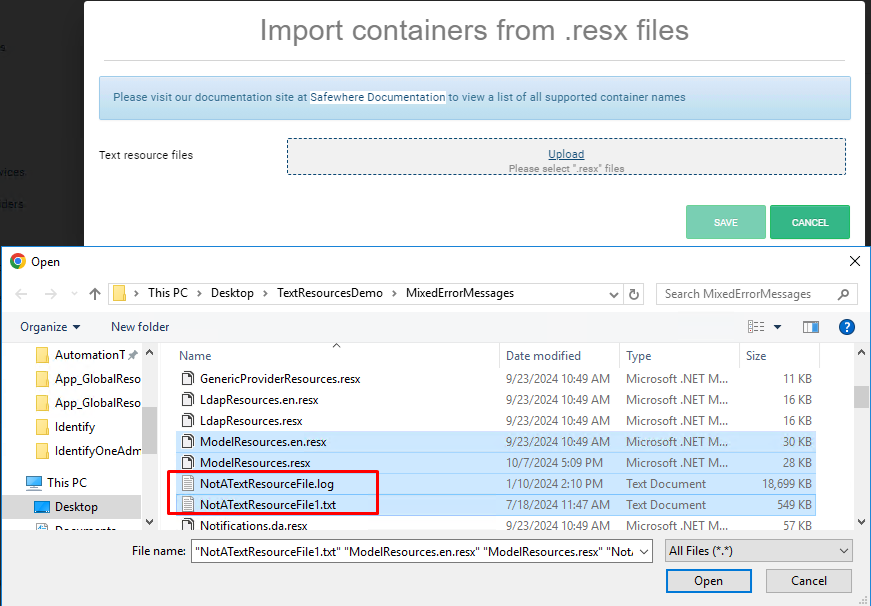
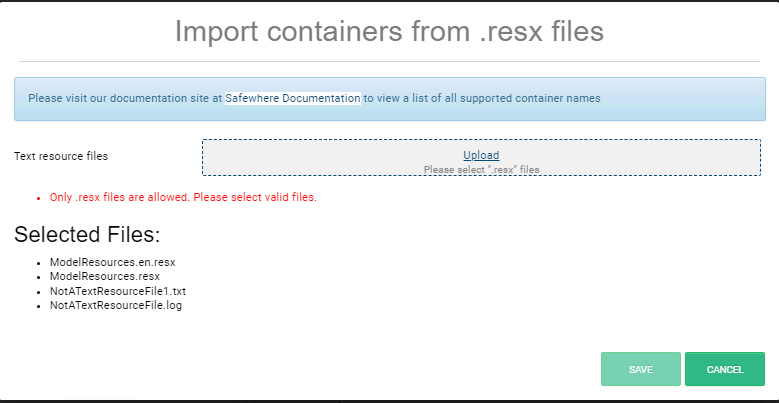
Invalid file format (not .resx)
If a selected file is not a .resx file, an error message will be displayed..
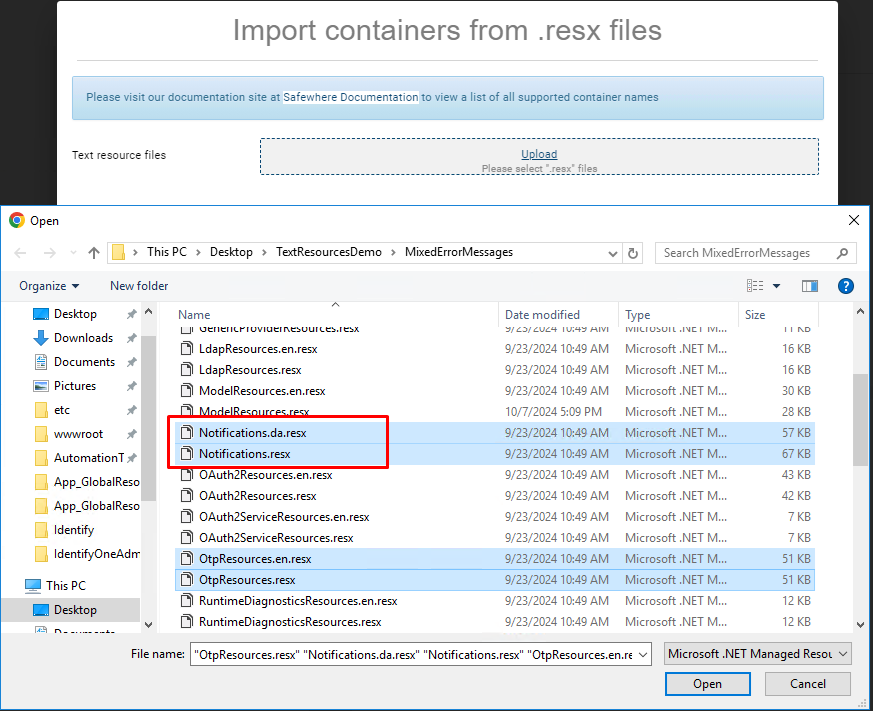
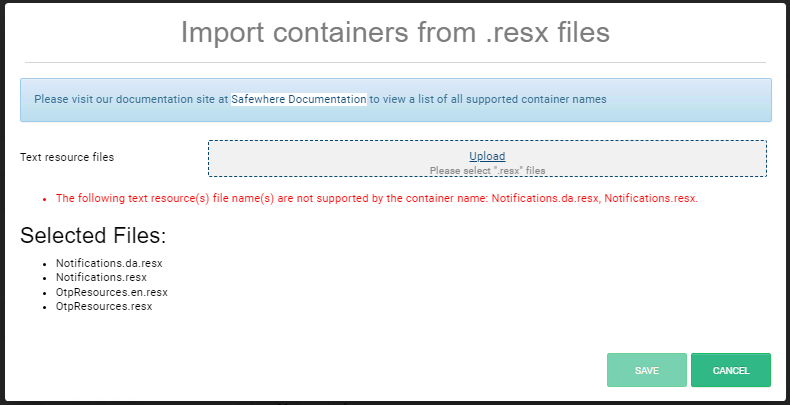
Unsupported .resx file
If a selected .resx file is unsupported by Identify, an error message will be displayed.
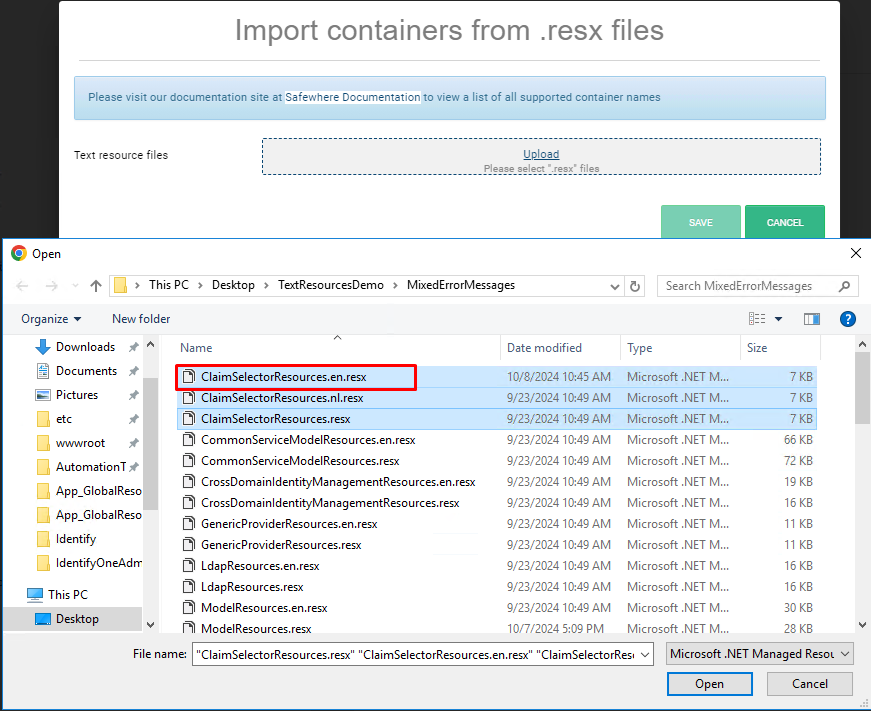
Invalid XML content
If the .resx file cannot be parsed as a valid XML document, an error message will be displayed.
How to use your newly added text resources
Let's assume that you have created a GlobalTextResources container with a new text resource named NewTextResource, you can use it for both Razor views and Hosted forms.
Razor views
The syntax you can use depends on whether your custom text resource is in the GlobalTextResources container or a built-in container.
GlobalTextResources container
Syntax:
@Resources.GlobalTextResources.Text["TextResourceKey"]
Example:
@Resources.GlobalTextResources.Text["MyCustomText"]
Built-in container
You can use the same syntax that you have been using before:
@Resources.UserNamePasswordResources.Title
Please note that using a built-in container implies that the text resource exists in one of the built-in text resource files. Therefore, *@Resources.UserNamePasswordResources.MySuperAwesomeNewTextResource* won't work.
You can also retrieve the text resource from the GlobalTextResources container:
Syntax:
@Resources.GlobalTextResources.Text["ContainerName.TextResourceKey"]
Example:
@Resources.GlobalTextResources.Text["UserNamePasswordResources.Title"]
Hosted forms
For hosted forms, you can use the same syntax for text resources in both GlobalTextResources container and built-in containers.
Syntax:
{{Resources.ContainerName.TextResourceKey}}
Example:
{{Resources.RuntimeModelResources.TextResourceKey}}

{{Resources.GlobalTextResources.NewTextResource}}