Using synced passkey in Safewhere Identify
Continue with the Passkey authentication guide, this document explains how to use passkeys stored in Google Password Manager, iCloud Keychain and Samsung Pass with Safewhere Identify.
Google Password Manager
According to Google documentation (supported environments and use cases), here are some key notes:
Google Password Manager stores, serves and synchronizes passkeys on Android and Chrome. Google Password Manager is enabled by default as a passkey provider on Android and available for all apps including Chrome and other browsers. Chrome on desktop operating systems (Windows, macOS, Linux and ChromeOS) comes with Google Password Manager support as well.
Passkeys are synchronized across devices that are part of the same ecosystem. For example, if a user creates a passkey on Android, it's available on all Android devices as long as the user is signed in to the same Google account. However, the same passkey isn't available on iOS, macOS or Windows, even if you're using the same browser, like Chrome.
A user can use a passkey on their phone to sign in on other devices by scanning a QR code, as long as the phone is near the laptop and the user approves the sign-in on the phone. This works across different operating systems and browsers.
iCloud Keychain
iCloud Keychain ensures that your passkeys are accessible across all your Apple devices linked to the same Apple ID. This seamless synchronization allows you to use passkeys on your iPhone, iPad, and Mac without the need for manual transfers.
Samsung Pass
Samsung Pass began supporting Passkeys with the release of the One UI 6.0 update in November 2023. This update allows users to sign in to apps and websites without entering IDs and passwords, utilizing biometric authentication instead. The feature was initially available on the Galaxy S23 series and is planned to extend to older Galaxy devices throughout 2024.
Second factor authentication on a Windows machine using a passkey stored in Google Password Manager on the same device
In this demonstration:
- A user accesses IdentifyMe on a Windows machine and successfully signs in with the first factor authentication.
- During the second factor authentication phase, the user unlocks Windows Hello to create a passkey in Google Password Manager.
- The user logs out of IdentifyMe.
- The user re-accesses IdentifyMe on a Windows machine and successfully signs in with the first factor authentication.
- During the second factor authentication phase, the user's passkey in Google Password Manager is selected, and Windows Hello is prompted to authenticate the user.
- The user unlocks Windows Hello to complete the login.
To set up necessary connections in Identify, follow these steps:
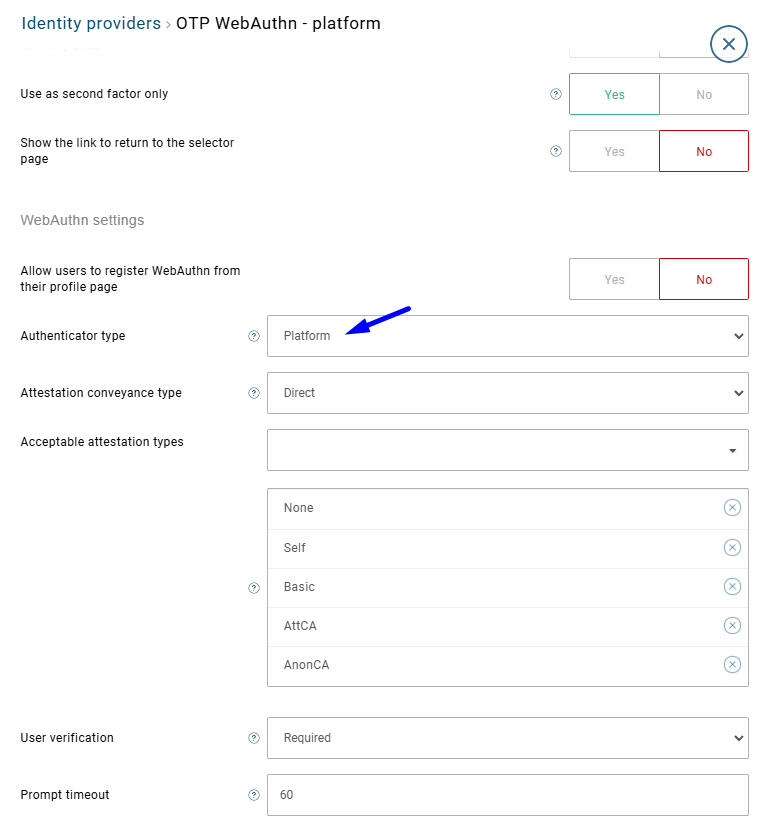
- Create an OTP connection for WebAuthn as shown below. In this demonstration, a passkey is created on the device initiating the WebAuthn registration ceremony, so set the Authenticator type setting to Platform.
- Set the OTP connection as the second factor of another identity provider (a Username & Password identity provider is used in this demonstration).
After that, a user can log in and create a passkey:
- A user accesses IdentifyMe via Chrome on a Windows machine, and successfully signs in the first factor authentication.
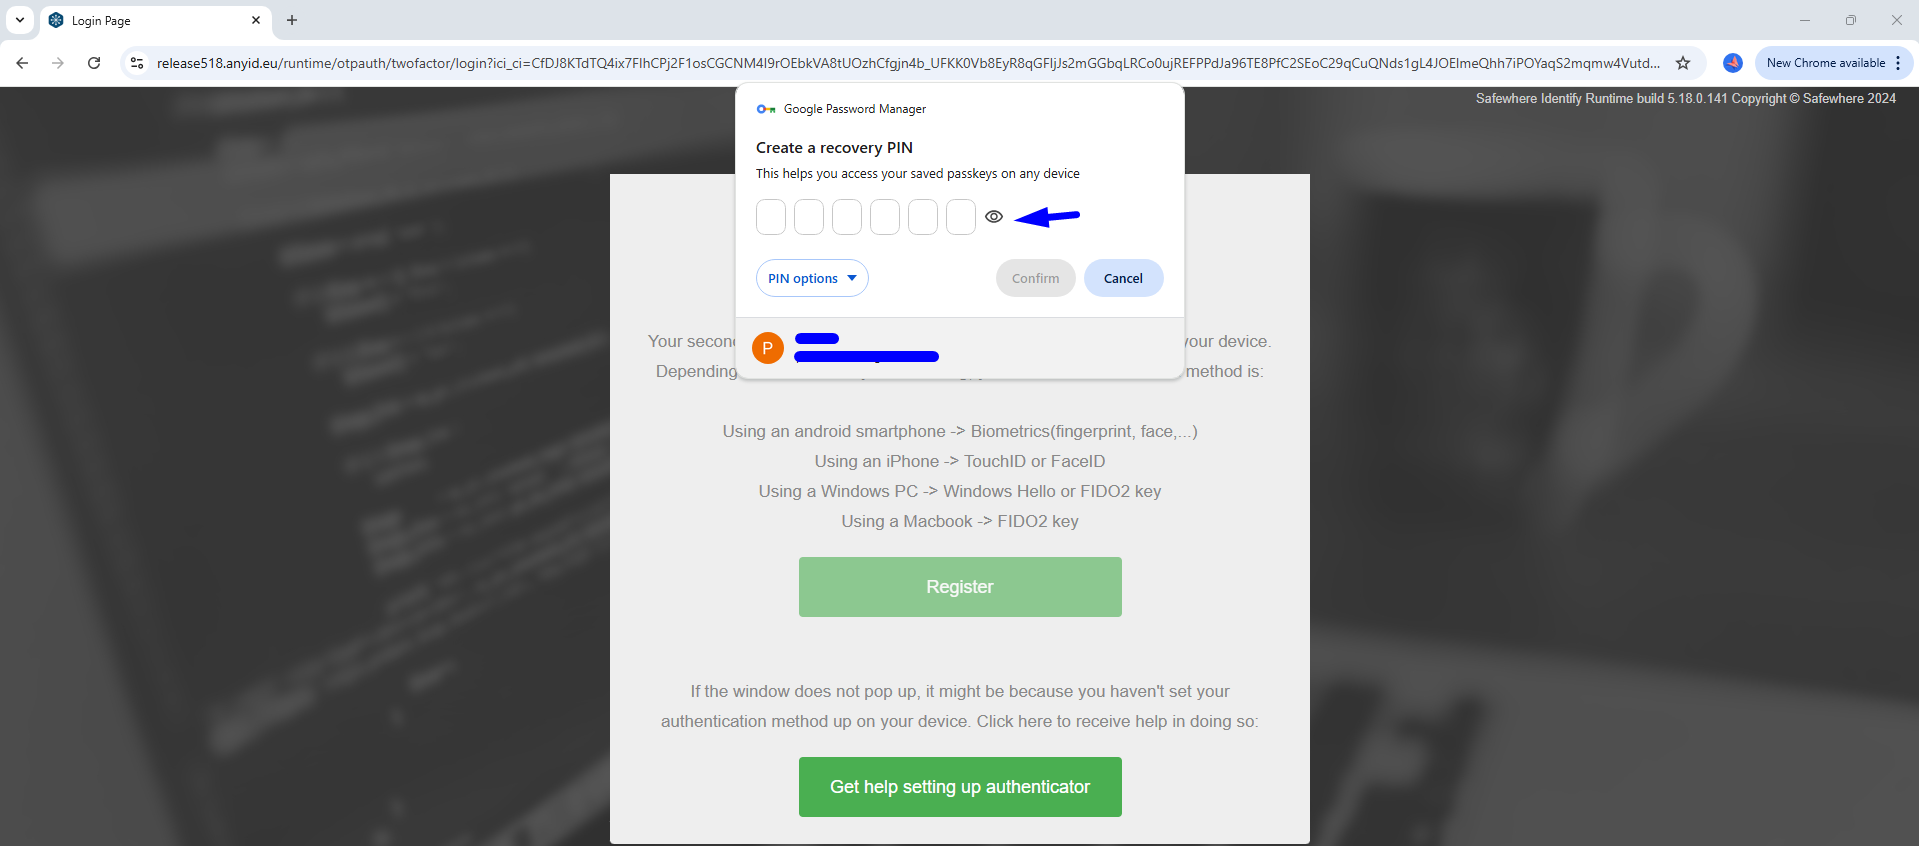
- During the second factor authentication phase, Google Password Manager prompts the user to create a passkey.

Note: When a user creates a passkey with Google Password Manager, it is synchronized and end-to-end encrypted. If the first passkey for Google Password Manager is created on a desktop, Chrome asks to create a Google Password Manager PIN. The user needs to sign in to their Google Account and enter their Android device screen lock or Google Password Manager PIN to decrypt a synced passkey on a new environment.
- After the user clicks the Create button, Windows Hello on the Windows machine is prompted to authenticate the user.
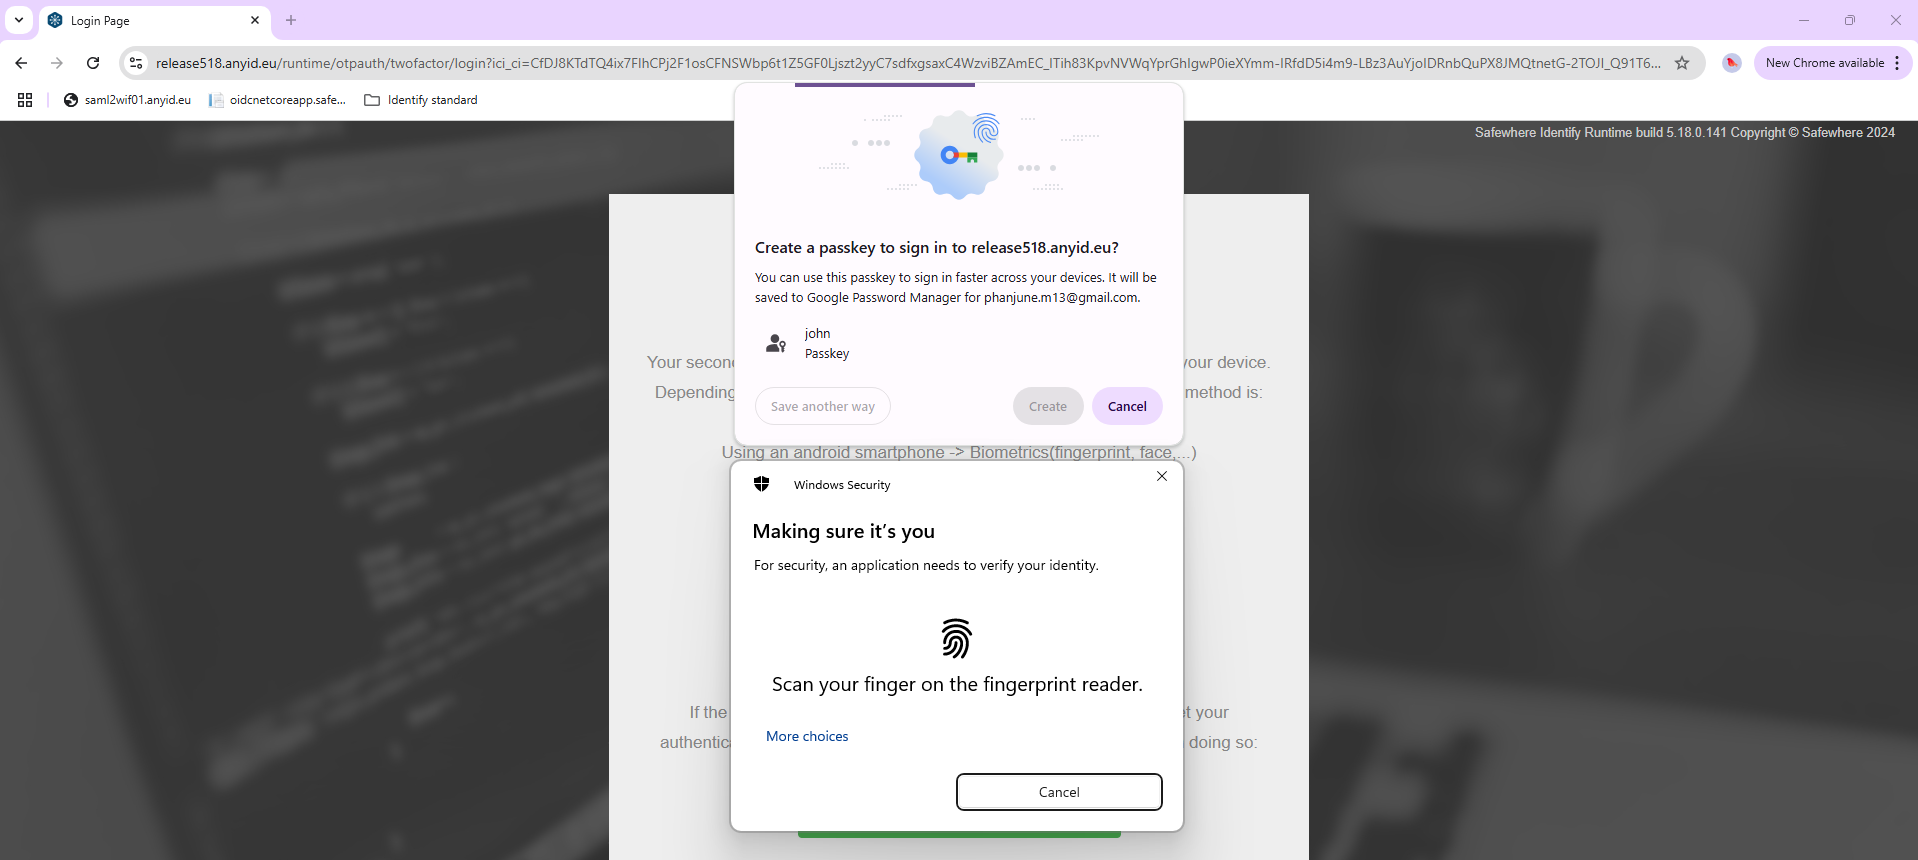
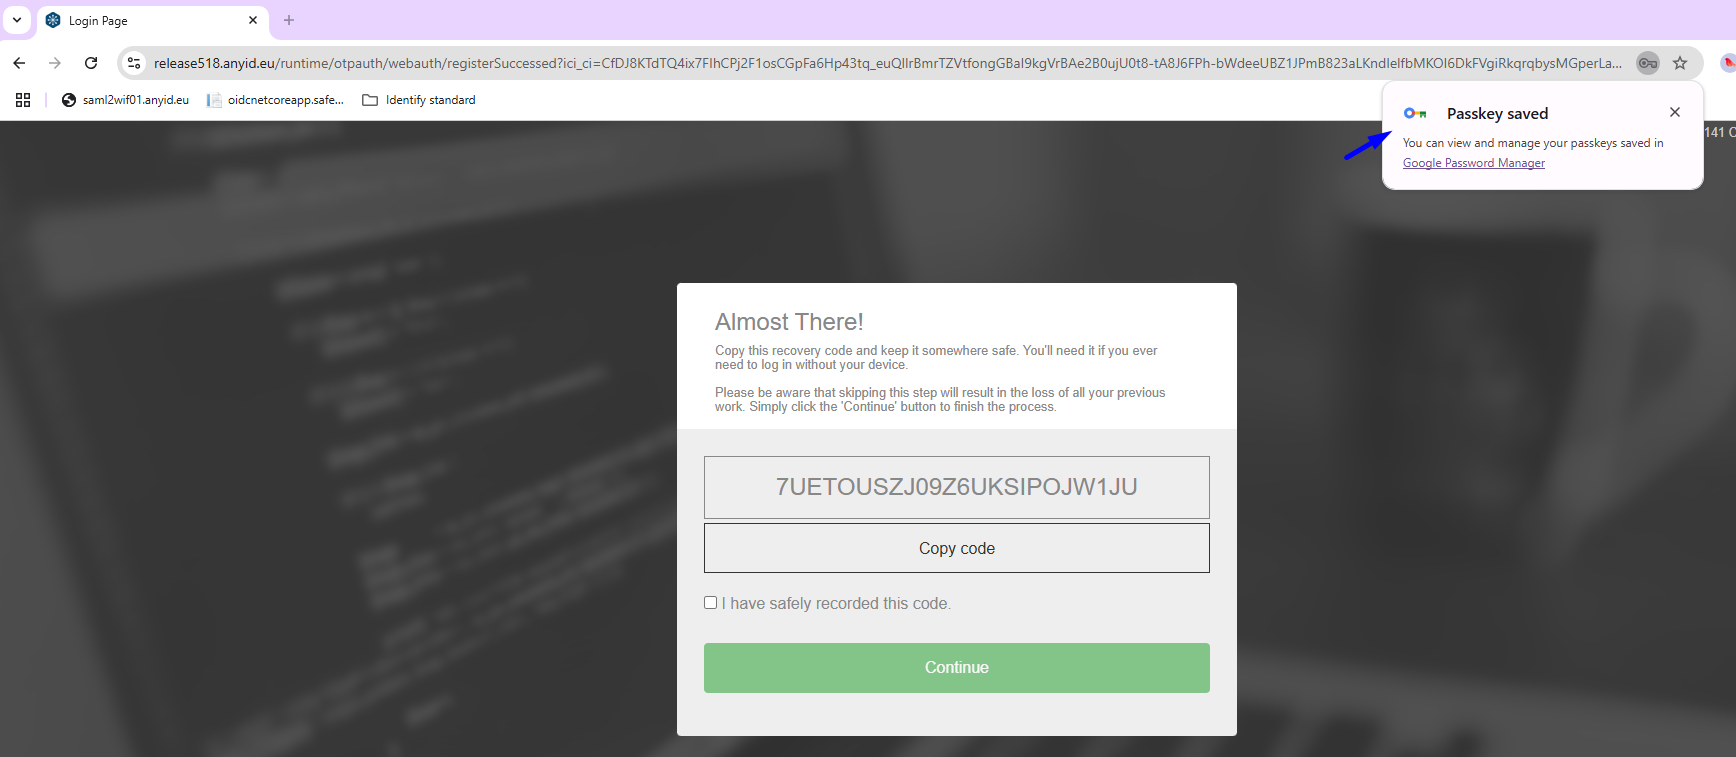
- After the user is authenticated with Windows Hello, a new passkey is created and saved to Google Password Manager.
The user can now log in using the newly created passkey:
The user re-accesses IdentifyMe on a Windows machine and successfully logs in with the first factor authentication.
The user's passkey in Google Password Manager is selected, and Windows Hello is prompted to authenticate the user.
- The user unlocks Windows Hello to complete the login.
Second factor authentication on an iPad using a passkey in iCloud Keychain from an iPhone
In this demonstration:
- A user accesses IdentifyMe on an iPhone and successfully signs in with the first factor authentication.
- During the second factor authentication phase, the user unlocks the phone to create a passkey in iCloud Keychain.
- The user accesses IdentifyMe on an iPad that has the same Apple ID as the iPhone and successfully signs in with the first factor authentication.
- On the iPad, the user chooses to sign in with a passkey in iCloud Keychain.
- The user is prompted to approve the use of their passkey on the iPad device, for example, with Touch ID. After doing so, they're signed in on the iPad.
Note: The passkey itself is not transferred to the iPad but remains securely stored in iCloud Keychain.
To set up necessary connections in Identify, follow these steps:
- Create an OTP connection for WebAuthn as shown below. In this demonstration, a passkey is created on the device initiating the WebAuthn registration ceremony, so set the Authenticator type setting to Platform.
- Set the OTP connection as the second factor of another identity provider (a Username & Password identity provider is used in this demonstration).
After that, a user can log in and create a passkey:
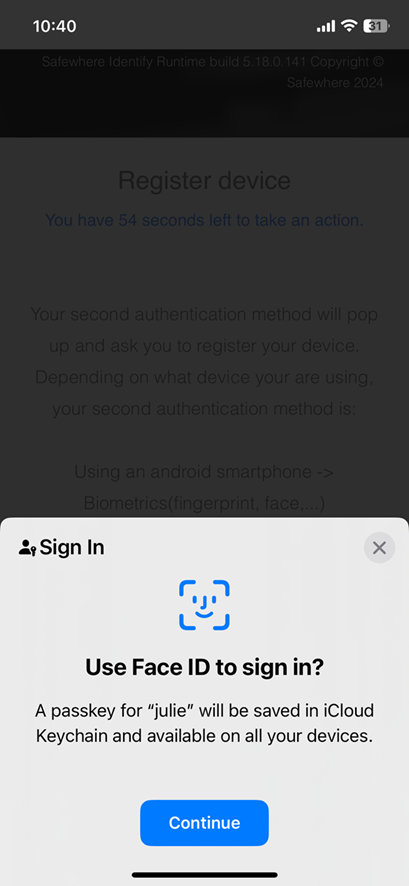
- A user accesses IdentifyMe on an iPhone and successfully signs in with the first factor authentication.
- During the second factor authentication phase, the user unlocks the phone to create a passkey in iCloud Keychain.
The user can now log in using the newly created passkey:
- The user accesses IdentifyMe on an iPad that has the same iCloud account as the iPhone and successfully signs in with the first factor authentication.
- On the iPad, the user chooses to sign in with a passkey in iCloud Keychain.
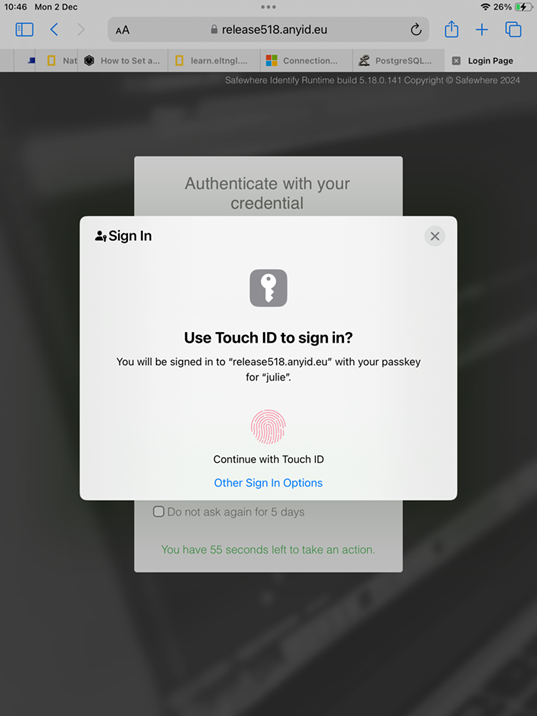 3. The user is prompted to approve the use of their synced passkey on the iPad device, for example, with Touch ID. After doing so, they're signed in on the iPad.
Second factor authentication on a Windows machine using a passkey in Google Password Manager from an Android phone
In this demonstration:
- A user accesses IdentifyMe on an Android phone and successfully signs in with the first factor authentication.
- During the second factor authentication phase, the user unlocks the phone to create a passkey in Google Password Manager.
- The user accesses IdentifyMe on a Windows machine and successfully signs in with the first factor authentication.
- On the Windows machine, the user chooses to sign in with a passkey from another device.
- The two devices connect via Bluetooth.
- The user is prompted to approve the use of their passkey on the Android device, for example, with a fingerprint sensor. After doing so, they're signed in on the Windows machine.
Note: The passkey itself is not transferred to the Windows machine but remains securely stored in Google Password Manager, accessible via the Android device for authentication.
To set up necessary connections in Identify, follow these steps:
- Create an OTP connection for WebAuthn as shown below. In this demonstration, a passkey is created on the device initiating the WebAuthn registration ceremony, so set the Authenticator type to Platform.
- Set the OTP connection as the second factor of another identity provider (a Username & Password identity provider is used in this demonstration).
After that, a user can log in and create a passkey:
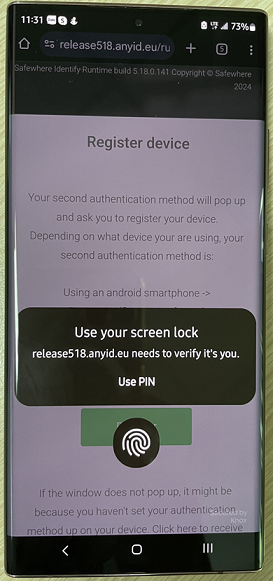
A user accesses IdentifyMe on an Android phone and successfully signs in with the first factor authentication.
During the second factor authentication phase, the user unlocks the phone to create a passkey in Google Password Manager.
The user can now log in using the newly created passkey:
The user accesses IdentifyMe on a Windows machine and successfully signs in with the first factor authentication.
On the Windows machine, the user chooses to sign in with a passkey from another device.
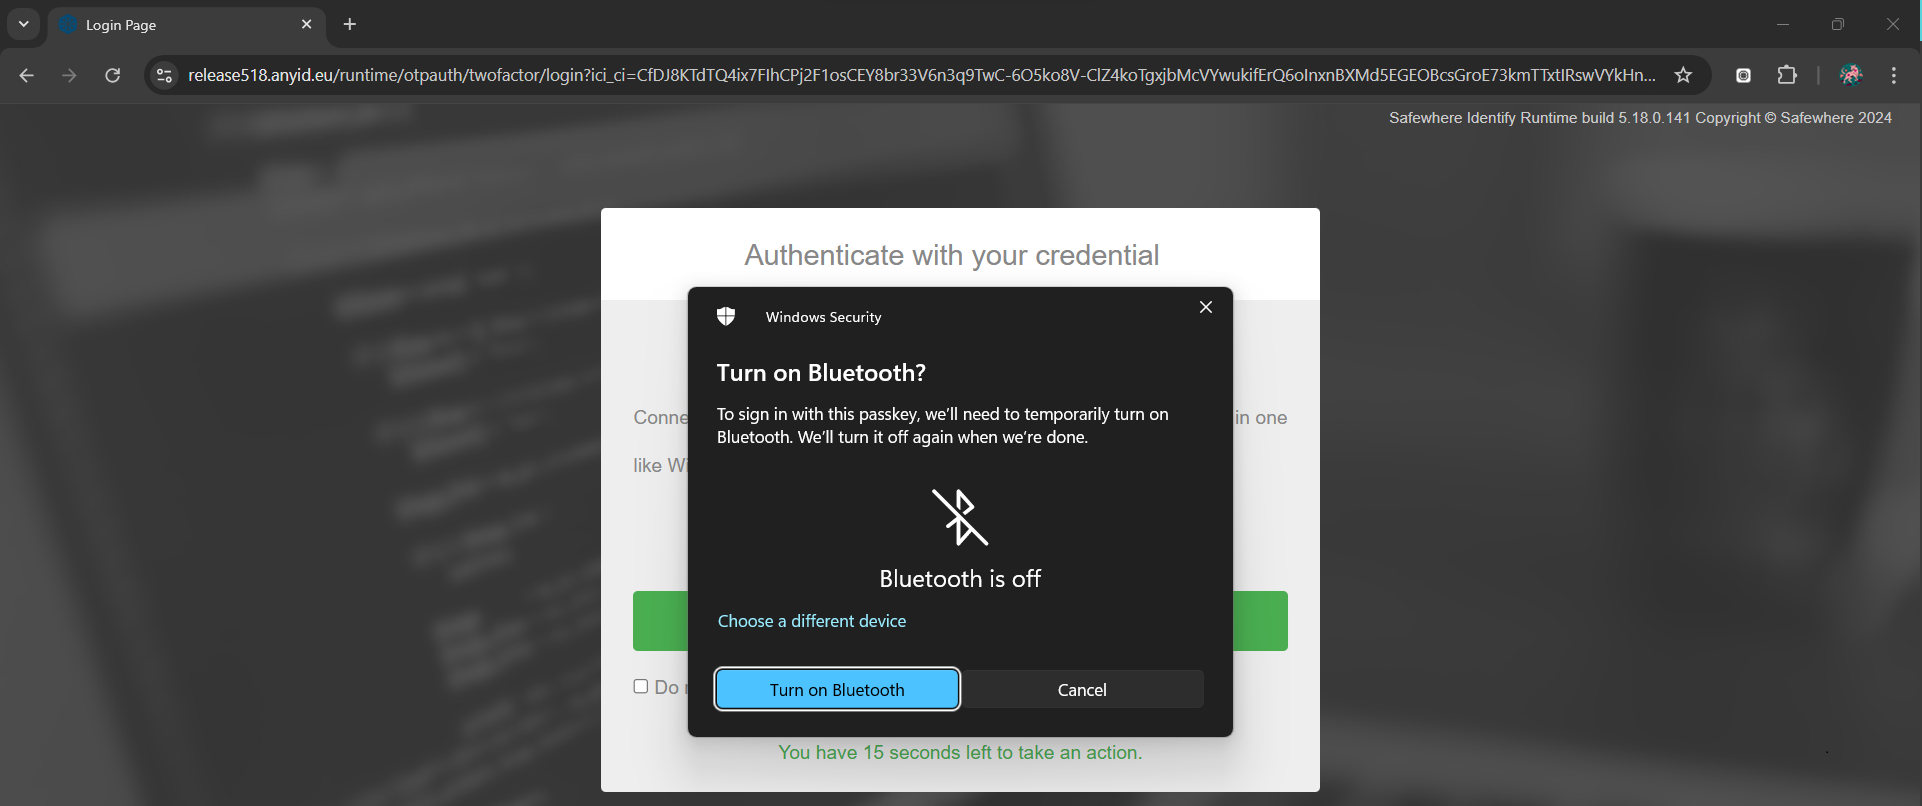
- The user is prompted to turn on Bluetooth on the Windows machine.
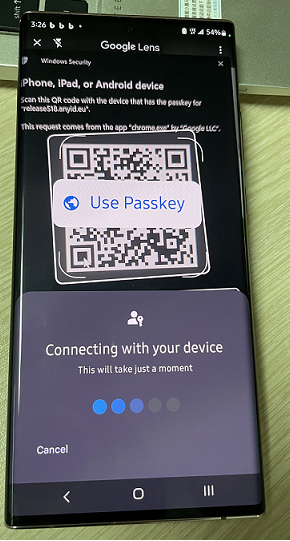
- The Windows machine displays a QR code.
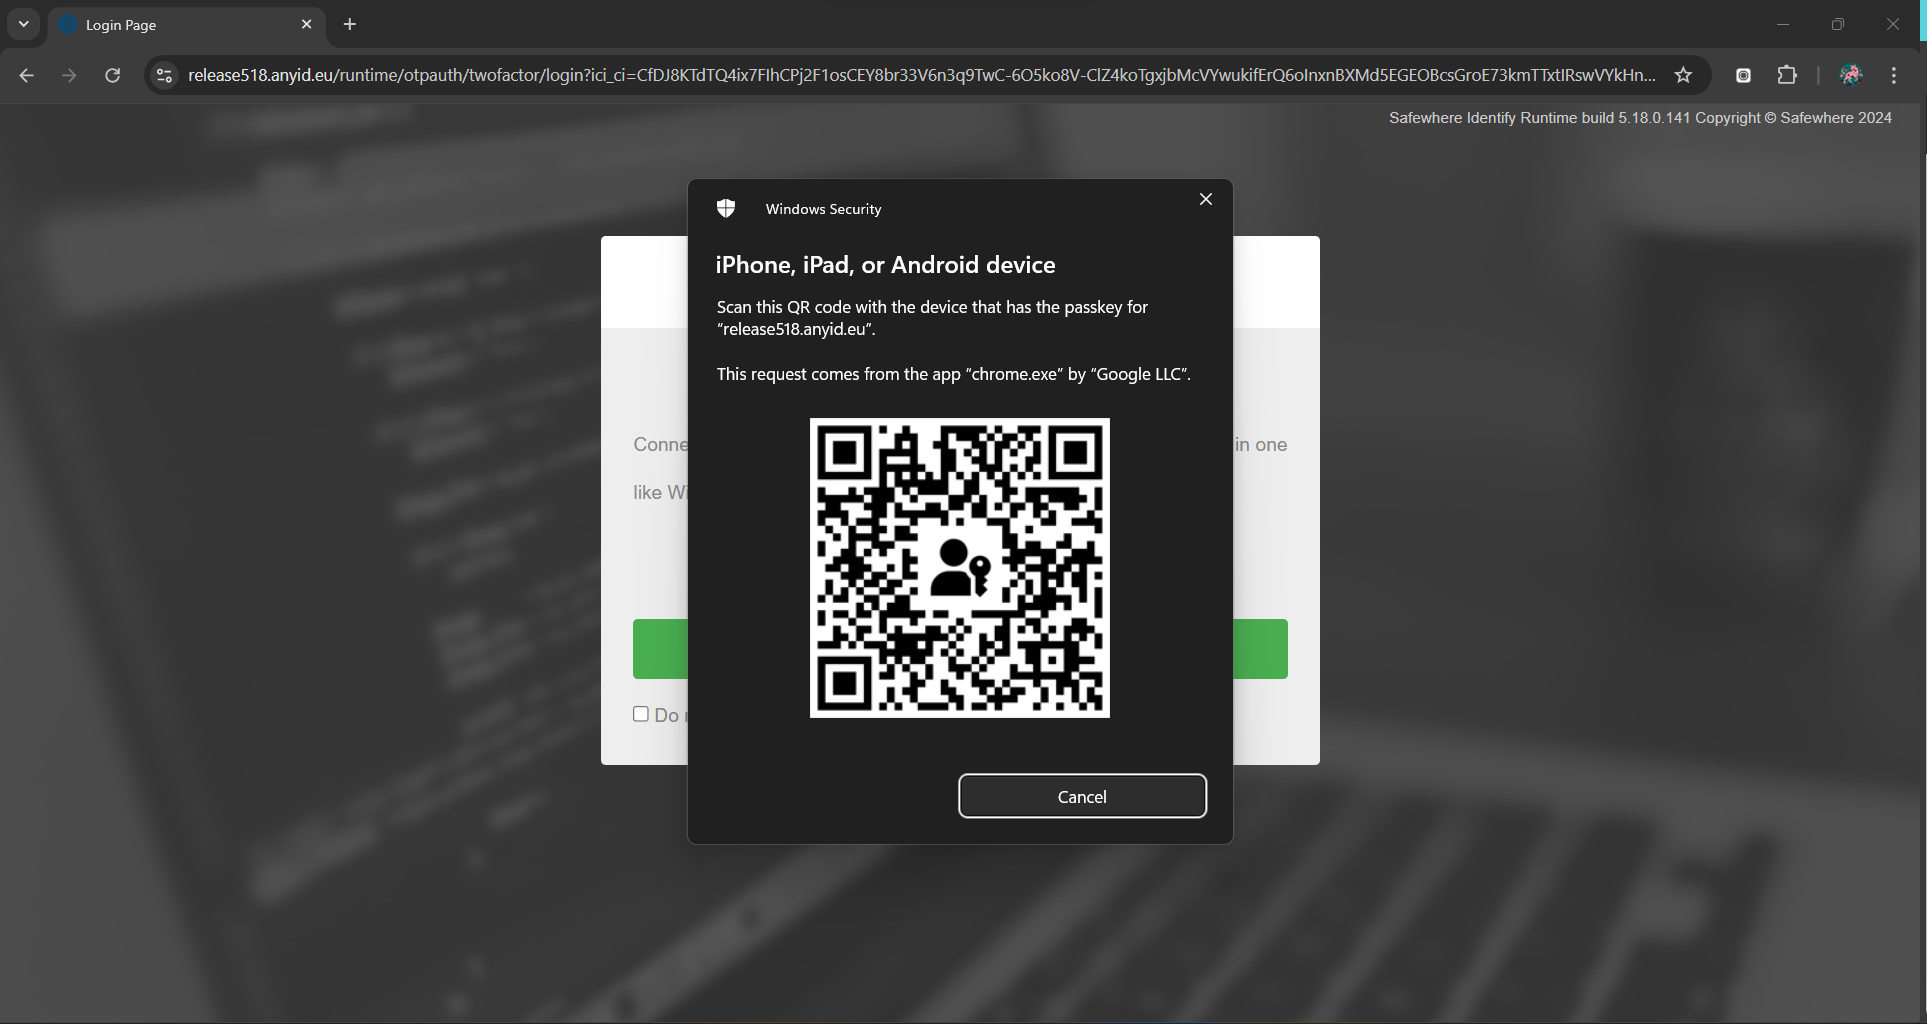
- The user uses the camera of the Android phone or Google Lens to scan this QR code.
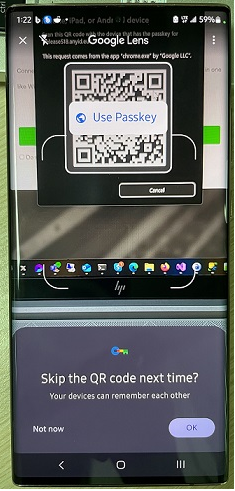
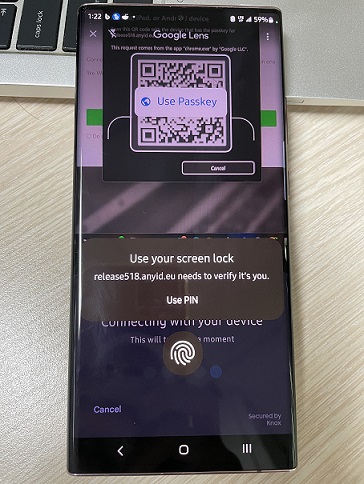
- Then, the Android phone connects to the Windows machine.
- The user is prompted to approve the use of their passkey on the Android device, for example, with a fingerprint sensor. After doing so, they're signed in on the Windows machine. Note that the passkey itself isn't transferred to the Windows machine.
Second factor authentication on a Windows machine using a passkey in iCloud Keychain from an iPhone
In this demonstration:
- A user accesses IdentifyMe on a Windows machine and successfully signs in with the first factor authentication.
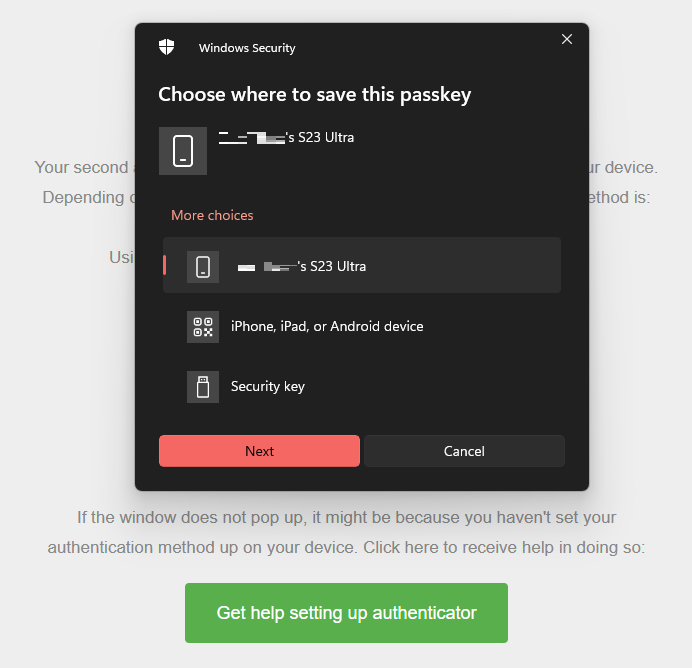
- During the second factor authentication phase, the user chooses to save a passkey to an iPhone, iPad, or Android device. In this demonstration, the user uses an iPhone.
- The user logs out of IdentifyMe.
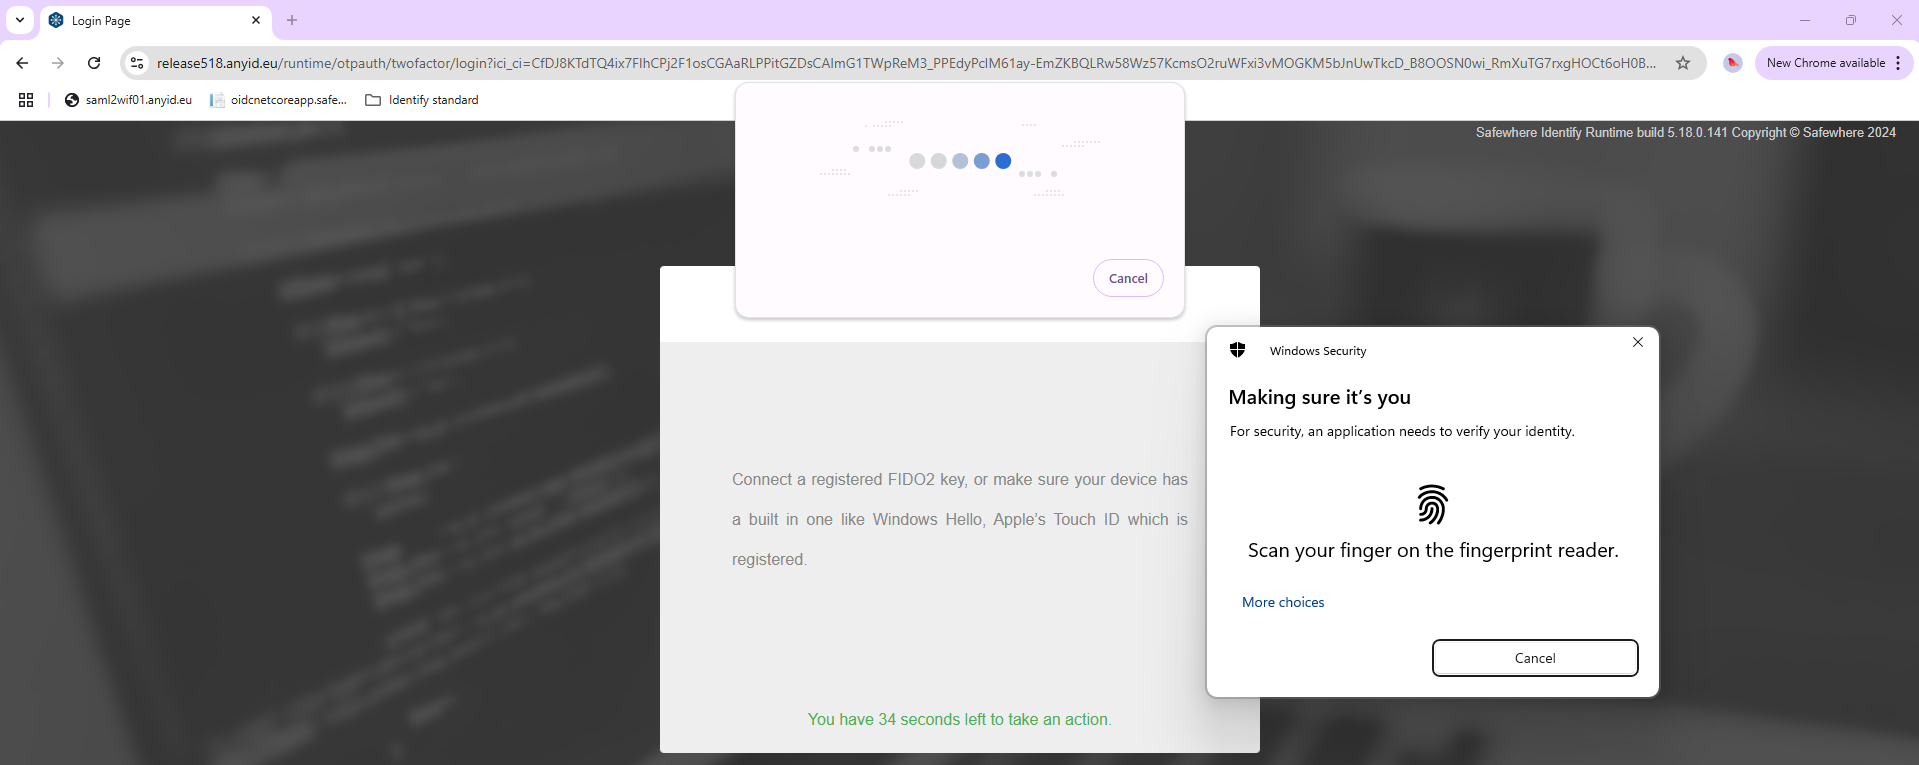
- The user re-accesses IdentifyMe on a Windows machine and successfully signs in with the first factor authentication.
- On the Windows machine, the user chooses to sign in with a passkey from another device.
- The two devices connect via Bluetooth.
- The user is prompted to approve the use of their passkey on the iPhone device, for example, with Face ID. After doing so, they're signed in on the Windows machine.
To set up necessary connections in Identify, follow these steps:
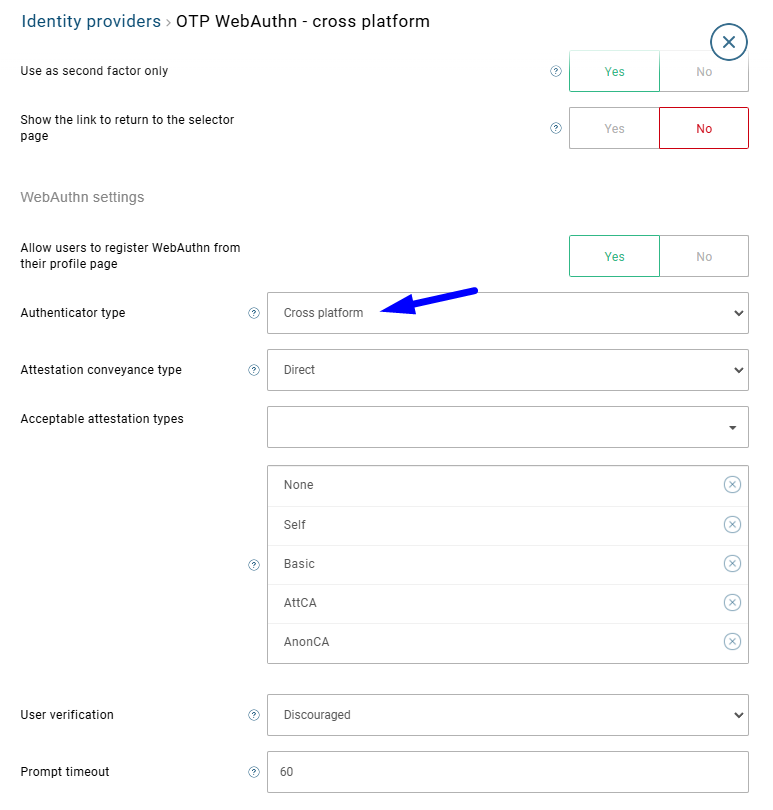
- Create an OTP connection for WebAuthn as shown below. In this demonstration, a passkey is created on a device different from the one initiating the WebAuthn registration ceremony, so set the Authenticator type setting to Cross platform.
- Set the OTP connection as the second factor of another identity provider (a Username & Password identity provider is used in this demonstration).
After that, a user can log in and create a passkey:
- A user accesses IdentifyMe on a Windows machine and successfully signs in with the first factor authentication.
- During the second factor authentication phase, select the option I have already set it up.
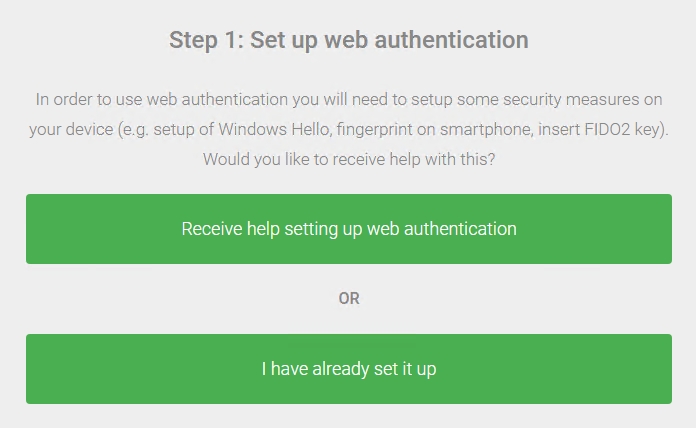
- On the Register device form, click the Register button. The system will prompt you for an authorization gesture.
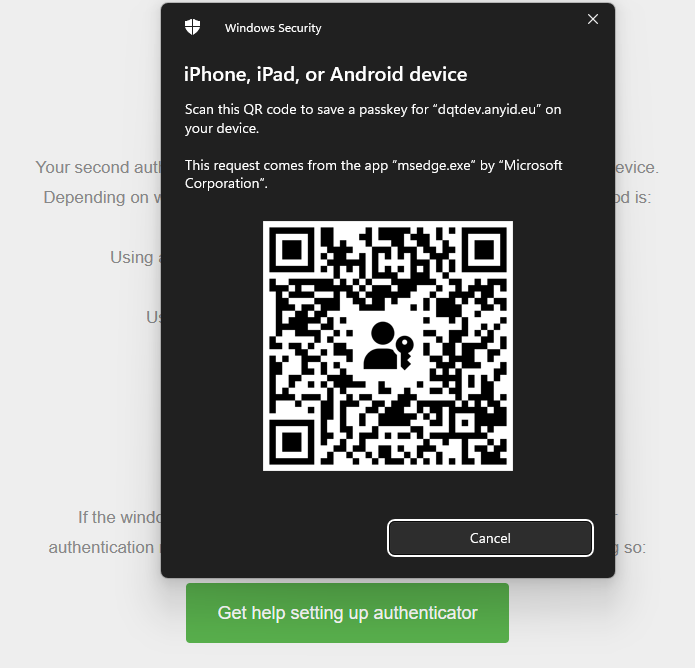
- The user chooses to save a passkey to an iPhone, iPad, or Android device. In this demonstration, the user uses an iPhone.
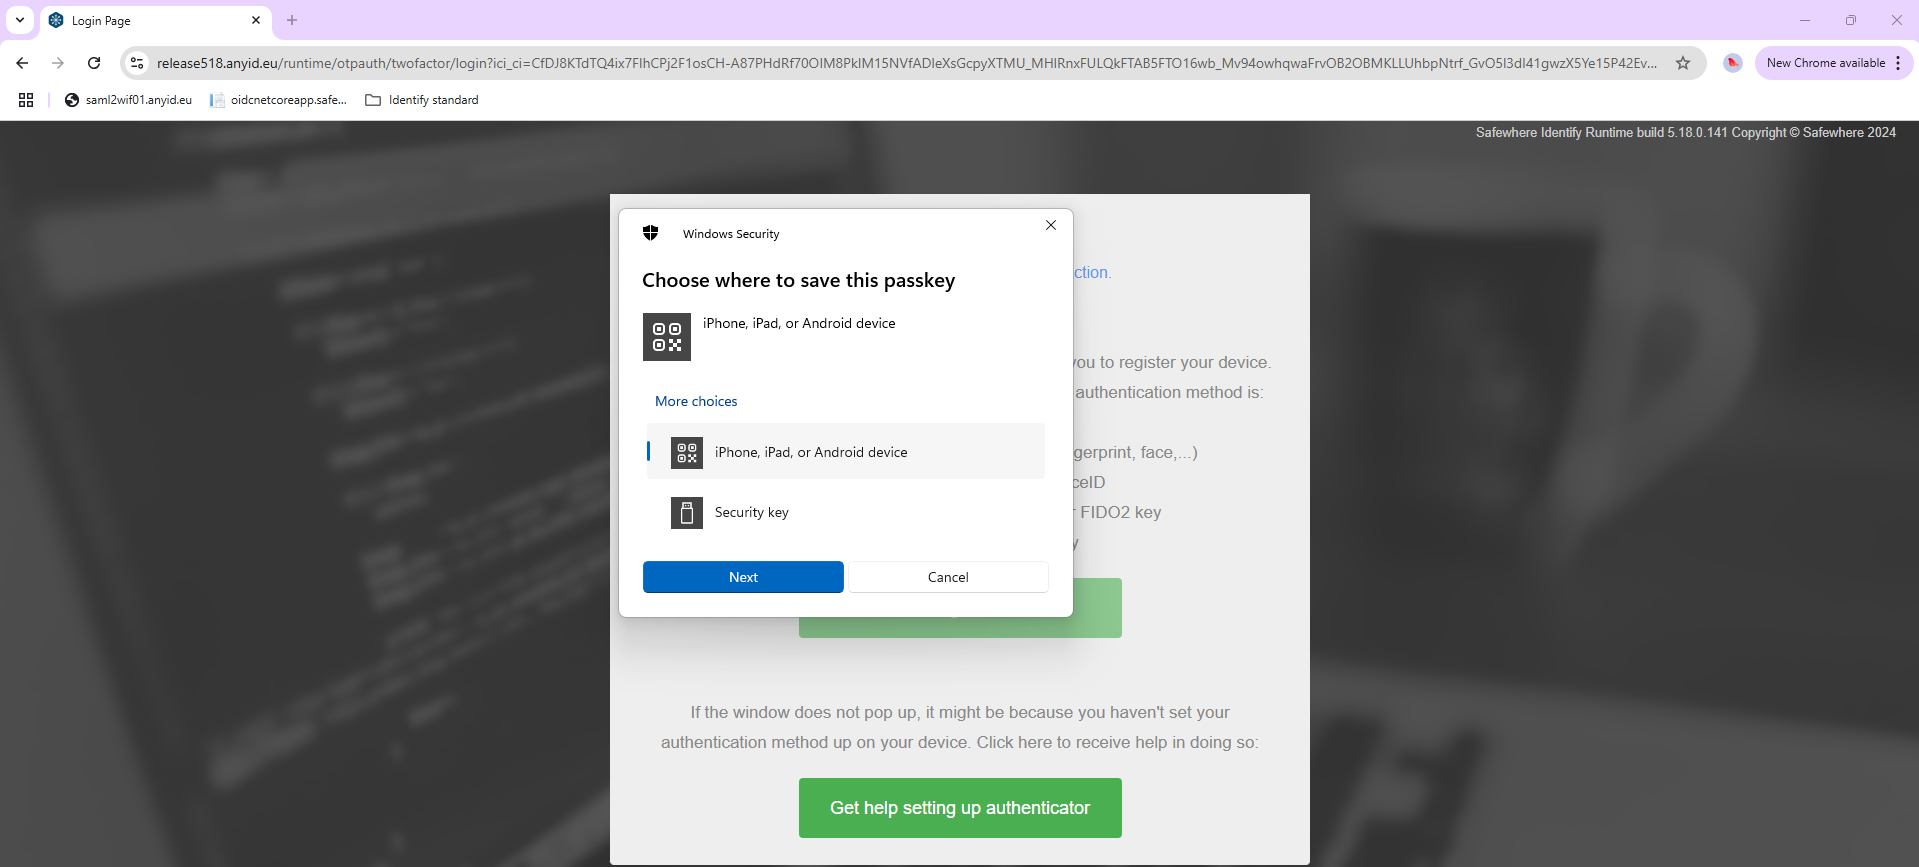
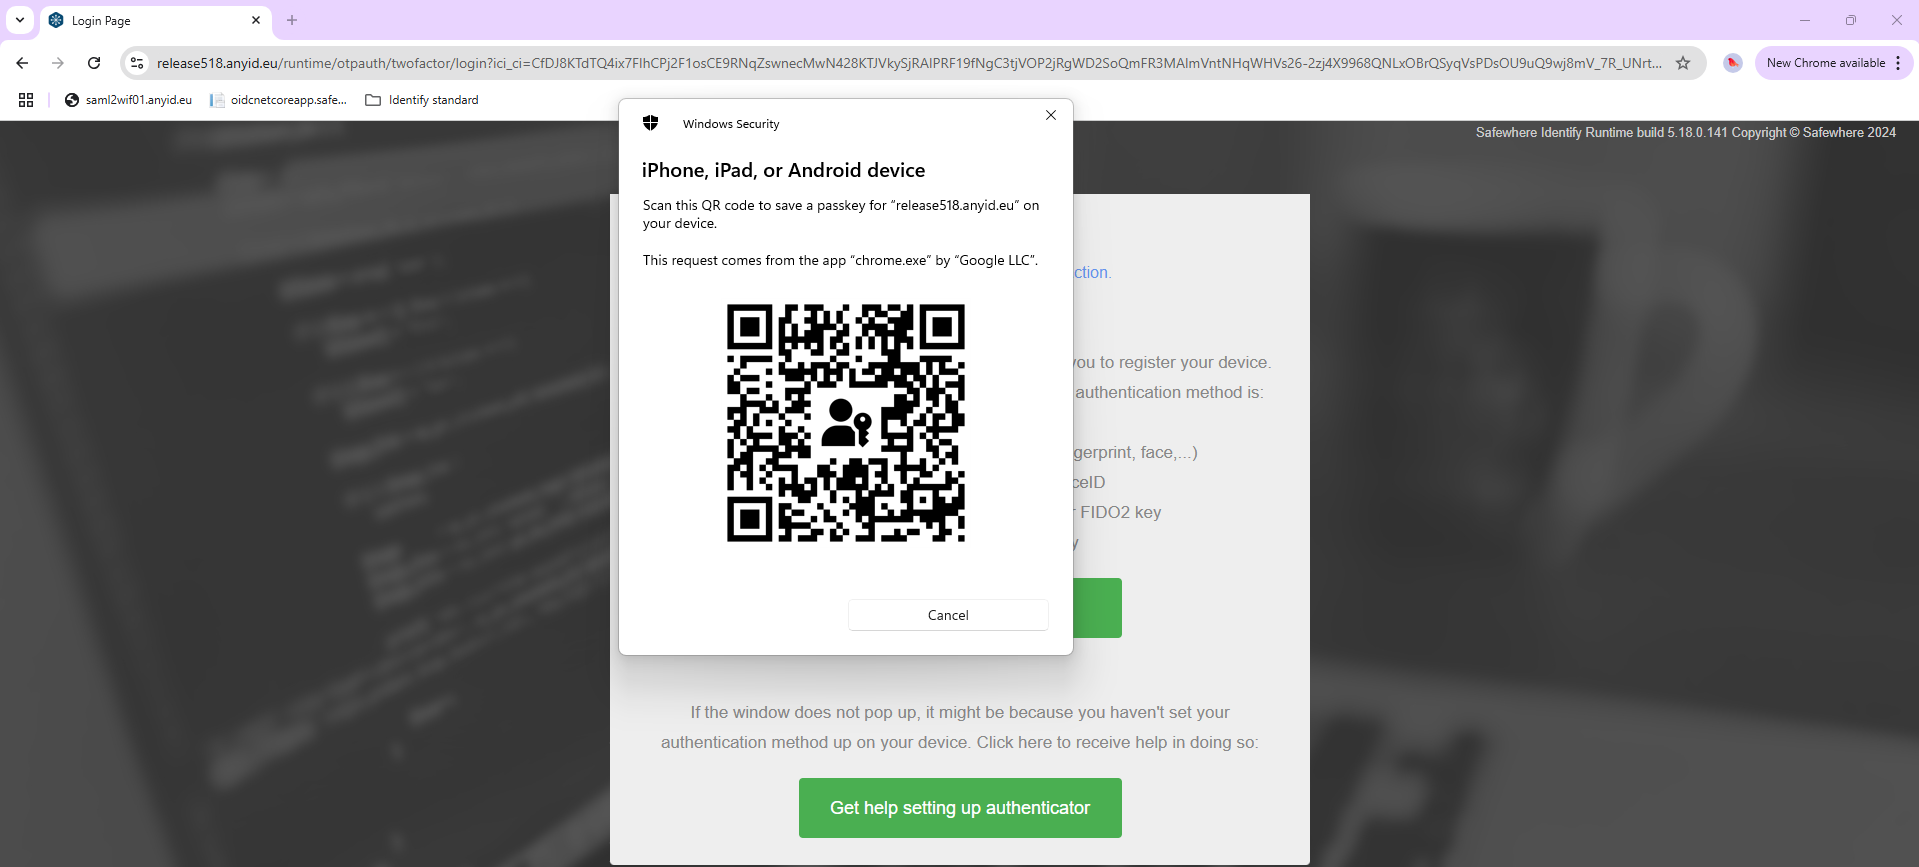
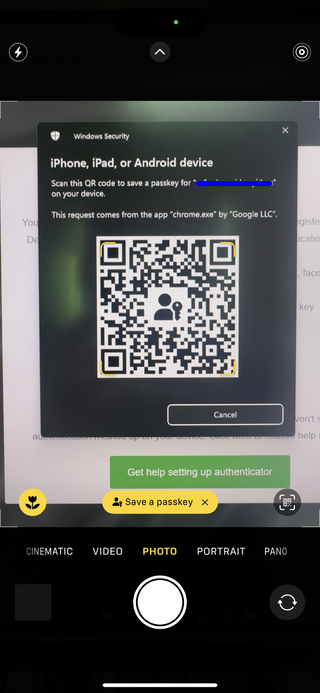
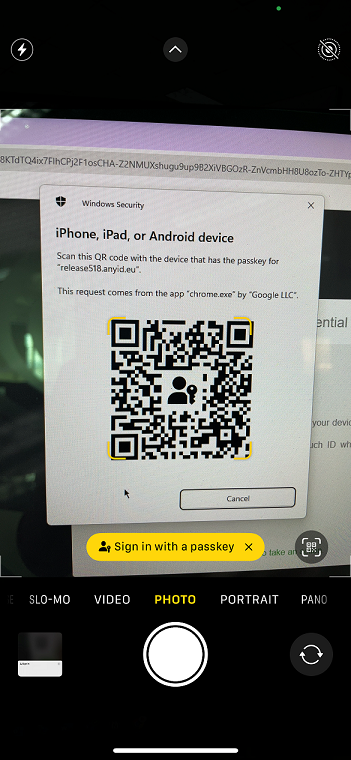
- The browser will display a QR code. The user uses the mobile phone's camera to scan it.
- The user taps on the Use passkey to sign in for Android or Save a passkey on iPhone option that appears on the user's phone screen.
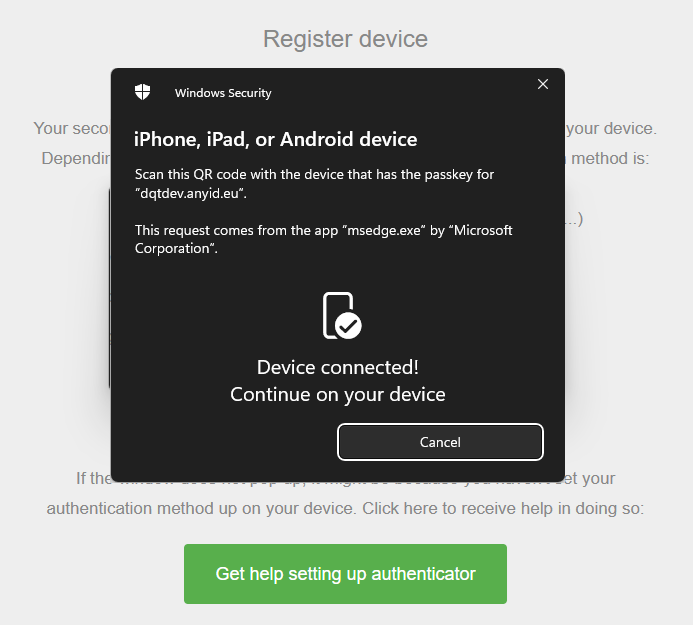
- The user's phone will then try to connect with the Windows machine via Bluetooth.

- A notification is displayed when these devices are connected.

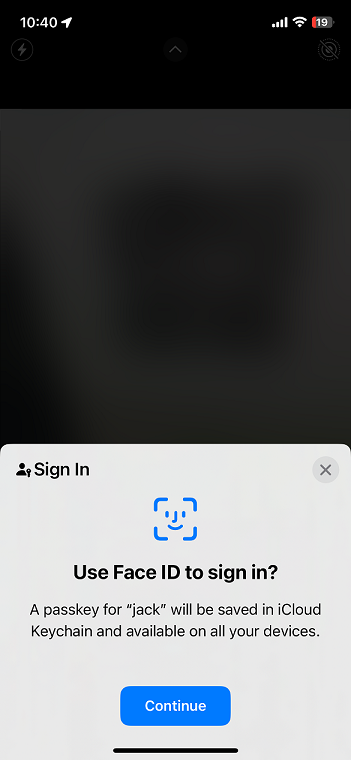
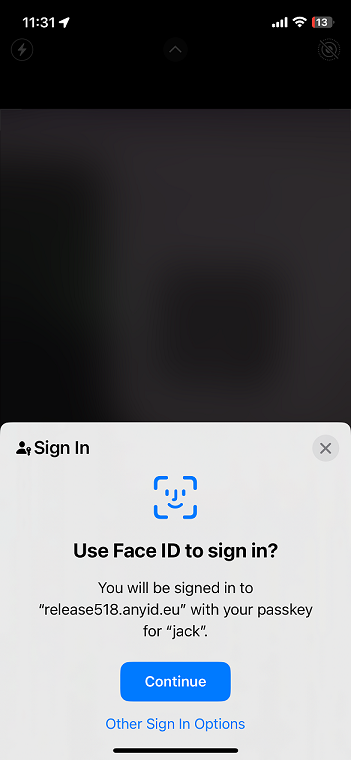
- The user is prompted to authenticate with Face ID to complete the login.
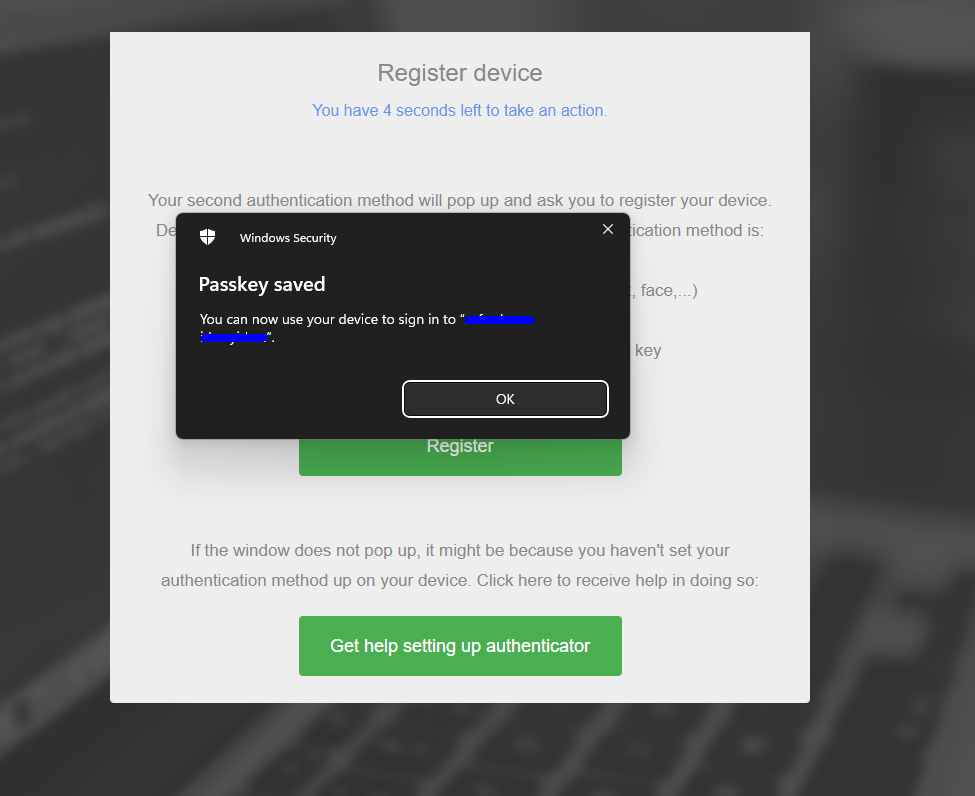
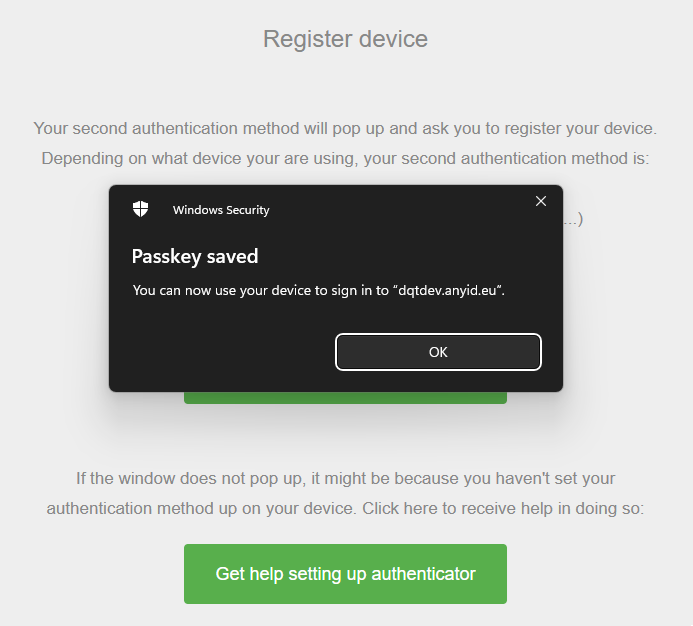
- After the passkey is saved successfully to the iPhone, a notification is displayed on the Windows machine. Then, the user clicks the OK button.
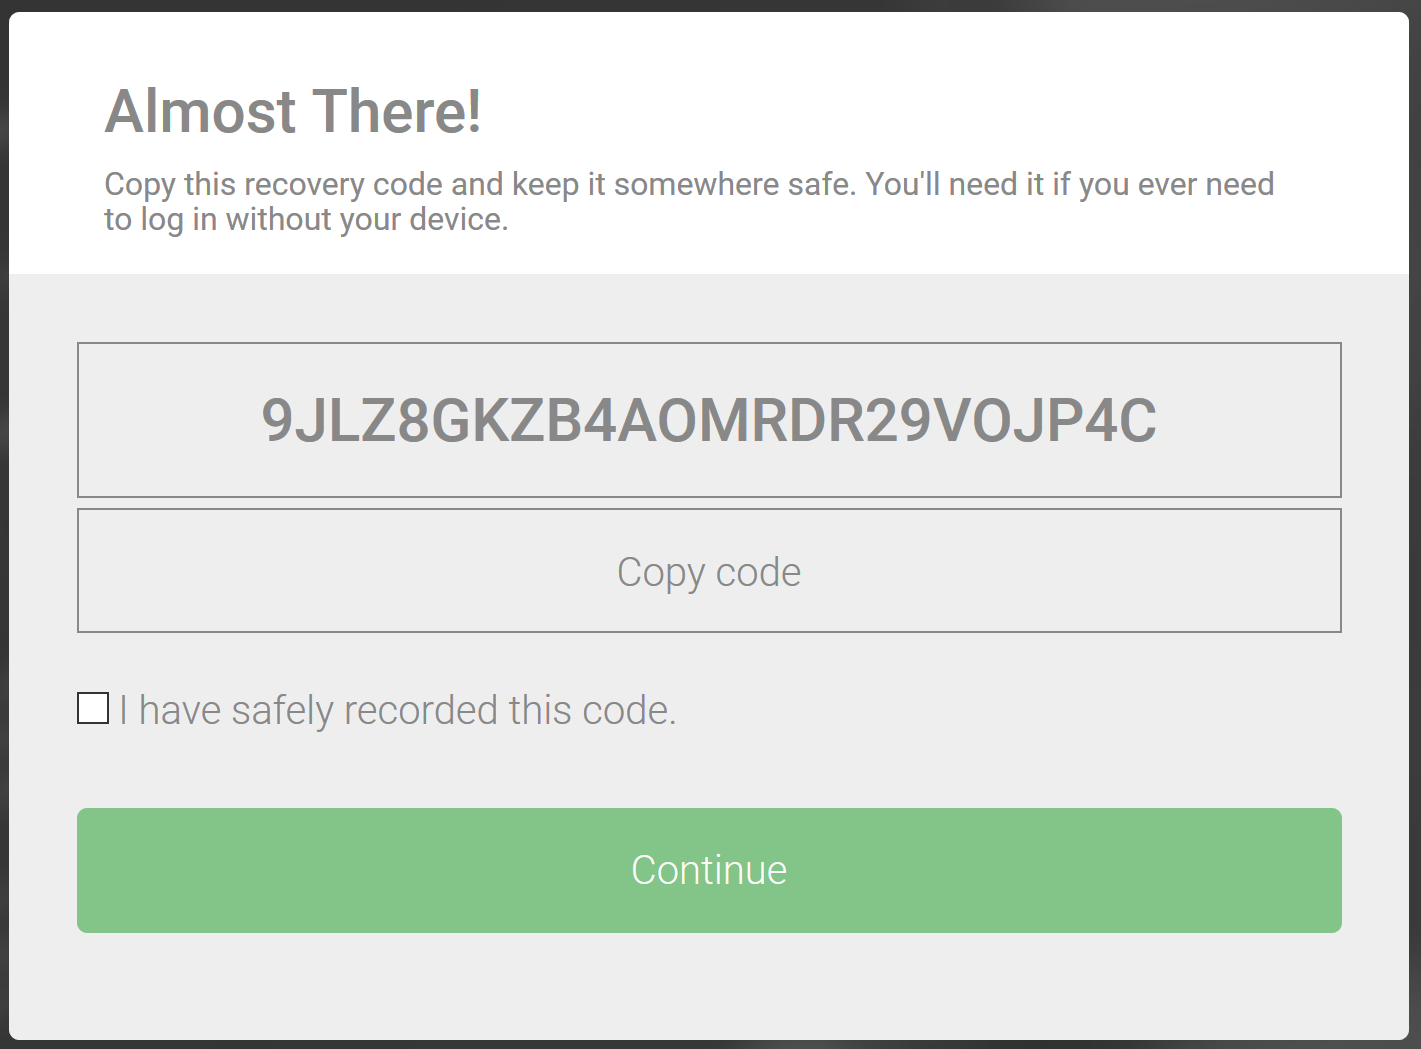
- The system will prompt the user to save a recovery code as a backup. Tick the I have safely recorded this code checkbox and click Continue to complete onboarding.
The user can now log in using the newly created passkey:
The user accesses IdentifyMe on a Windows machine and successfully signs in with the first factor authentication.
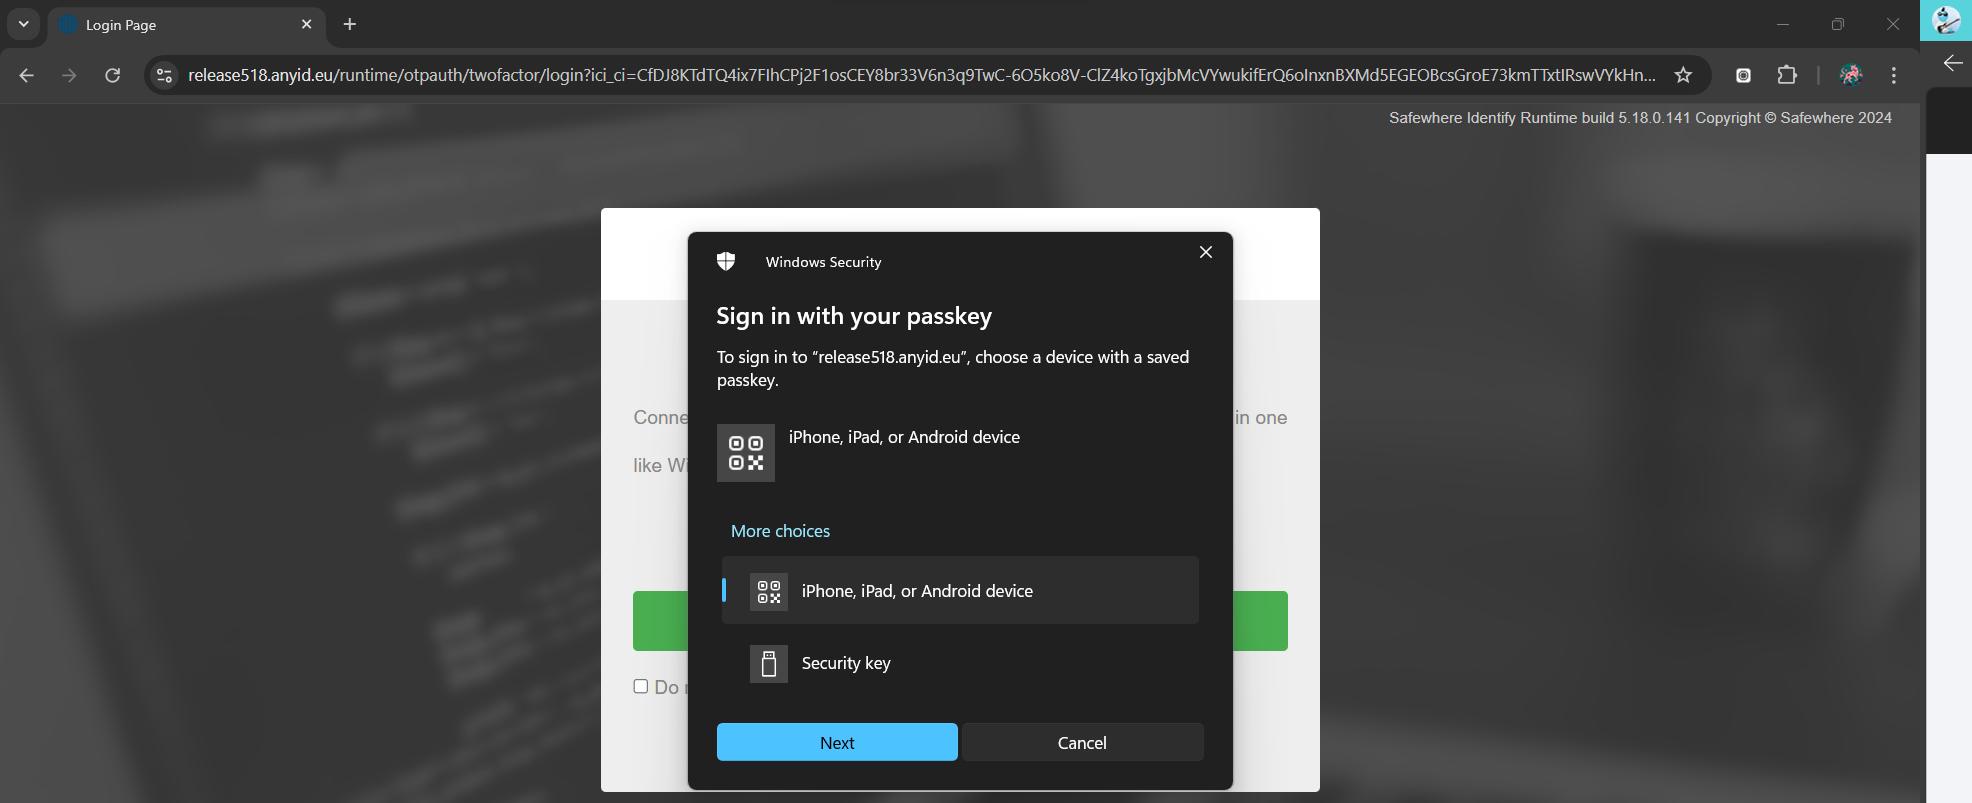
On the Windows machine, the user chooses to sign in with a passkey from another device.
- The user is prompted to turn on Bluetooth on the Windows machine.
- The Windows machine displays a QR code.
- The user uses the camera of the iPhone to scan this QR code.
- Then, the iPhone connects to the Windows machine.
- The user is prompted to approve the use of their passkey on the iPhone device, for example, with Face ID. After doing so, they're signed in on the Windows machine. Note that the passkey itself isn't transferred to the Windows machine.
Second factor authentication on a Windows machine using a passkey in Samsung Pass from a Samsung device.
Prerequisites:
- A Samsung device running One UI 6.0 or later.
- Bluetooth enabled on the Samsung device.
In this demonstration:
- A user accesses IdentifyMe on a Windows machine and successfully signs in with the first factor authentication.
- During the second factor authentication phase, the user chooses to save a passkey to a Samsung device.
- The user logs out of IdentifyMe.
- The user re-accesses IdentifyMe on a Windows machine and successfully signs in with the first factor authentication.
- On the Windows machine, the user chooses to sign in with a passkey from Samsung device.
- The two devices connect via Bluetooth.
- The user is prompted to approve the use of their passkey on the Samsung device, for example, with Fingerprint. After doing so, they're signed in on the Windows machine.
To set up necessary connections in Identify, follow these steps:
Create an OTP connection for WebAuthn as shown below. In this demonstration, a passkey is created on a device different from the one initiating the WebAuthn registration ceremony, so set the Authenticator type setting to Cross platform.
Set the OTP connection as the second factor of another identity provider (a Username & Password identity provider is used in this demonstration).
After that, a user can log in and create a passkey:
A user accesses IdentifyMe on a Windows machine and successfully signs in with the first factor authentication.
During the second factor authentication phase, select the option I have already set it up.
On the Register device form, click the Register button. The system will prompt you for an authorization gesture.
Select Samsung device to save passkey
The user selects a Samsung device in the Windows prompt when it detects the device via Bluetooth.
Alternatively, the user could choose the iPhone, iPad, or Android device option.
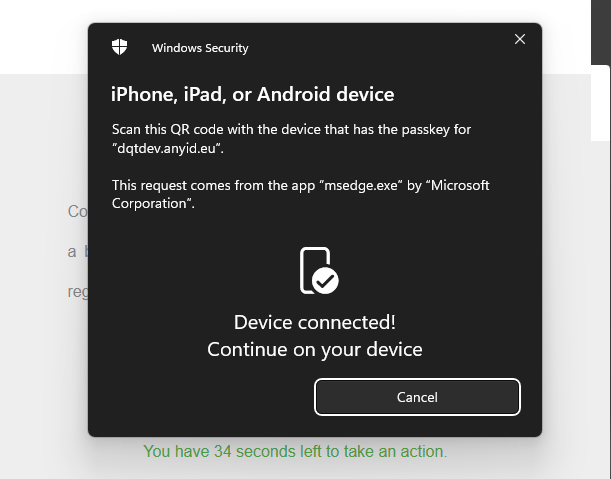
The browser will display a QR code. The user uses the Samsung device's camera to scan it.
After scanning, the Windows machine notifies that it is connected to the Samsung device.
Authenticate Using Biometrics on Samsung Device
- The user approves the creation of a passkey by authenticating via biometrics (e.g., fingerprint or facial recognition) on the Samsung device.
- Upon success, the passkey is saved to the Samsung device, and a confirmation notification is displayed on the Windows machine.
- The user then clicks
OK
The system will prompt the user to save a recovery code as a backup. Tick the I have safely recorded this code checkbox and click Continue to complete onboarding.
Passkey Information Saved to Samsung Pass Manager
After successfully creating and saving the passkey on the Samsung device, the passkey information will be stored in the Samsung Pass manager. In the demonstration, this is shown as follows:
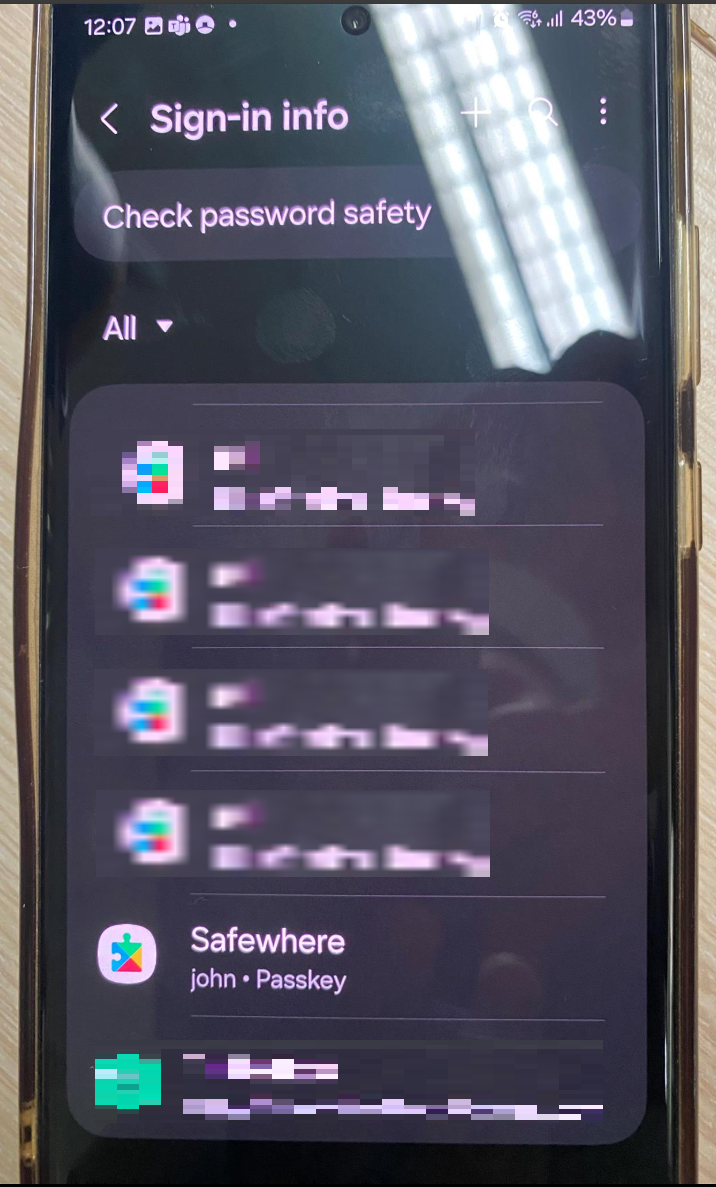
The title "Safewhere" in the screenshot above is derived from the
Organization Display Namesetting in Safewhere Admin. This can be configured in the Safewhere Admin settings, as shown below: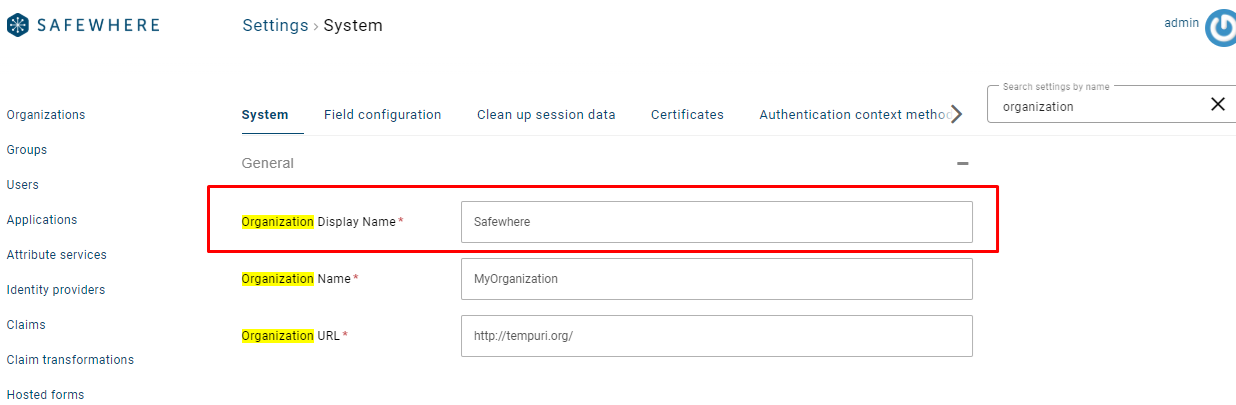
The
Organization Display Nameis used as a label to identify the service associated with the passkey within Samsung Pass. This ensures that users can easily identify which service the passkey belongs to when managing their credentials in Samsung Pass.
The user can now log in using the newly created passkey:
The user accesses IdentifyMe on a Windows machine and successfully signs in with the first factor authentication.
The user selects the option to sign in with a passkey using the Samsung device detected via Bluetooth or selects the
iPhone, iPad, or Android deviceoption.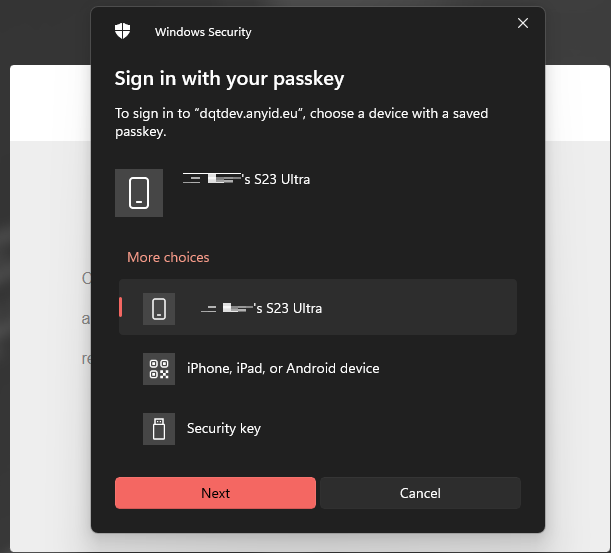
The browser displays a QR code. The user scans it using the Samsung device's camera.
After scanning, the Windows machine notifies that it is connected to the Samsung device.
Authenticate with Biometrics on a Samsung device
- The user approves the use of the passkey by authenticating via biometrics on the Samsung device.
- Once approved, the user is successfully signed into IdentifyMe on the Windows machine.