How to set up and use Azure Managed HSM for Identify
Introduction
Azure Managed HSM allows you to manage cryptographic keys that Identify can use to do all of its cryptographic operations. Azure Managed HSM is validated for FIPS 140-2 Level 3 that meets the requirements of the NSIS standard. More information about Managed HSM can be found at its official document.
This document shows you how to configure Azure Managed HSM to use for Safewhere Identify.
Provisioning and activating an Azure Managed HSM
To use the Azure Managed HSM for Identify, you need to:
- Provision an Azure Managed HSM instance.
- Generate a private key and a public key, or import them to the Azure Managed HSM instance.
- Prepare a certificate that contains your public key.
In the context of this guideline, a certificate contains the public key only.
Before adding/importing a key to Azure Managed HSM, you need to have a Managed HSM instance. Please refer to this document for more information. In this section, we will go through all the important steps to provision and activate an Azure Managed HSM by using the local Azure CLI.
Log in to your Azure account and create a resource group
az login
az group create --name "CttTestResourceGroup" --location eastus2
Create a Managed HSM instance
az ad signed-in-user show --query objectId -o tsv)
Replace #YourObjectId by the returned objectId in the below commandline, then execute it
az keyvault create --hsm-name "CttTestHSM" --resource-group "CttTestResourceGroup" --location "East US 2" --administrators "#YourObjectId"
Use OpenSSL to generate public certificates to activate the managed HSM
openssl req -newkey rsa:2048 -nodes -keyout cert_0.key -x509 -days 365 -out cert_0.cer
openssl req -newkey rsa:2048 -nodes -keyout cert_1.key -x509 -days 365 -out cert_1.cer
openssl req -newkey rsa:2048 -nodes -keyout cert_2.key -x509 -days 365 -out cert_2.cer
Activate the Managed HSM
Download above certificates and save to C:\certs folder, then run this command:

This command may take a while to finish. After that, you have an active, ready to use Managed HSM.
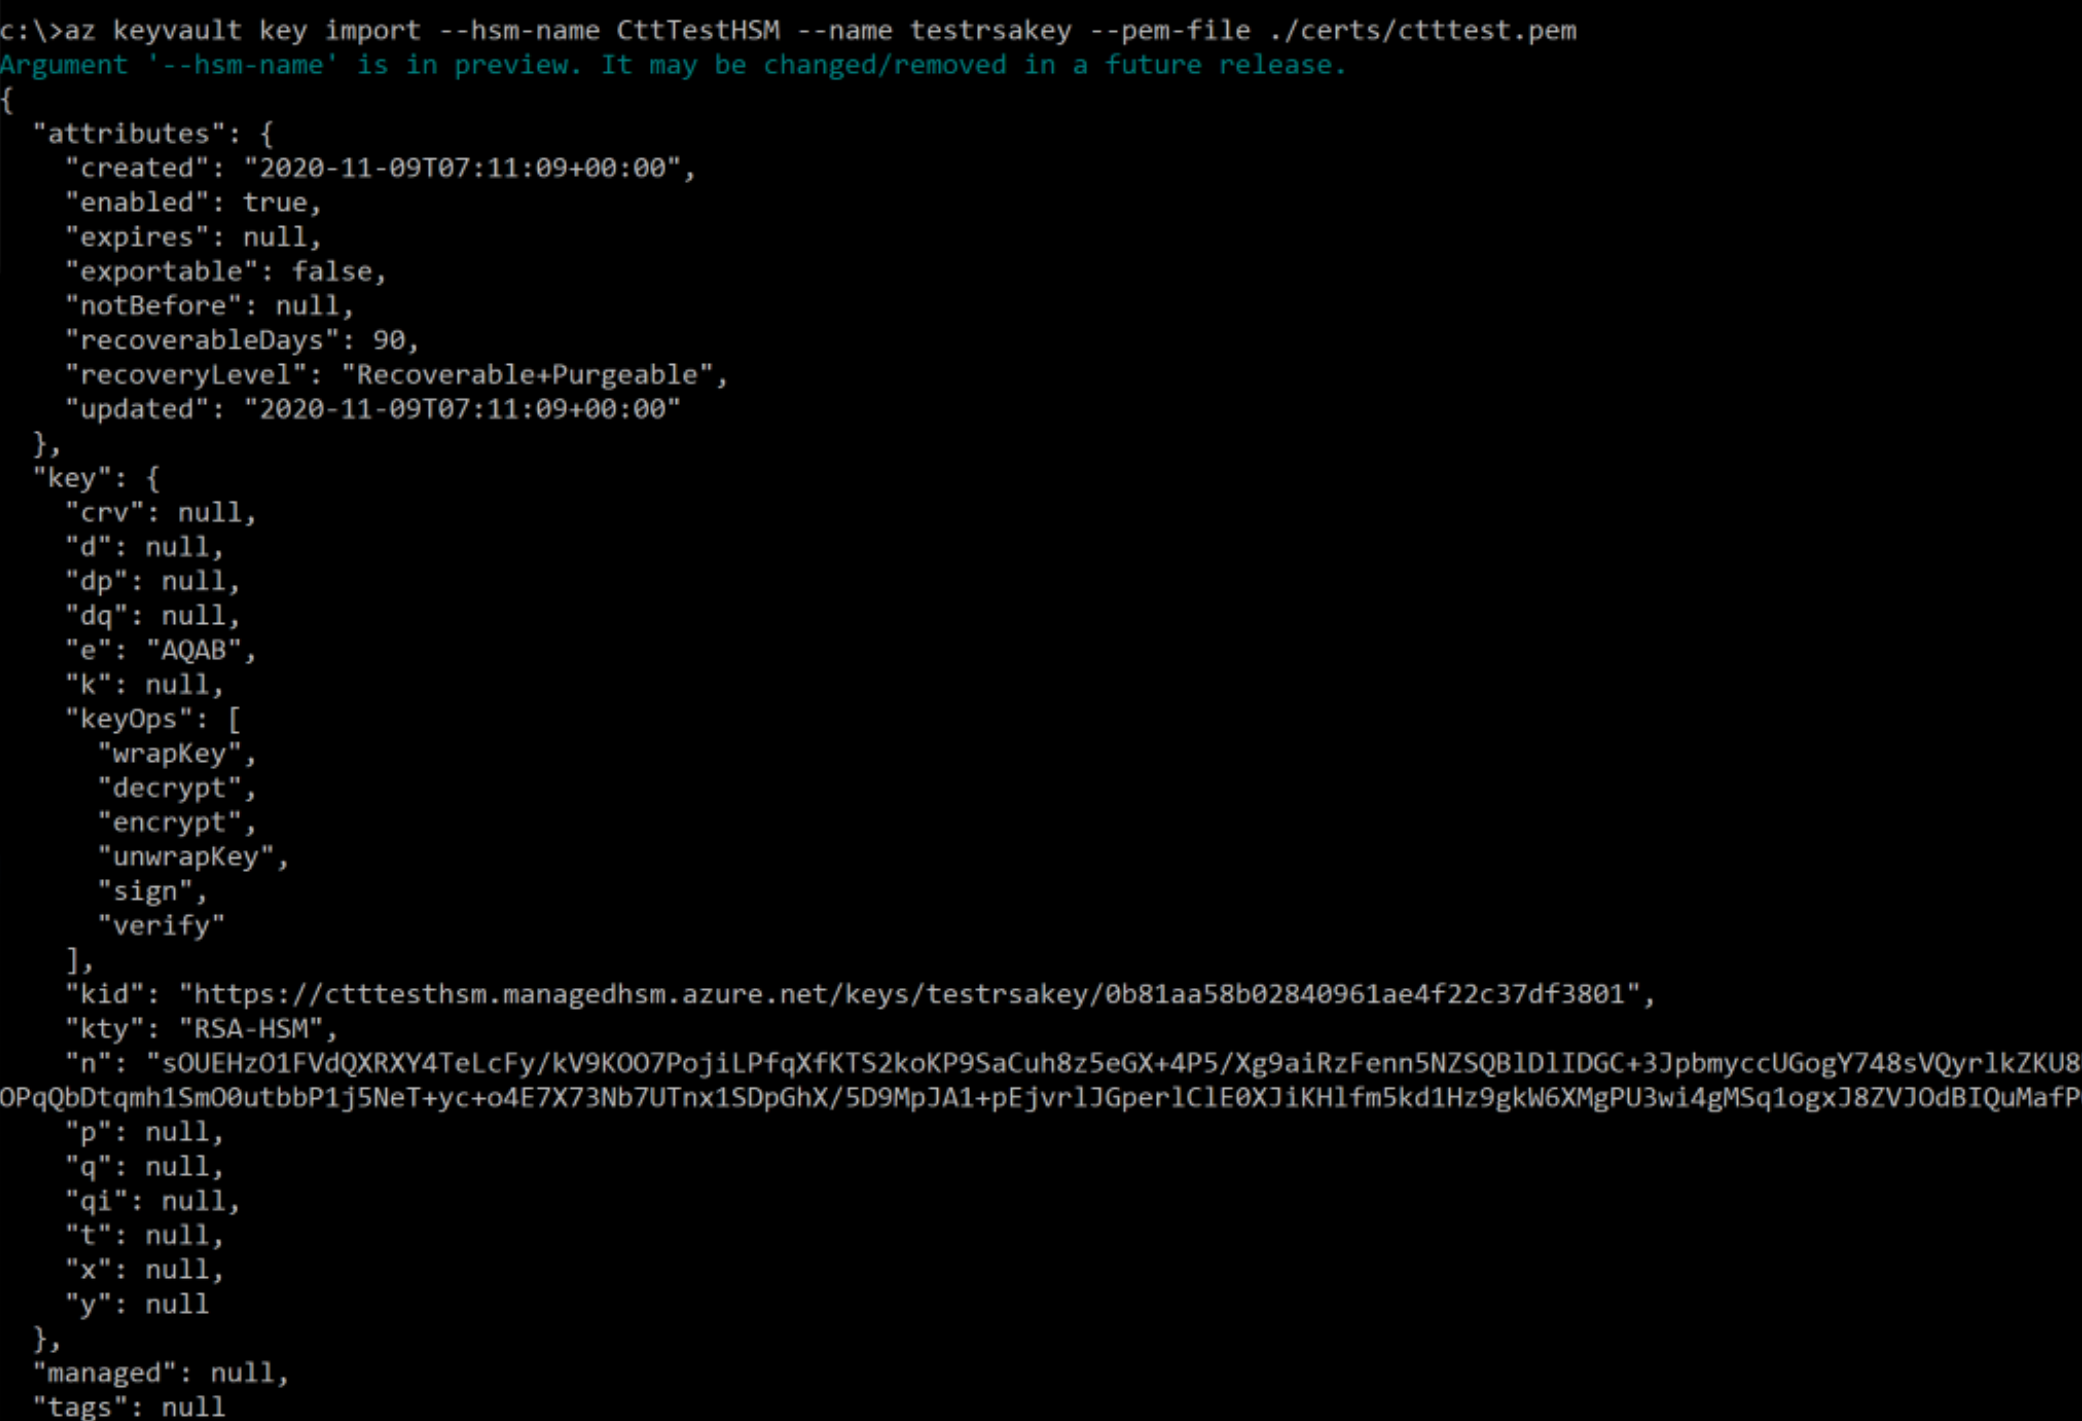
Importing a key to Azure Managed HSM
At the moment, Azure does not support generating a CSR for a Managed HSM's key pair (all available commands can be found here). For the time being, let us try the case in which you can import your own private key (e.g. from a PFX or a P12 file) to Azure Managed HSM:
Export a private key to a PEM file using OpenSSL
You can use the OpenSSL tool to generate a PEM file:
openssl pkcs12 -in VOCES_gyldig_2022.p12 -out ctttest.pem -nodesImport the PEM file to Managed HSM
Role Assignment
Just like the Azure Key Vault certificate access policies, you need to grant access to the Managed HSM for an application by using the role assignment command:
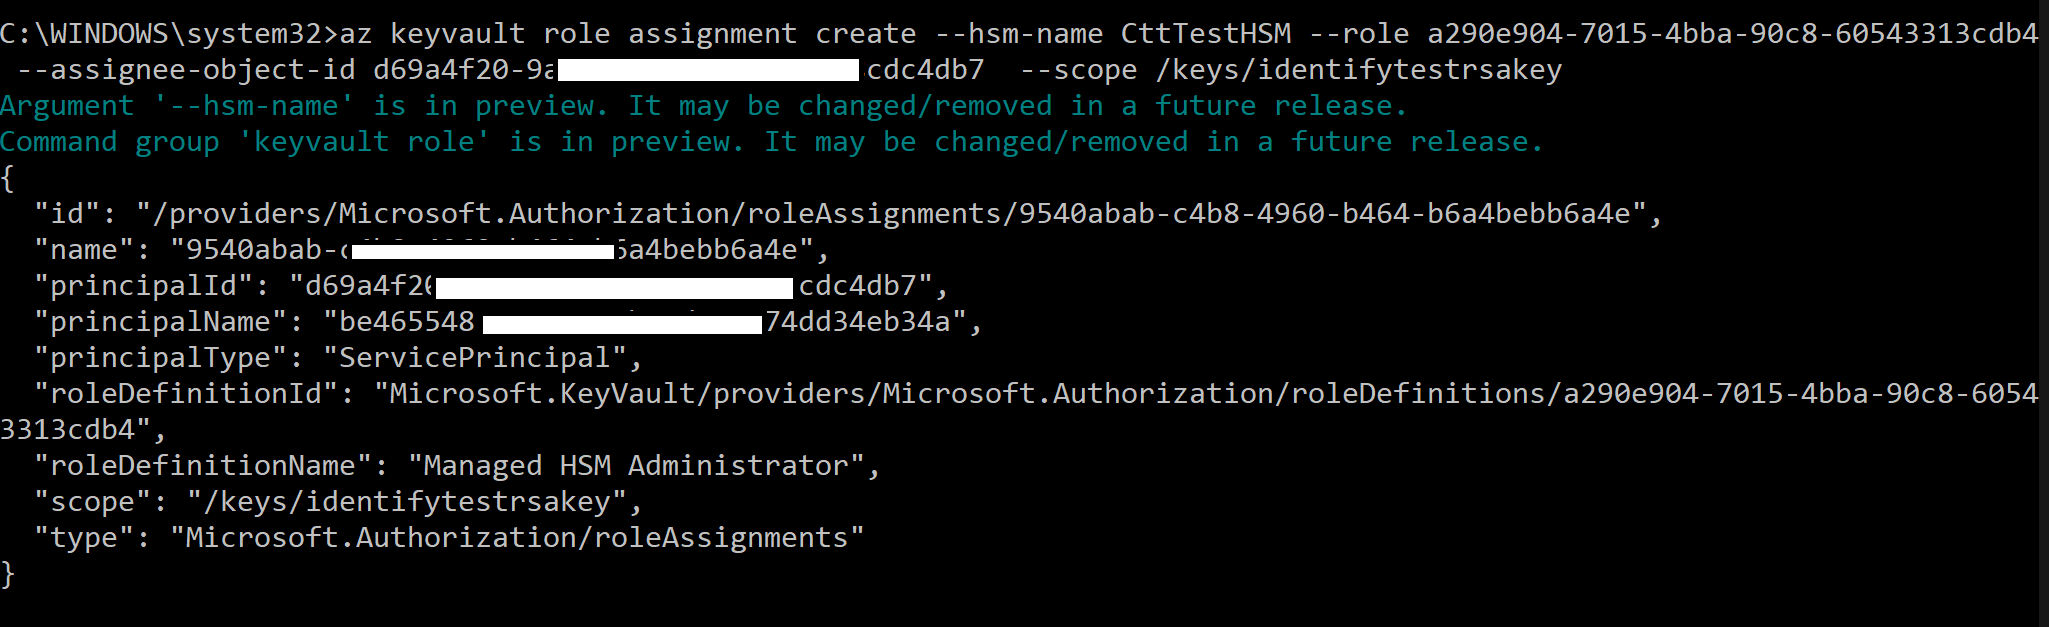
Where the --assignee-object-id parameter receives an object ID of the application that you wish to configure to use as a service principal for Azure Key Vault authentication. To learn more about Role Assignment, you can read it from the Azure Managed HSM document.
To get the Object Id of an Application, you can follow these steps:
Assuming you're trying to assign the Managed HSM Administrator role to an application ID "be465548-xxxx-xxxx-xxxx-e74dd34eb34a"
Get the objectID of the service principal:

Use the Object ID from the previous command to assign the Managed HSM Administrator role over just one key, using the role-id (instead of Name): "a290e904-7015-4bba-90c8-60543313cdb4". See the above picture for how to use the Object ID - the "--assignee-object-id" parameter.
As a result, the key is now ready to use.
Using the key in Azure Managed HSM
In addition to the key in Azure Managed HSM, you also need the certificate with a public key from your PFX/P12 file in Base64 encoding format. Using the key in Azure Managed HSM and the certificate, you can reconfigure an existing Identify tenant or set up a new Identify tenant where all its cryptographic operations can be done by the Azure Managed HSM:

The above picture shows the Azure Key Vault setting dialog where you can input all required information to reconfigure an existing Identify tenant to work with a Managed HSM Key.
The dialog to set up the Azure Key Vault information for the Tenant creation flow is the same as the one wyou use to reconfigure an existing tenant. The difference to the setting to use an Azure Key Vault certificate, is that it requires you to choose the "Key" mode and a base-64 certificate.
Performance notes
Performance is a key factor to consider when using any external service for Safewhere Identify and the Managed HSM is not an exception. Besides Azure's Service limits, the Managed HSM's latency is an important factor that affects Identify's overall logins' latency and throughputs. Our preliminary test used 12 concurrent threads to continuously send Sign requests to the Managed HSM. The client machine and the Managed HSM instance were provisioned in the same Azure region. The result showed that it can take from 3 to 24 milliseconds to finish a Sign data operation. We will perform more in-depth testing later.